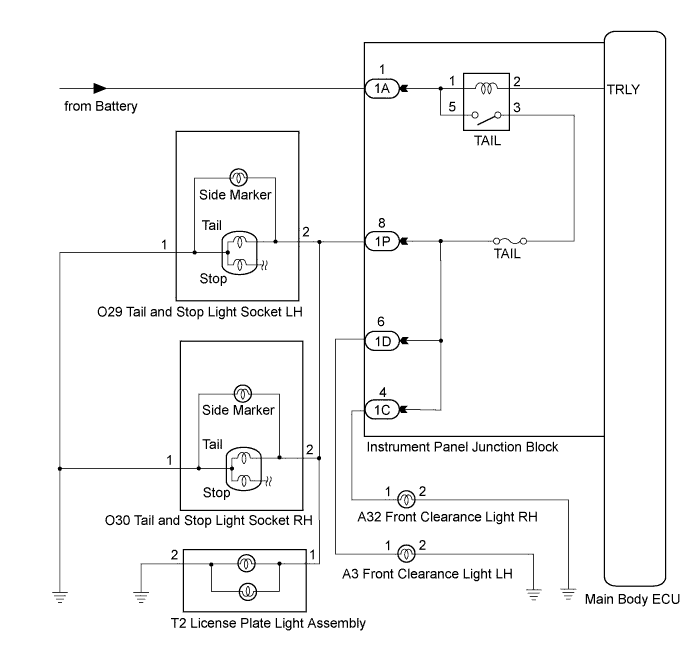
LIGHTING SYSTEM > Taillight Relay Circuit |
| 1.PERFORM ACTIVE TEST USING TECHSTREAM |
Connect the Techstream to the DLC3.
Turn the power switch on (IG).
Turn the Techstream on.
Enter the following menus: Body Electrical / Main Body / Active Test.
Check the operation.
| Tester Display | Test Part | Control Range | Diagnostic Note |
| Taillight Relay | Taillight relay | ON/OFF | - |
|
| ||||
| OK | ||
 | ||
| ||
| 2.INSPECT FUSE (TAIL) |
Remove the TAIL fuse from the instrument panel junction block.
Measure the resistance according to the value(s) in the table below.
| Tester Connection | Condition | Specified Condition |
| TAIL fuse | Always | Below 1 Ω |
|
| ||||
| OK | |
 |
| 3.INSPECT TAILLIGHT RELAY (TAIL) |
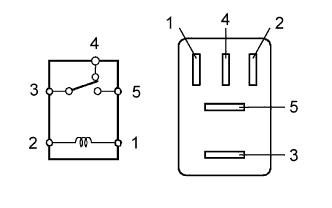 |
Remove the taillight relay from the instrument panel junction block.
Measure the resistance according to the value(s) in the table below.
| Tester Connection | Condition | Specified Condition |
| 3 - 5 | Voltage is not applied between terminals 1 and 2 | 10 kΩ or higher |
| Apply the battery voltage between terminals 1 and 2 | Below 1 Ω | |
| 3 - 4 | Voltage is not applied between terminals 1 and 2 | Below 1 Ω |
| Apply the battery voltage between terminals 1 and 2 | 10 kΩ or higher |
|
| ||||
| OK | |
|
| 4.INSPECT MAIN BODY ECU (INSTRUMENT PANEL JUNCTION BLOCK) |
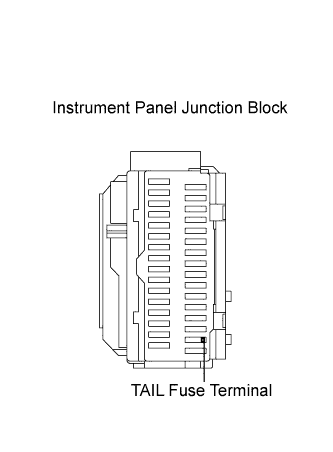 |
Measure the voltage between the loading slot of the TAIL fuse and body ground.
| Tester Connection | Condition | Specified Condition |
| TAIL fuse terminal - Body ground | Light control switch OFF → TAIL | Below 1 V → 11 to 14 V |
|
| ||||
| OK | ||
| ||
| ||
| 5.CHECK HARNESS AND CONNECTOR (BATTERY - INSTRUMENT PANEL JUNCTION BLOCK) |
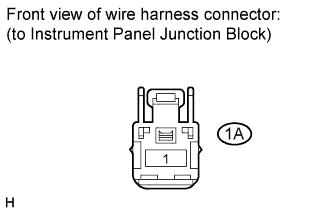 |
Disconnect the 1A instrument panel junction block connector.
Measure the voltage according to the value(s) in the table below.
| Tester Connection | Condition | Specified Condition |
| 1A-1 - Body ground | Always | 11 to 14 V |
|
| ||||
| OK | ||
| ||
| ||

