Home › BODY › WINDSHIELD / WINDOWGLASS › WINDSHIELD DEICER SWITCH

WINDSHIELD DEICER SWITCH > ON-VEHICLE INSPECTION

for Preparation Click here


1. CHECK WINDSHIELD DEICER SWITCH
  1. Disconnect the windshield deicer switch connector.


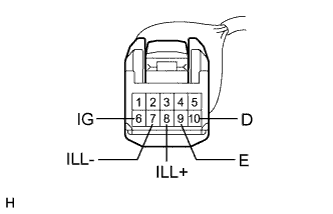
    B172575E01
  1. Measure the voltage according to the value(s) in the table below.

    Standard voltage:
    Tester Connection
    Condition
    Specified Condition
    8 (ILL+) - 7 (ILL-)
    Headlight dimmer switch OFF → ON
    Below 1 V → 11 to 14 V
    10 (D) - 9(E)
    Ignition switch on (IG)
    11 to 14 V
    6 (IG) - 9(E)
    Ignition switch on (IG)
    11 to 14 V

    Standard resistance:
    Tester Connection
    Condition
    Specified Condition
    7 (ILL-) - Body ground
    Always
    Below 1 Ω
    9 (E) - Body ground
    Always
    Below 1 Ω
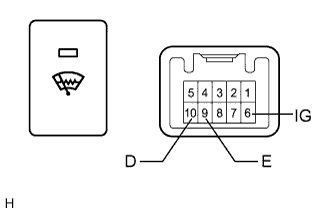
  1. Reconnect the windshield deicer connector.


    B172576E01
  1. Measure the voltage according to the value(s) in the table below.

    Standard voltage:
    Tester Connection
    Condition
    Specified Condition
    10 (D) - 9 (E)
    Ignition switch on (IG) , windshield deicer switch OFF → ON
    11 to 14 V → Below 1 V (after 15 + / - 3 minutes: 11 to 14 V)
    6 (IG) - 9 (E)
    Ignition switch on (IG) , windshield deicer switch OFF → ON
    Below 1 V → 11 to 14 V


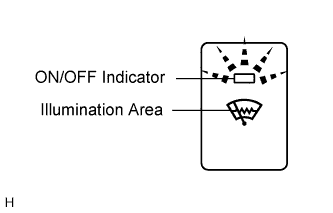
    B134593E01
  1. Check the ON/OFF indicator of the switch.

    1. Push the switch several times. Check that the ON/OFF indicator illuminates or turns off according to the switch operation.


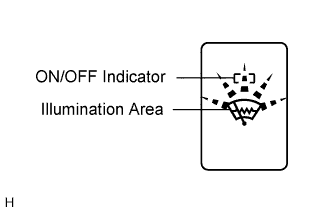
    B134594E01
  1. Check the illumination area of the switch.

    1. Check that the ON/OFF indicator illuminates or turns off according to the switch operation.