 |
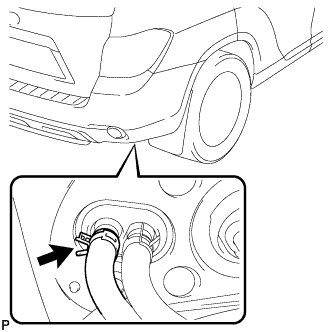
Using pliers, grip the claws of the clip and slide the clip to disconnect the rear heater outlet water hose.
- NOTICE:
- Do not apply excessive force to the rear heater outlet water hose.
- Prepare a drain pan or cloth in case the coolant leaks.
AIR OUTLET CONTROL SERVO MOTOR (for Rear) > REMOVAL |
| 1. RECOVER REFRIGERANT FROM REFRIGERATION SYSTEM |
Turn the A/C switch on.
Operate the A/C with the setting temperature at 25°C (77°F) and the blower level at LO for 10 minutes to circulate the refrigerant. This causes most of the compressor oil from the various components of the A/C system to collect in the A/C compressor.
Turn the power switch off.
Recover the refrigerant from the A/C system using a refrigerant recovery unit.
| 2. DISCONNECT REAR HEATER OUTLET WATER HOSE |
|
Using pliers, grip the claws of the clip and slide the clip to disconnect the rear heater outlet water hose.
| 3. DISCONNECT REAR HEATER INLET WATER HOSE |
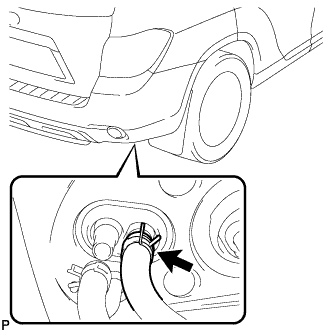 |
Using pliers, grip the claws of the clip and slide the clip to disconnect the rear heater inlet water hose.
| 4. DISCONNECT COOLER REFRIGERANT LIQUID PIPE C |
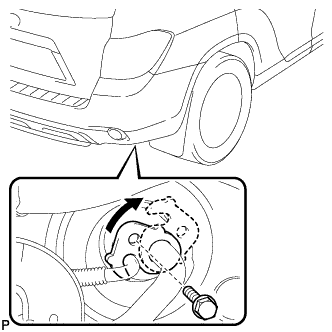 |
Remove the bolt, and slide the hook connector.
Disconnect the cooler refrigerant liquid pipe C.
Remove the O-ring from the cooler refrigerant liquid pipe C.
| 5. DISCONNECT COOLER REFRIGERANT SUCTION HOSE |
Disconnect the rear cooler refrigerant suction hose.
Remove the O-ring from the rear cooler refrigerant suction hose.
| 6. REMOVE REAR DOOR SCUFF PLATE RH |
| 7. REMOVE REAR DOOR OPENING TRIM WEATHERSTRIP RH |
| 8. REMOVE DECK BOARD ASSEMBLY |
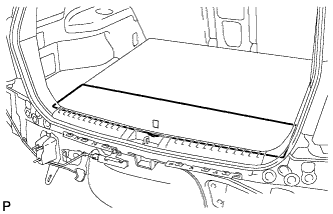 |
Remove the deck board assembly.
| 9. REMOVE NO. 3 DECK BOARD SUB-ASSEMBLY |
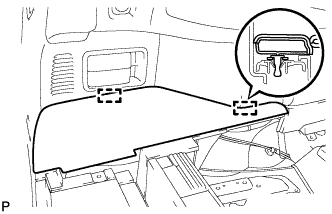 |
Disengage the 2 guides and remove the No. 3 deck board sub-assembly.
| 10. REMOVE NO. 2 DECK BOARD SUB-ASSEMBLY |
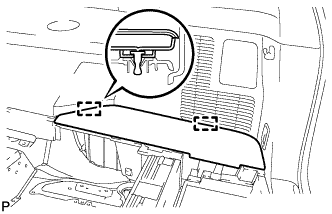 |
Disengage the 2 guides and remove the No. 2 deck board sub-assembly.
| 11. REMOVE TONNEAU COVER ASSEMBLY (w/ Tonneau Cover) |
Remove the tonneau cover assembly.
| 12. REMOVE REAR SEAT SIDE COVER LH |
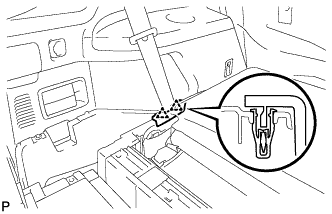 |
Disengage the 2 clips and remove the rear seat side cover LH.
| 13. REMOVE DECK SIDE TRIM BOX LH |
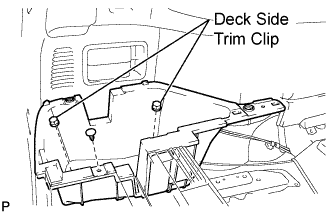 |
Remove the 2 deck side trim clips and clip.
Remove the deck side trim box LH as shown in the illustration.
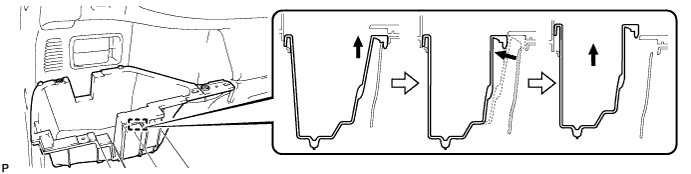
| 14. REMOVE REAR SEAT SIDE COVER RH |
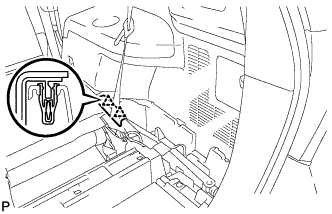 |
Disengage the 2 clips and remove the rear seat side cover RH.
| 15. REMOVE JACK CARRIER SUPPORT |
| 16. REMOVE JACK CARRIER CUSHION |
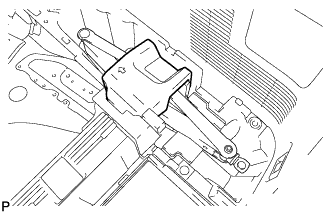 |
Remove the jack carrier cushion.
| 17. REMOVE JACK ASSEMBLY |
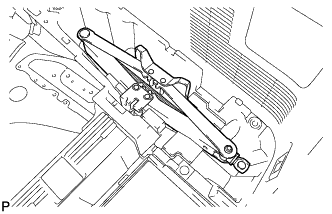 |
Remove the jack assembly.
| 18. REMOVE JACK CARRIER ASSEMBLY |
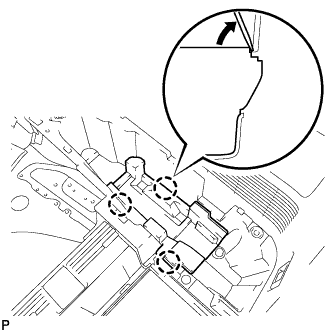 |
Using a screwdriver, disengage the 3 claws and remove the jack carrier assembly.
| 19. REMOVE DECK SIDE TRIM BOX RH |
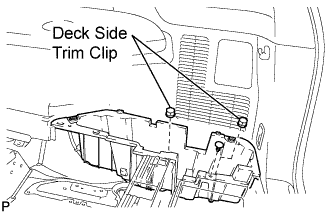 |
Remove the 2 deck side trim clips and clip.
Remove the deck side trim box RH as shown in the illustration.
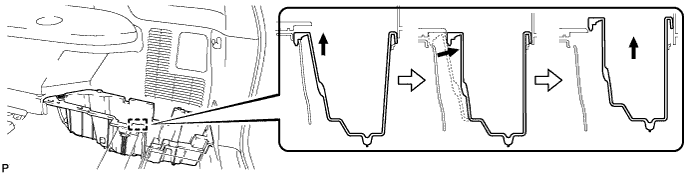
| 20. REMOVE REAR MAT |
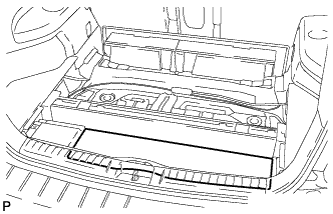 |
Remove the rear mat.
| 21. REMOVE DECK FLOOR BOARD ASSEMBLY |
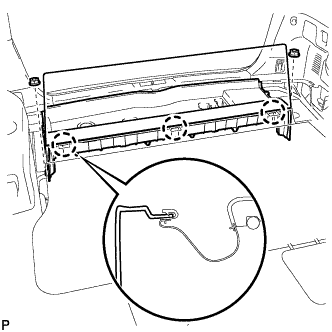 |
Disengage the 3 claws.
Remove the 2 nuts and the deck floor board assembly.
| 22. REMOVE REAR NO. 2 SEAT INNER BELT ASSEMBLY |
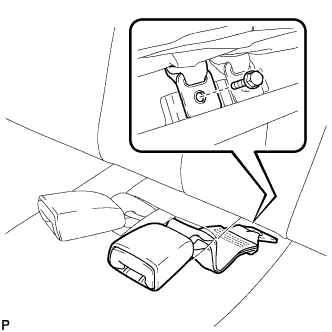 |
Remove the bolt and rear No. 2 seat inner belt assembly.
| 23. DISCONNECT REAR SEAT LAP TYPE BELT ASSEMBLY LH |
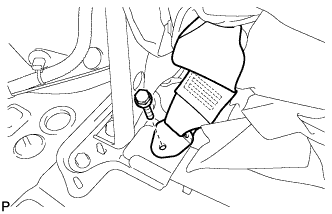 |
Remove the bolt and disconnect the rear seat lap type belt assembly LH.
| 24. DISCONNECT REAR SEAT LAP TYPE BELT ASSEMBLY RH |
| 25. REMOVE REAR NO. 2 SEAT ASSEMBLY |
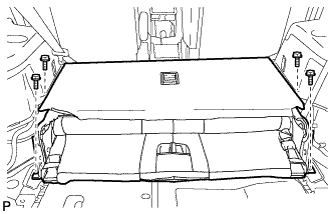 |
Remove the 4 bolts and the rear No. 2 seat assembly.
| 26. REMOVE REAR FLOOR FINISH PLATE |
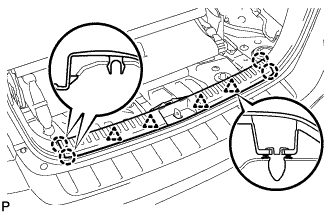 |
Disengage the 4 clips and the 4 claws, and remove the rear floor finish plate.
| 27. REMOVE REAR SEAT SIDE GARNISH CAP |
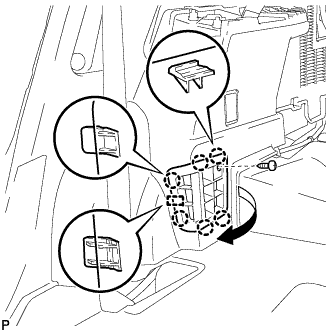 |
Remove the screw.
Disengage the 6 claws and the guide, and remove the rear seat side garnish cap.
| 28. REMOVE DECK SIDE TRIM COVER RH |
| 29. REMOVE DECK SIDE TRIM RH |
| 30. REMOVE SIDE TRIM COVER RH (for Manual Air Conditioning System) |
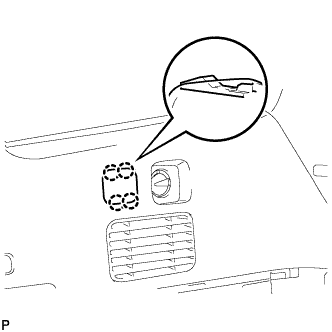 |
Disengage the 4 claws and remove the side trim cover RH.
| 31. REMOVE REAR ROOM TEMPERATURE SENSOR (for Automatic Air Conditioning System) |
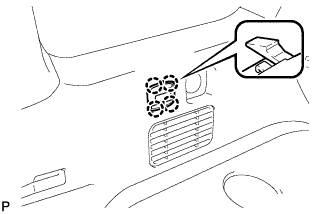 |
Disengage the 4 claws and remove the rear room temperature sensor.
Disconnect the connector.
| 32. REMOVE REAR COMBINATION LIGHT SERVICE COVER RH |
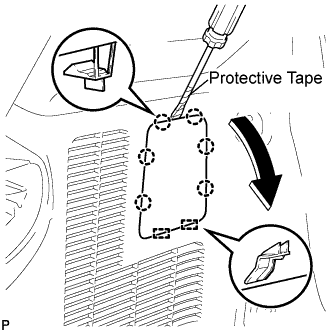 |
Using a screwdriver, disengage the 6 claws and the 2 guides, and remove the rear combination light service cover RH.
| 33. REMOVE ROPE HOOK ASSEMBLY (for RH Side) |
| 34. REMOVE NO. 1 LUGGAGE COMPARTMENT TRIM HOOK |
| 35. REMOVE FRONT DECK SIDE TRIM COVER RH |
| 36. REMOVE DECK TRIM SIDE PANEL ASSEMBLY RH |
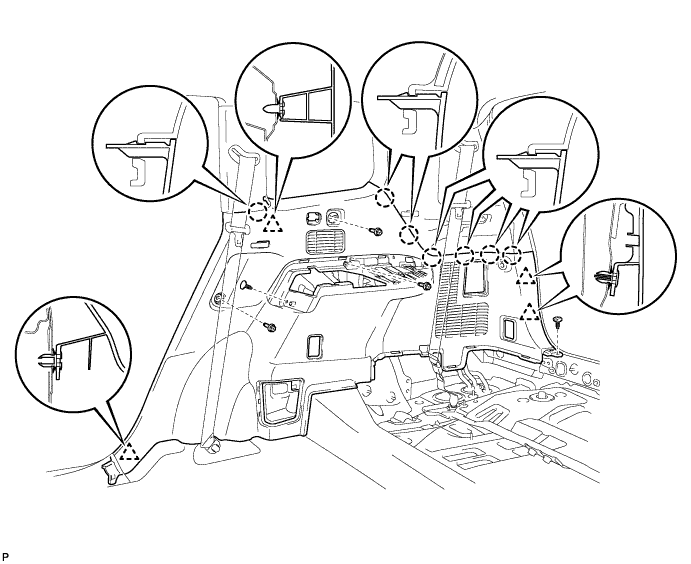
Remove the 3 bolts.
Remove the 2 clips.
Disengage the 7 claws and 4 clips, and remove the deck trim side panel assembly RH.
| 37. REMOVE ROOF SIDE INNER GARNISH ASSEMBLY RH |
| 38. REMOVE COOLER PLATE |
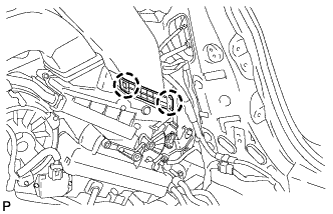 |
Disengage the 2 claws and remove the cooler plate.
| 39. REMOVE NO. 1 COOLER AIR DUCT |
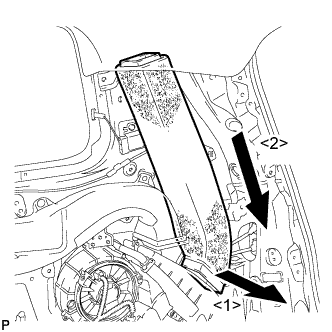 |
Remove the No. 1 cooler air duct as shown in the illustration.
| 40. REMOVE REAR NO. 5 AIR DUCT |
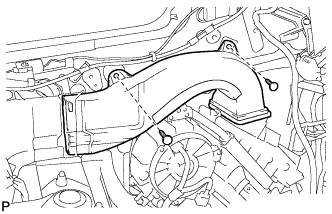 |
Remove the 2 clips and the rear No. 5 air duct.
| 41. REMOVE REAR COOLING UNIT ASSEMBLY |
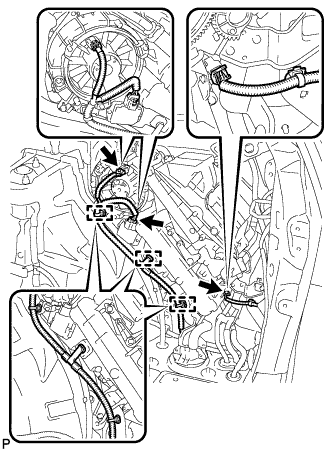 |
Disengage each clamp.
Disconnect each connector.
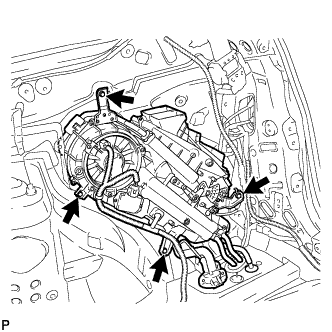 |
Remove the 4 bolts and the rear cooling unit assembly.
| 42. REMOVE REAR AIR OUTLET CONTROL SERVO MOTOR SUB-ASSEMBLY |
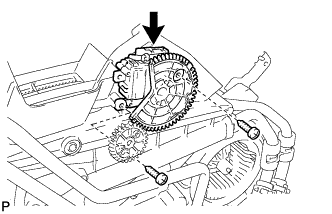 |
Disconnect the connector.
Remove the 2 screws and rear air outlet control servo motor sub-assembly.