 |
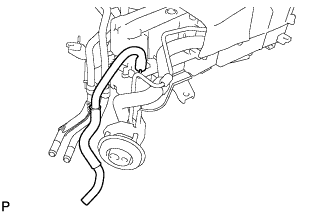
Remove the drain cooler hose.
REAR COOLING UNIT > DISASSEMBLY |
| 1. REMOVE DRAIN COOLER HOSE |
|
Remove the drain cooler hose.
| 2. REMOVE REAR AIR MIX CONTROL SERVO MOTOR SUB-ASSEMBLY |
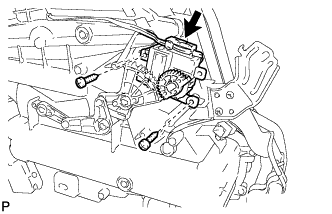 |
Disconnect the connector.
Remove the 2 screws and rear air mix control servo motor sub-assembly.
| 3. REMOVE REAR AIR OUTLET CONTROL SERVO MOTOR SUB-ASSEMBLY |
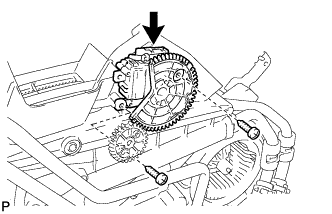 |
Disconnect the connector.
Remove the 2 screws and rear air outlet control servo motor sub-assembly.
| 4. REMOVE REAR AIR CONDITIONING TUBE AND ACCESSORY ASSEMBLY |
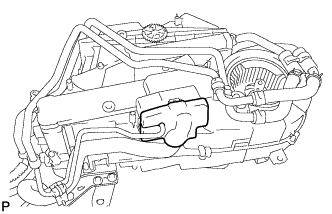 |
Remove the packing.
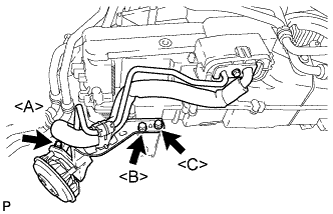 |
Remove the screw <C>.
Remove the screw <B>.
Remove the bolt <A>.
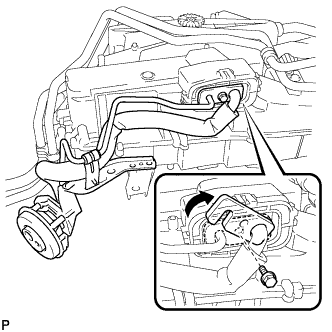 |
Remove the bolt and slide the hook connector.
Remove the rear air conditioning tube and accessory assembly.
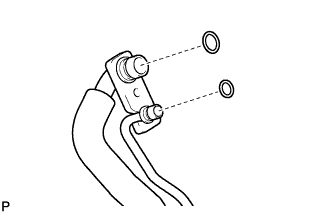 |
Remove the 2 O-rings from the rear air conditioning tube and accessory assembly.
| 5. REMOVE HEATER WATER PIPE AND HOSE SUB-ASSEMBLY |
Using pliers, grip the claws of the 2 clips and slide the clips to disconnect the heater water hose.
Remove the 2 screws and the heater water pipe and hose sub-assembly.
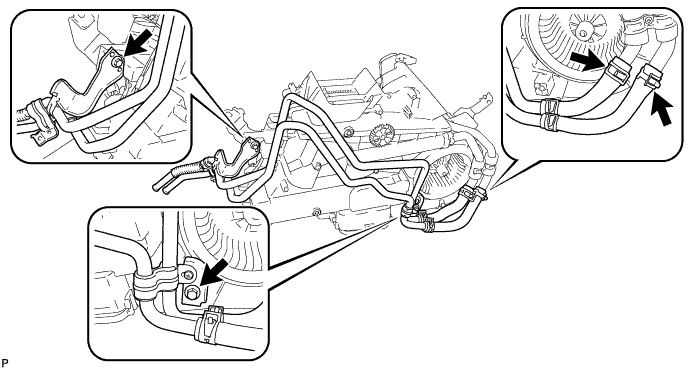
| 6. REMOVE HEATER RADIATOR UNIT SUB-ASSEMBLY |
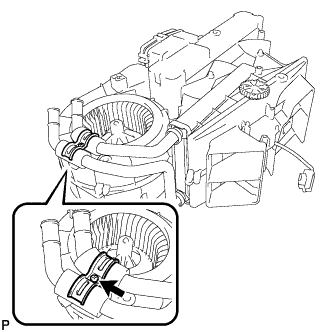 |
Remove the screw and the heater clamp.
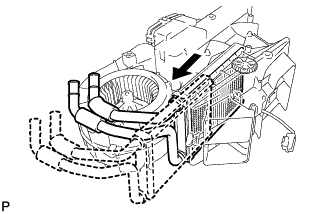 |
Remove the heater radiator unit sub-assembly from the rear cooling unit as shown in the illustration.
| 7. REMOVE REAR BLOWER MOTOR SUB-ASSEMBLY |
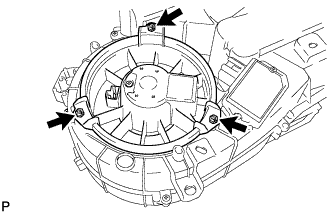 |
Remove the 3 screws and the rear blower motor sub-assembly.
| 8. REMOVE BLOWER MOTOR CONTROLLER |
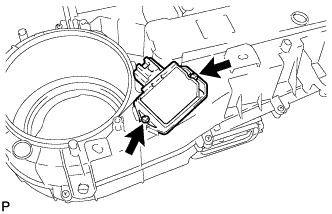 |
Remove the 2 screws and the blower motor controller.
| 9. REMOVE REAR COOLING UNIT EXPANSION VALVE |
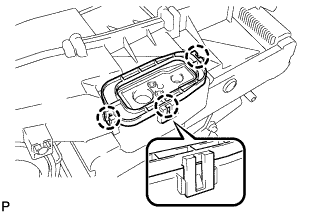 |
Disengage the 3 claws and remove the plate.
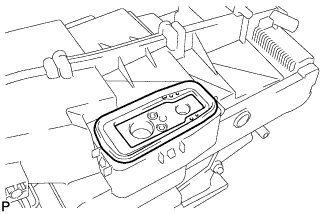 |
Remove the grommet.
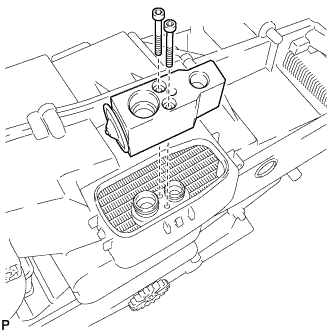 |
Using a 4 mm hexagon wrench, remove the 2 hexagon bolts and rear cooling unit expansion valve.
| 10. REMOVE REAR EVAPORATOR SUB-ASSEMBLY |
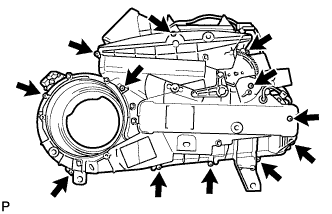 |
Remove the 12 screws.
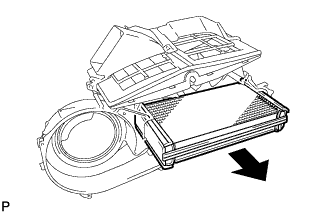 |
Remove the rear evaporator sub-assembly as shown in the illustration.
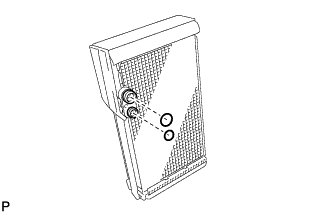 |
Remove the 2 O-rings from the rear evaporator sub-assembly.
| 11. REMOVE REAR EVAPORATOR TEMPERATURE SENSOR |
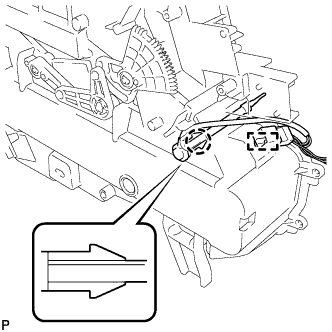 |
Disengage the clamp.
Disengage the claw and the rear evaporator temperature sensor.