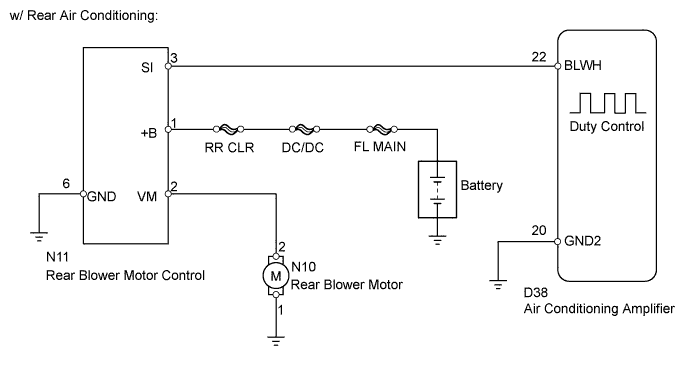
AIR CONDITIONING SYSTEM (for Automatic Air Conditioning System) > Rear Blower Motor Circuit |
| 1.PERFORM ACTIVE TEST USING TECHSTREAM (REAR BLOWER MOTOR) |
Connect the Techstream to the DLC3.
Turn the power switch on (IG) and turn the Techstream main switch on.
Select the item below in the Active Test, and then check that the rear blower motor operates.
| Tester Display | Test Part | Control Range | Diagnostic Note |
| Rear Blower Motor | Rear blower motor | Min.: 0, Max.: 31 | - |
| Result | Proceed to |
| NG (blower motor does not operate) | A |
| NG (blower motor operates but does not change speed) | B |
| OK | C |
|
| ||||
|
| ||||
| A | |
 |
| 2.INSPECT FUSE (RR CLR) |
Remove the RR CLR H-fuse from the main body ECU.
Measure the resistance of the H-fuse.
| Tester Connection | Condition | Specified Condition |
| RR CLR H-fuse | Always | Below 1 Ω |
|
| ||||
| OK | |
|
| 3.INSPECT REAR BLOWER MOTOR |
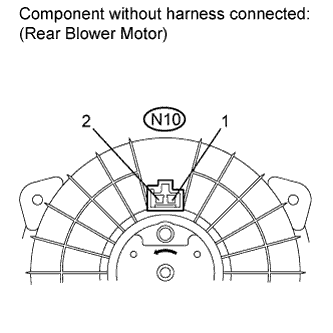 |
Disconnect the N10 motor connector.
Connect a battery positive (+) lead to terminal 2 and a negative (-) lead to terminal 1, then check that the rear blower motor operates smoothly.
Measure the current of the connector.
| Tester Connection | Condition | Specified Condition |
| N10-1 - N10-2 | Rear blower motor operates | Below 13.5 A |
|
| ||||
| OK | |
|
| 4.CHECK HARNESS AND CONNECTOR (REAR BLOWER MOTOR CONTROL - BODY GROUND) |
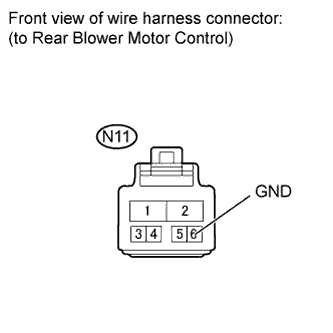 |
Disconnect the N11 rear motor control connector.
Measure the resistance according to the value(s) in the table below.
| Tester Connection | Condition | Specified Condition |
| N11-6 (GND) - Body ground | Always | Below 1 Ω |
|
| ||||
| OK | |
|
| 5.CHECK HARNESS AND CONNECTOR (REAR BLOWER MOTOR CONTROL - BATTERY) |
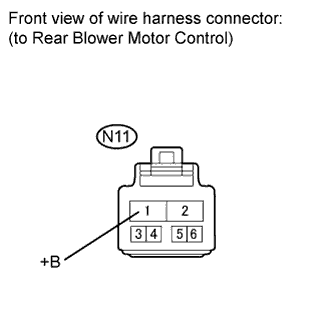 |
Disconnect the N11 rear motor control connector.
Measure the voltage according to the value(s) in the table below.
| Tester Connection | Switch Condition | Specified Condition |
| N11-1 (+B) - Body ground | Power switch on (IG) | 11 to 14 V |
|
| ||||
| OK | |
|
| 6.CHECK HARNESS AND CONNECTOR (AIR CONDITIONING AMPLIFIER - BODY GROUND) |
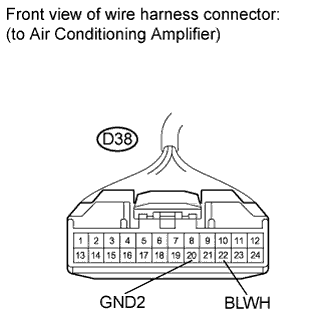 |
Disconnect the D38 amplifier connector.
Measure the voltage according to the value(s) in the table below.
| Tester Connection | Condition | Specified Condition |
| D38-22 (BLWH) - D38-20 (GND2) | Power switch on (IG) Blower switch OFF | 4.5 to 5.5 V |
|
| ||||
| OK | |
|
| 7.CHECK AIR CONDITIONING AMPLIFIER |
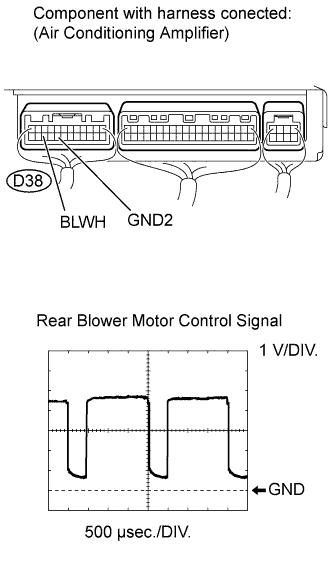 |
Remove the air conditioning amplifier with its connectors still connected.
Check the waveform of the amplifier connector.
| Item | Content |
| Tester Connection | D38-22 (BLWH) - D38-20 (GND2) |
| Tool Setting | 1 V/DIV., 500 μsec./DIV. |
| Condition | Power switch on (IG) Blower switch LO |
|
| ||||
| OK | ||
 | ||
| ||

