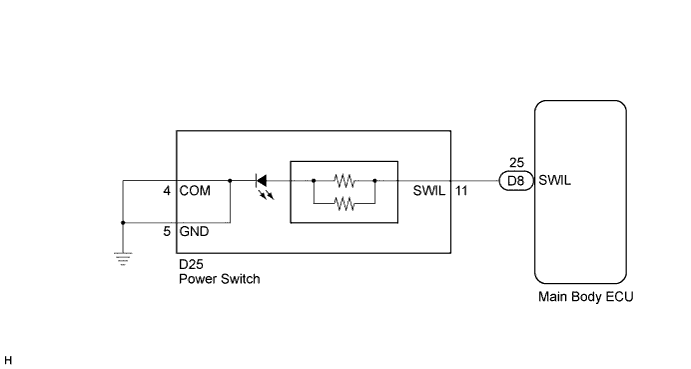
LIGHTING SYSTEM > Power Switch Illumination Circuit |
| 1.PERFORM ACTIVE TEST USING TECHSTREAM |
Connect the Techstream to the DLC3.
Turn the power switch on (IG).
Turn the Techstream on.
Enter the following menus: Body Electrical / Main Body / Active Test.
Check the operation.
| Tester Display | Test Part | Control Range | Diagnostic Note |
| Indicator for Lighting | Engine switch illumination | ON / OFF | - |
|
| ||||
| OK | ||
 | ||
| ||
| 2.INSPECT POWER SWITCH |
Remove the power switch.
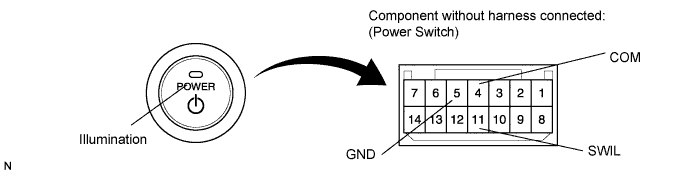
Apply battery voltage to the power switch.
Check that the illumination comes on.
| Measurement Condition | Specified Condition |
| Battery positive (+) → Terminal 11 (SWIL) Battery negative (-) → Terminal 5 (GND) or 4 (COM) | Power switch illumination comes on |
|
| ||||
| OK | |
 |
| 3.CHECK HARNESS AND CONNECTOR (ENGINE SWITCH - MAIN BODY ECU AND BODY GROUND) |
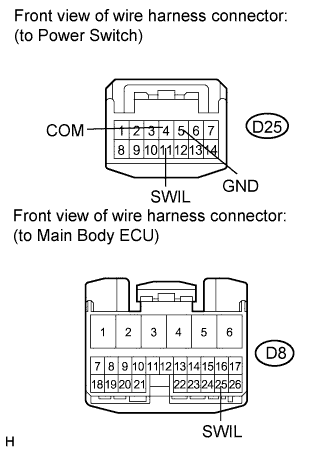 |
Disconnect the D8 main body ECU connector.
Disconnect the D25 power switch connector.
Measure the resistance according to the value(s) in the table below.
| Tester Connection | Condition | Specified Condition |
| D25-11 (SWIL) - D8-25 (SWIL) | Always | Below 1 Ω |
| D25-4 (COM) or D25-5 (GND) - Body ground | Always | Below 1 Ω |
| D25-11 (SWIL) - Body ground | Always | 10 kΩ or higher |
|
| ||||
| OK | ||
| ||
| ||

