 |
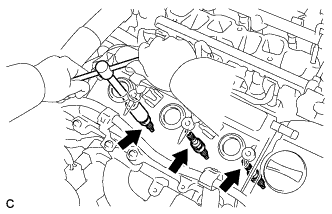
Install the 6 spark plugs.
- Torque:
- 18 N*m{ 183 kgf*cm , 13 ft.*lbf }
IGNITION COIL AND SPARK PLUG > INSTALLATION |
| 1. INSTALL SPARK PLUG |
|
Install the 6 spark plugs.
| 2. INSTALL IGNITION COIL ASSEMBLY |
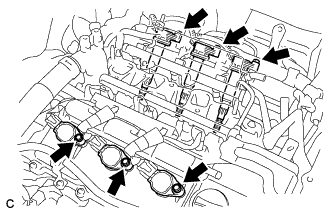 |
Install the 6 ignition coils with the 6 bolts.
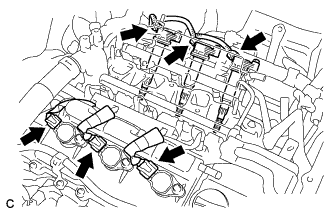 |
Connect the 6 ignition coil connectors.
| 3. INSTALL INTAKE AIR SURGE TANK |
Install a new gasket to the intake air surge tank.
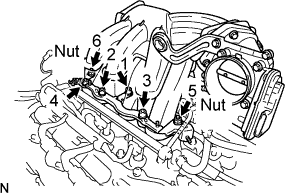 |
Using a socket hexagon wrench 8 mm, install the intake air surge tank with the 4 bolts and 2 nuts. Using several steps, tighten the bolts and nuts uniformly in the sequence shown in the illustration.
Connect the ground cable connector.
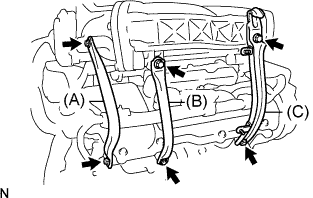 |
Install the No. 2 surge tank stay (A) with the 2 bolts.
Install the No. 1 surge tank stay (B) with the 2 bolts.
Install the No. 1 engine hunger (C) with the 2 bolts.
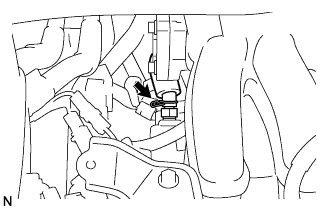 |
Connect the ventilation hose.
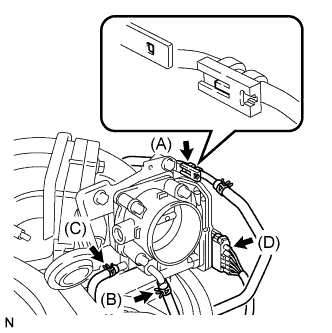 |
Connect the fuel vapor feed hose (A).
Connect the No. 3 water by-pass hose (B).
Connect the No. 2 water by-pass hose (C).
Connect the throttle motor connector (D).
| 4. INSTALL EMISSION CONTROL VALVE SET |
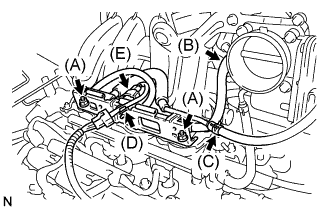 |
Install the emission control valve set with the 2 nuts (A).
Connect the No. 2 fuel vapor feed hose (B).
Connect the No. 1 fuel vapor feed hose (C).
Connect the wire harness clamp (D).
Connect the VSV connector (E).
| 5. INSTALL AIR CLEANER BRACKET |
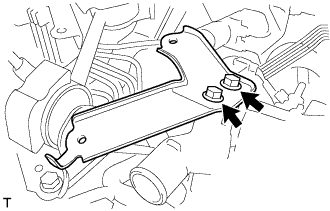 |
Install the 2 bolts and air cleaner bracket.
| 6. INSTALL AIR CLEANER CASE SUB-ASSEMBLY |
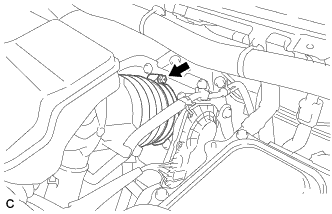 |
Align the tab on the throttle body with the groove on the air cleaner hose and tighten the hose clamp.
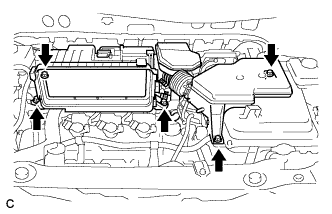 |
Install the air cleaner case sub-assembly with the 5 bolts.
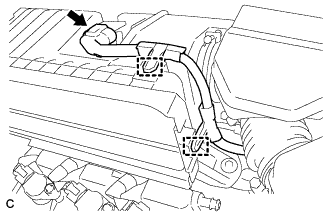 |
Connect the intake air flow meter connector.
Connect the 2 wire harness clamps to the air cleaner case.
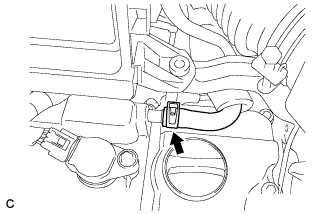 |
Connect the No. 1 ventilation hose.
| 7. INSTALL AIR CLEANER CAP SUB-ASSEMBLY |
Install the air cleaner filter element to the air cleaner case.
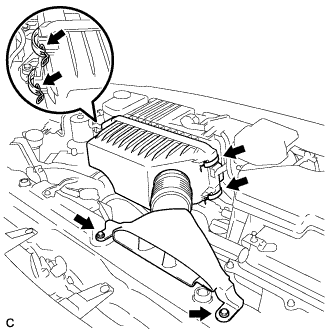 |
Install the 2 bolts, 4 clamps and air cleaner cap sub-assembly.
| 8. ADD ENGINE COOLANT (for Engine) |
Tighten the radiator drain cock plug.
Tighten the cylinder block drain cock plugs.
Loosen the air drain plug.
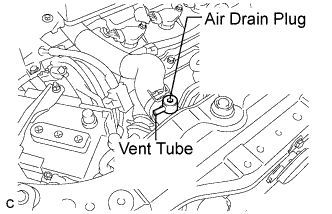 |
Install a vinyl tube to the vent tube located on the air drain plug.
Fill the radiator with engine coolant until the vinyl tube is filled with the coolant.
Tighten the air drain plug.
| Condition | Capacity |
| w/ rear heater | 12.8 liters (13.5 US qts, 11.2 lmp.qts) |
| w/o rear heater | 10.6 liters (11.2 US qts, 9.3 lmp.qts) |
Install the radiator cap securely.
Fill the radiator reservoir tank with coolant.
Warm up the engine until the thermostat opens. While the thermostat is open, allow the coolant to circulate for several minutes.
Stop the engine and wait until the coolant cools down.
Remove the radiator cap and check the coolant level inside the radiator.
If the coolant level is below the full level, perform the steps from (C) through (K) and repeat the operation until the coolant level stays at the full level.
Recheck the coolant level inside the radiator reservoir tank. If it is below the full level, add the coolant.
| 9. INSTALL NO. 2 ENGINE ROOM SIDE COVER LH |
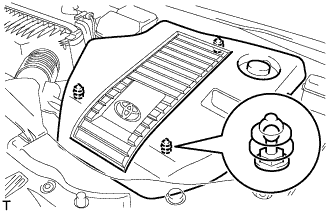 |
Fit the clips and install the No. 2 engine room side cover LH.
| 10. INSTALL COOL AIR INTAKE DUCT SEAL |
Install the cool air intake duct seal with the 11 clips.
| 11. INSTALL OUTER COWL TOP PANEL SUB-ASSEMBLY |
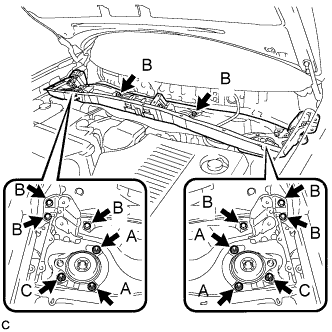 |
Install the outer cowl top panel sub-assembly with the 8 bolts and 6 nuts.
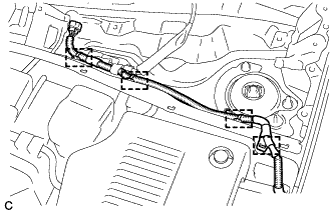 |
Engage the 4 clamps.
| 12. INSTALL WINDSHIELD WIPER MOTOR AND LINK ASSEMBLY |
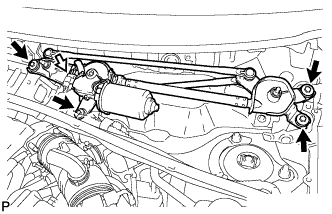 |
Install the windshield wiper motor and link assembly with the 4 bolts.
Connect the connector.
| 13. INSTALL COWL TOP VENTILATOR LOUVER SUB-ASSEMBLY |
Engage the 20 claws.
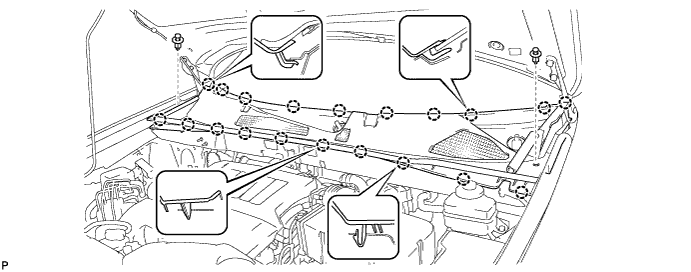
Install the cowl top ventilator louver sub-assembly with the 2 clips.
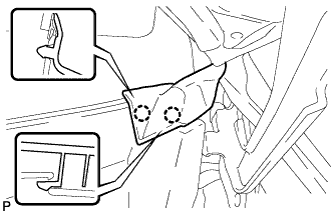 |
Engage the 2 claws and connect the front fender to cowl side seal LH.
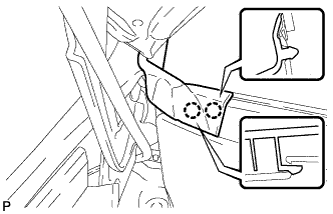 |
Engage the 2 claws and connect the front fender to cowl side seal RH.
| 14. INSTALL HOOD TO COWL TOP SEAL |
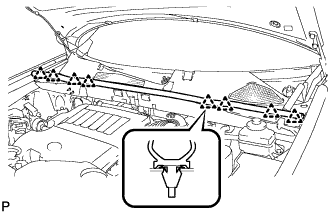 |
Engage the 8 clips and install the hood to cowl top seal.
| 15. INSTALL FRONT WIPER ARM AND BLADE ASSEMBLY LH |
Operate the wiper and stop the windshield wiper motor at the automatic stop position.
When reinstalling:
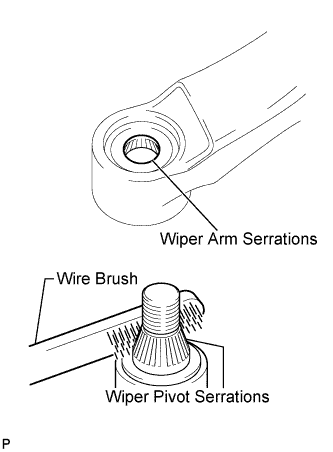 |
Clean the wiper arm serrations.
Clean the wiper pivot serrations with a wire brush.
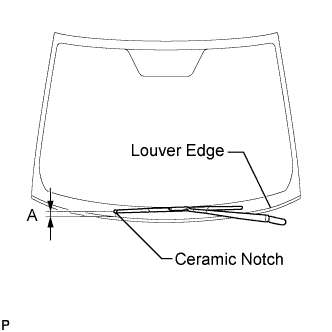 |
Install the front wiper arm and blade assembly LH with the nut to the position shown in the illustration.
| Area | Measurement |
| A | 31.9 mm (1.26 in.) |
Operate the front wipers while spraying washer fluid onto the windshield glass. Make sure that the front wipers function properly and the wipers do not come into contact with the vehicle body.
| 16. INSTALL FRONT WIPER ARM AND BLADE ASSEMBLY RH |
Operate the wiper and stop the windshield wiper motor at the automatic stop position.
When reinstalling:
|
Clean the wiper arm serrations.
Clean the wiper pivot serrations with a wire brush.
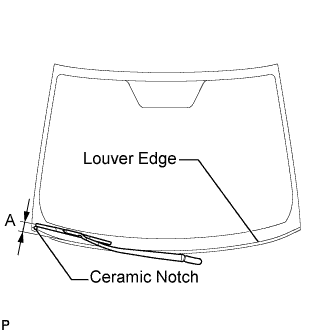 |
Install the front wiper arm and blade assembly RH with the nut to the position shown in the illustration.
| Area | Measurement |
| A | 25.6 mm (1.00 in.) |
| 17. CONNECT CABLE TO NEGATIVE BATTERY TERMINAL |
| 18. INSPECT FOR COOLANT LEAK (for Engine) |
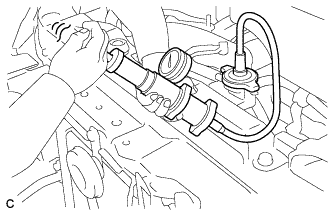 |
Fill the radiator with coolant and attach a radiator cap tester.
Pump the tester to 118 kPa (1.2 kgf/cm2, 17.1 psi), then check that the pressure does not drop.
If the pressure drops, check the hoses, radiator assembly and water pump assembly for leakage. If there are no signs or traces of external engine coolant leakage, check the heater core, cylinder block and cylinder head.