 |
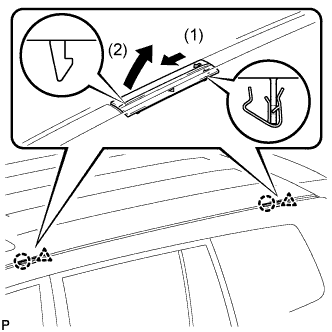
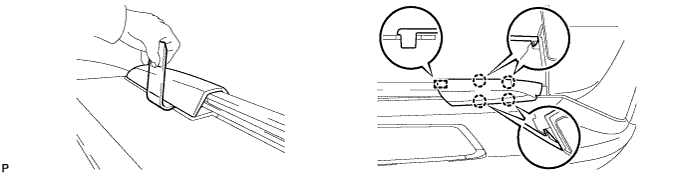
Disengage the clip and claw, and remove the roof drip side finish moulding joint cover as shown in the illustration.
- HINT:
- Use the same procedure for the rear side and front side.
ROOF DRIP SIDE FINISH MOULDING > REMOVAL |
| 1. REMOVE ROOF DRIP SIDE FINISH MOULDING JOINT COVER (w/o Roof Rack) |
|
Disengage the clip and claw, and remove the roof drip side finish moulding joint cover as shown in the illustration.
| 2. REMOVE FRONT ROOF RACK LEG COVER (w/ Roof Rack) |
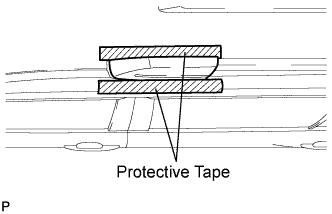 |
Put protective tape around the front roof rack leg cover.
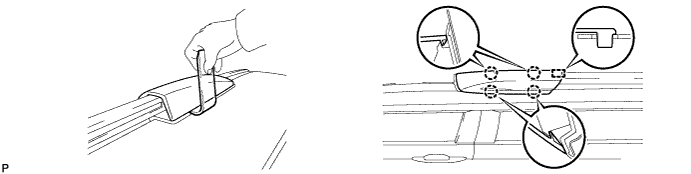
Using a moulding remover, disengage the 4 claws.
Disengage the guide and remove the front roof rack leg cover.
| 3. REMOVE REAR ROOF RACK LEG COVER (w/ Roof Rack) |
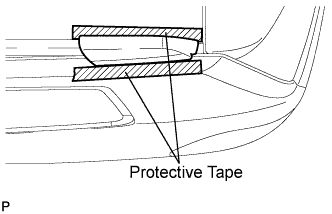 |
Put protective tape around the rear roof rack leg cover.
Using a moulding remover, disengage the 4 claws.
Disengage the guide and remove the rear roof rack leg cover.
| 4. REMOVE ROOF RACK ASSEMBLY (w/ Roof Rack) |
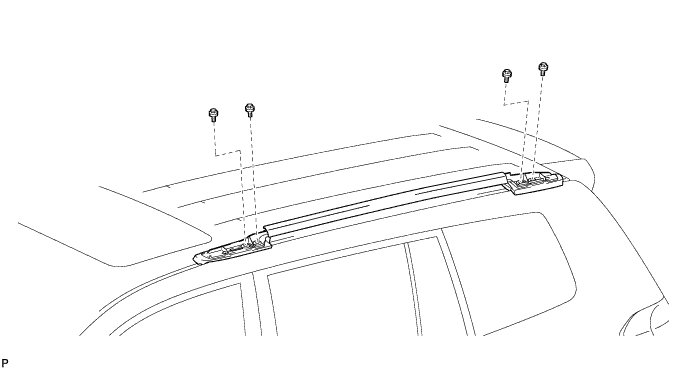
Remove the 4 bolts and roof rack assembly.
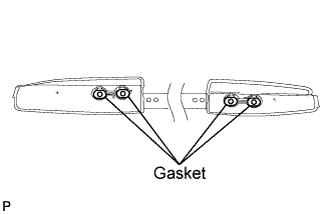 |
Remove the 4 gaskets.
| 5. REMOVE CENTER ROOF DRIP SIDE FINISH MOULDING |
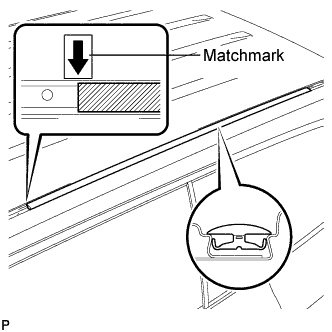 |
Place a matchmark on the vehicle body on the location indicated in the illustration.
Remove the center roof drip side finish moulding.
| 6. REMOVE ROOF DRIP SIDE FINISH MOULDING (for Front Side) |
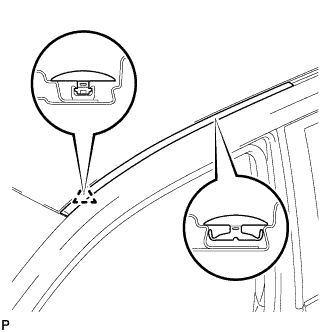 |
Disengage the clip and remove the roof drip side finish moulding.
| 7. REMOVE ROOF DRIP SIDE FINISH MOULDING (for Rear Side) |
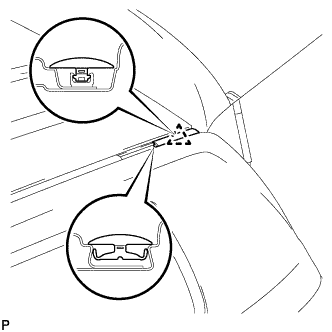 |
Disengage the clip and remove the roof drip side finish moulding.
| 8. REMOVE CENTER ROOF RACK BRACKET (w/o Roof Rack) |
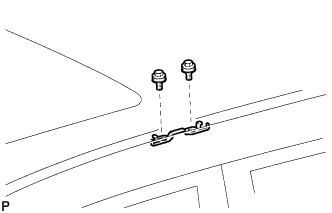 |
Remove the 2 bolts and center roof rack bracket.