 |
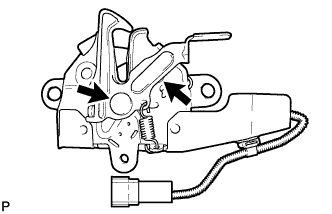
Apply MP grease to the sliding areas of the lock.
ENGINE HOOD COURTESY SWITCH > INSTALLATION |
| 1. INSTALL HOOD LOCK ASSEMBLY |
|
Apply MP grease to the sliding areas of the lock.
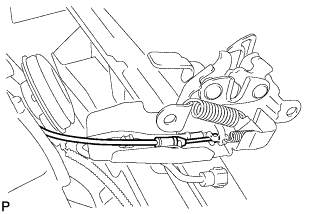 |
Connect the hood lock control cable.
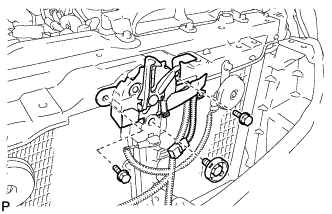 |
Install the hood lock assembly with the 3 bolts.
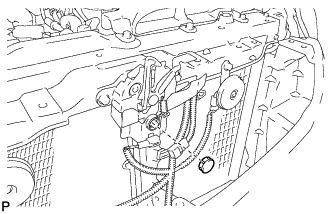 |
Install the hood lock nut cap.
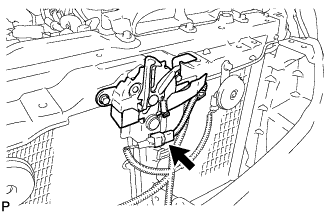 |
Connect the connector.
| 2. INSPECT HOOD SUB-ASSEMBLY |
Check that the clearance measurements of areas A through D are within each standard range.
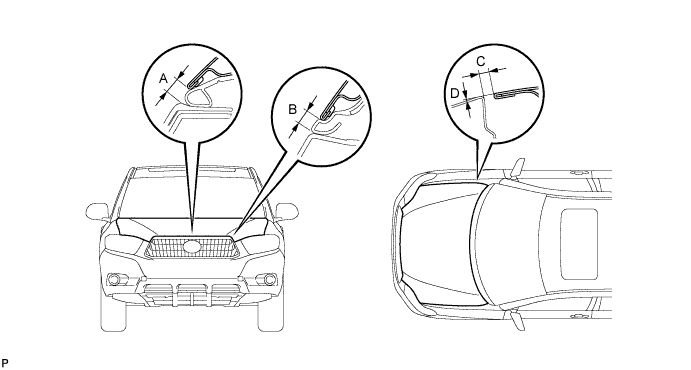
| Area | Measurement | Area | Measurement |
| A | 6.2 to 10.2 mm (0.244 to 0.402 in.) | C | 2.5 to 5.5 mm (0.098 to 0.217 in.) |
| B | 5.9 to 9.9 mm (0.232 to 0.390 in.) | D | -1.5 to 1.5 mm (-0.059 to 0.059 in.) |
| 3. ADJUST HOOD SUB-ASSEMBLY |
Horizontally and vertically adjust the hood.
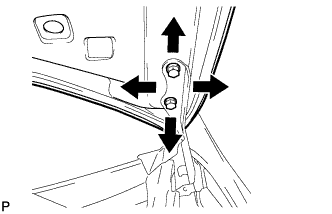 |
Loosen the 4 hinge bolts of the hood.
Adjust the clearance between the hood and front fender by moving the hood.
Tighten the 4 hinge bolts after the adjustment.
Adjust the height of the front end of the hood using the cushion rubber.
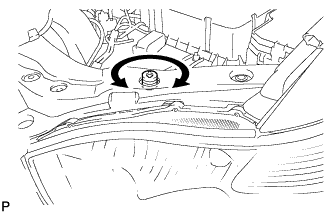 |
Adjust the cushion rubbers so that the heights of the hood and fender are aligned.
Adjust the hood lock.
|
Remove the hood lock nut cap.
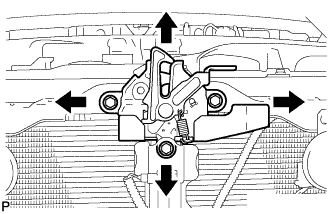 |
Loosen the 3 bolts.
Tighten the bolts after the adjustment.
|
Install the hood lock nut cap.
Check that the striker can engage with the hood lock smoothly.
| 4. INSTALL RADIATOR GRILLE |
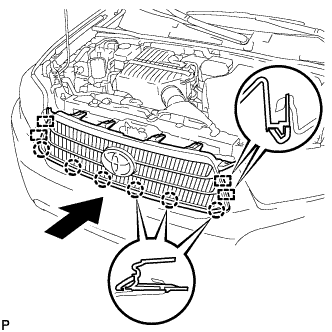 |
Engage the 4 guides and 6 claws, and install the radiator grille.
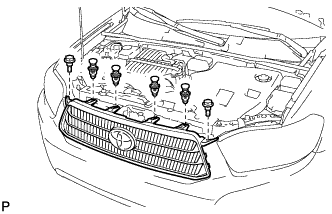 |
Install the 4 clips and 2 bolts.
| 5. INSTALL COOL AIR INTAKE DUCT SEAL |
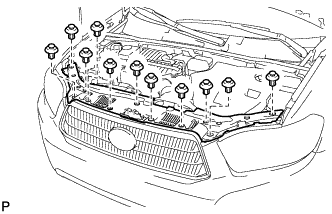 |
Install the cool air intake duct seal with the 11 clips.