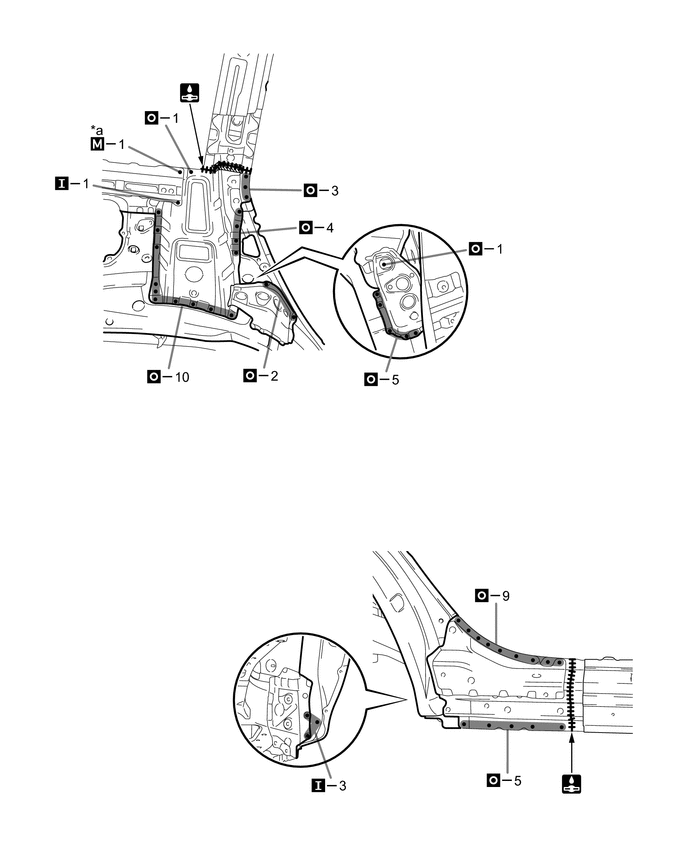
BODY WELD POINT QUARTER WHEEL HOUSING OUTER PANEL ASSEMBLY REPLACEMENT
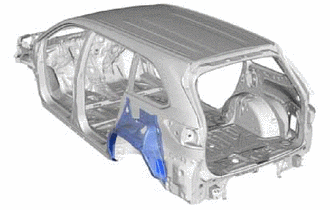
With the quarter panel removed.
REMOVAL
| Symbol meaning | |
|---|---|

|
Remove Weld Points |

|
Remove Weld Points |

|
Remove Weld Points |

|
Cut with Disc Sander etc. |

|
Cut and Join Location |
*a and *b are reused.
After removing the *a and *b, remove the quarter panel sub-assembly rear inner.
*c indicates the location of the foamed sealing material. Be careful when cutting as the foamed sealing material is located near the cutting position.
Remove the remaining foamed sealing material from the vehicles side.
| *A | LH | - | - |
| *a | Reused | *b | Reused |
| *c | Foamed Sealing Material | *d | mm (in.) |
| *1 | QUATER PANEL SUB-ASSEMBLY REAR INNER | - | - |
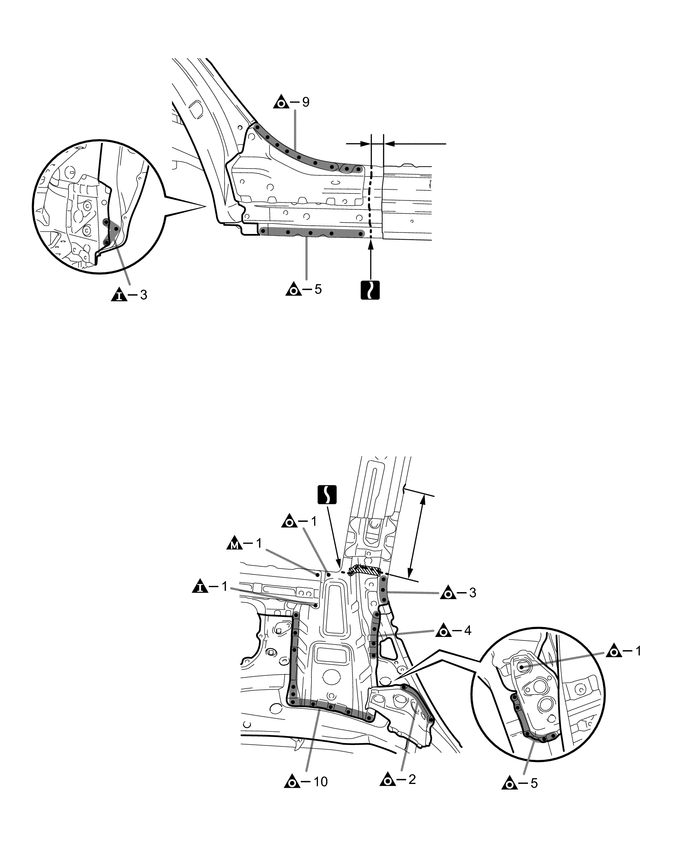
| *B | RH | - | - |
| *a | Reused | *b | Reused |
| *c | Foamed Sealing Material | *e | mm (in.) |
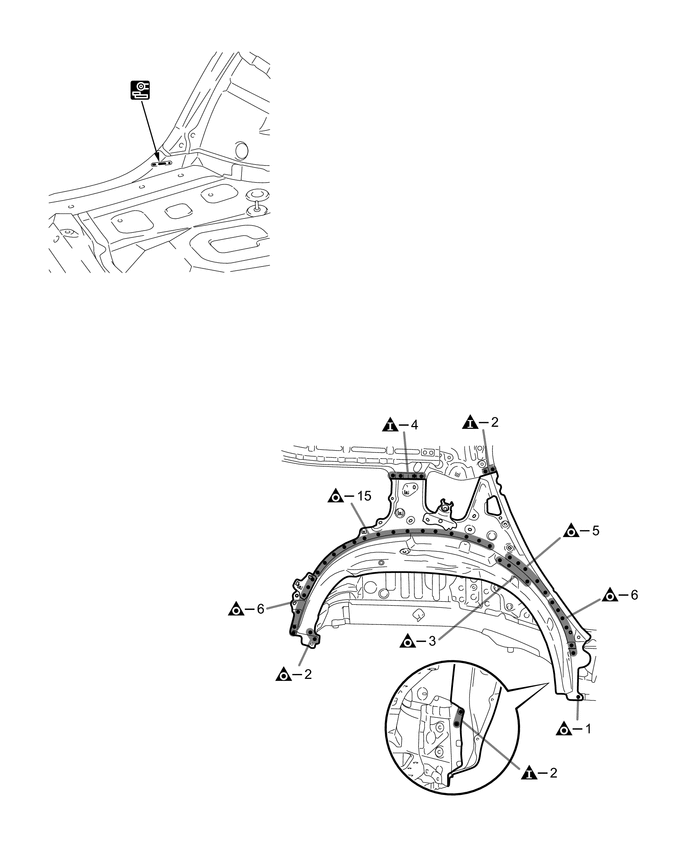
| *2 | QUATER PANEL SUB-ASSEMBLY REAR INNER | - | - |
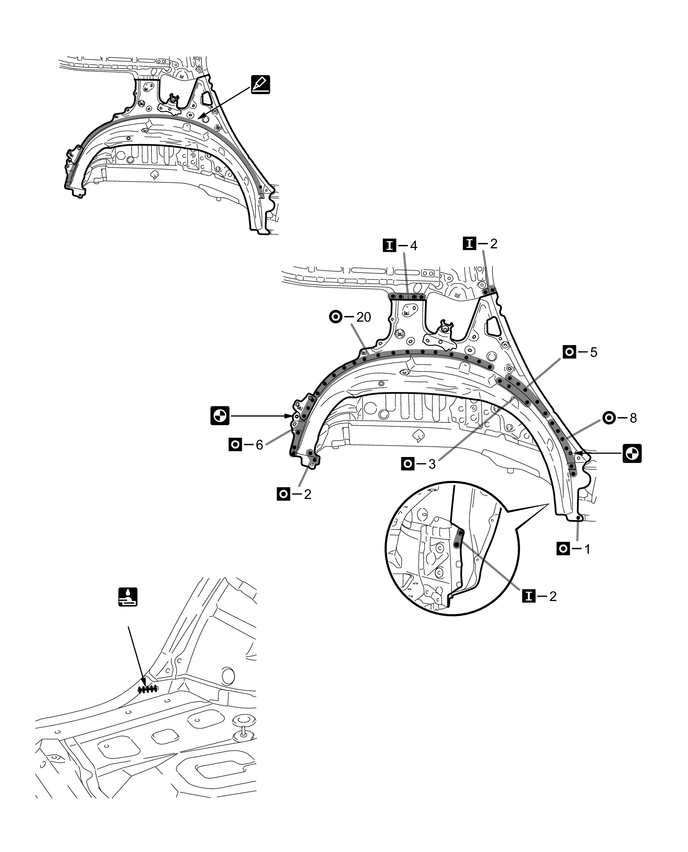
INSTALLATION
| Symbol meaning | |
|---|---|

|
Spot Weld |

|
Plug Weld |

|
Plug Weld |

|
Plug Weld |

|
Fillet Weld |

|
Butt Weld |

|
Body Sealer |

|
Assembly Mark |
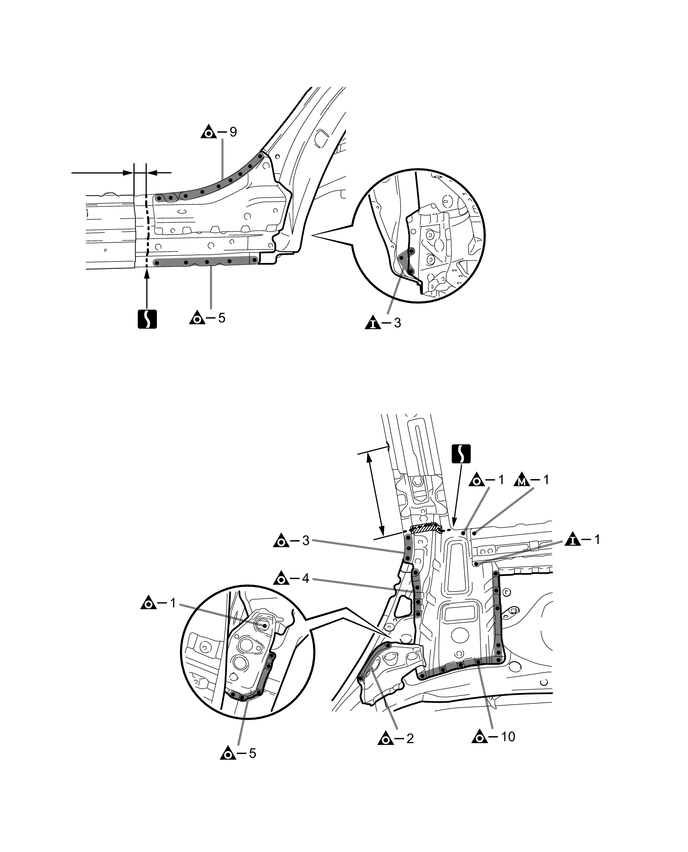
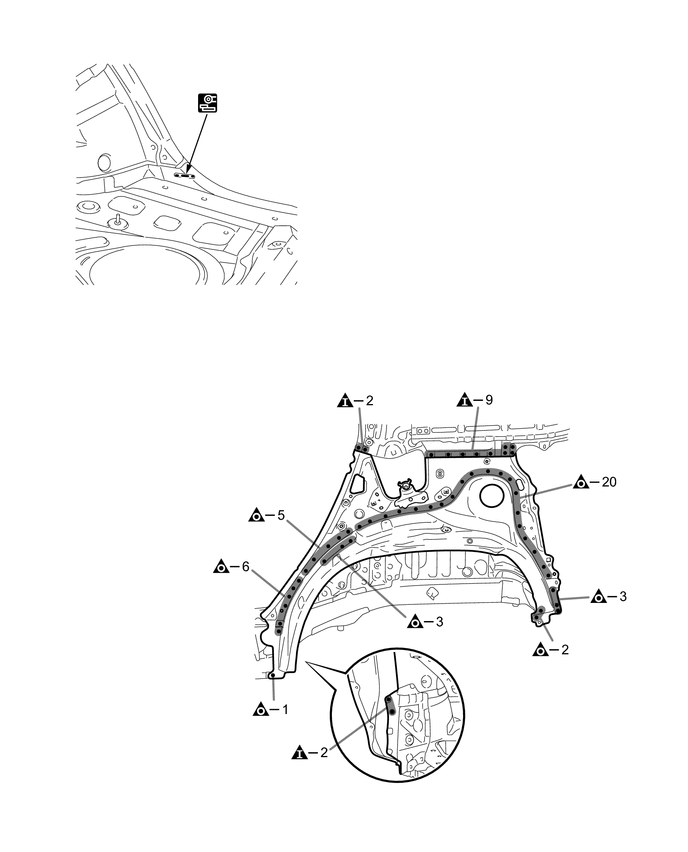
When welding *a, make a hole on a new part for plug welding and weld the panel with the panel behind completely.
For positioning of the new parts, align the installation standard holes of the outer panel and the inner panel.
Before installing a new part, apply body sealer.
- HINT:
-
Apply body sealer in an even, continuous bead.
After welding the quarter panel sub-assembly rear inner to the vehicle side, install the *b and *c.
After welding, apply body sealer and undercoating to the corresponding parts. (See the painting /coating)
After applying the top coat, apply anti-rust agent to the internal panel portion of the closed section structural weld points.
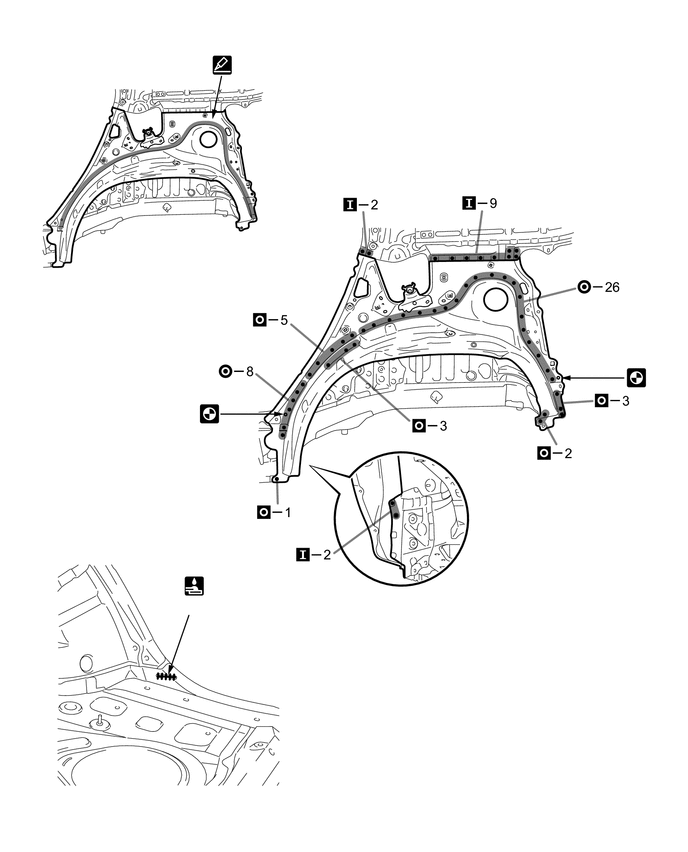
| *A | LH | - | - |
| *1 | QUATER PANEL SUB-ASSEMBLY REAR INNER | - | - |
| *d | mm (in.) | - | - |
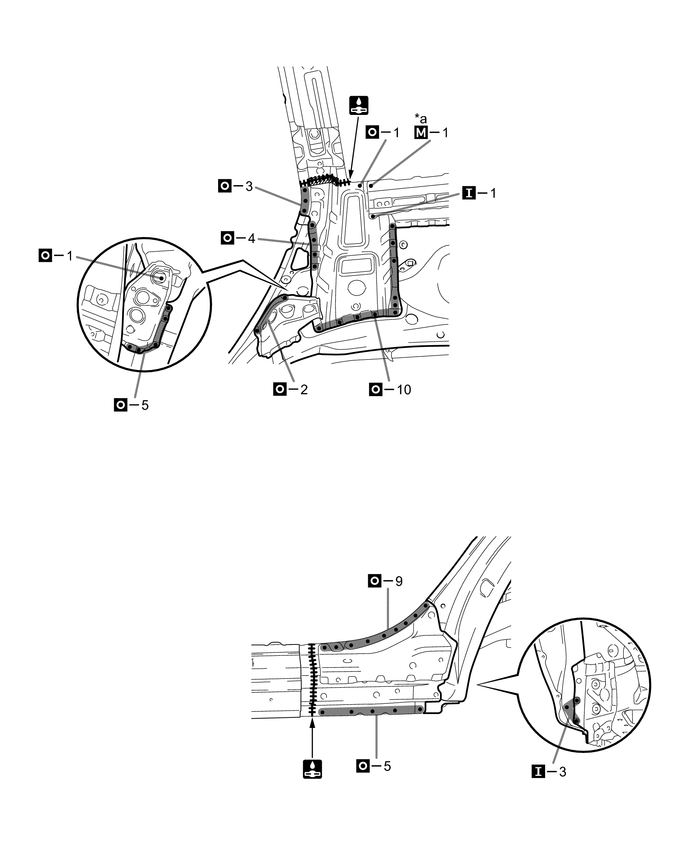
| *B | RH | - | - |
| *2 | QUATER PANEL SUB-ASSEMBLY REAR INNER | - | - |
| *e | mm (in.) | - | - |