STEERING COLUMN STEERING COLUMN ASSEMBLY INSPECTION
CAUTION / NOTICE / HINT
- NOTICE:
-
When using a vise, do not overtighten it.
PROCEDURE

 1.INSPECT PRELOAD
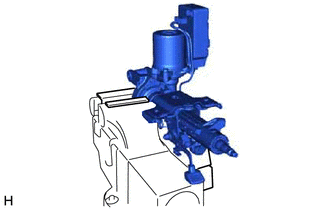
| *a | Aluminum Plate |
| *b | Wooden Block |
Secure the steering column assembly in a vise using aluminum plates and wooden blocks as shown in the illustration.
- NOTICE:
- ·
Do not overtighten the vise, as the steering column assembly may become deformed.
·Support the steering column assembly with a wooden block or similar item to ensure that it does not fall.
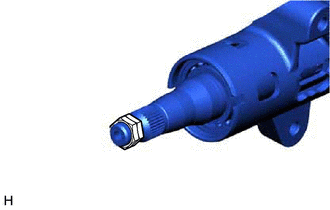
| *a | Service Nut |
Install 2 service nuts to the steering main shaft.
- Recommended Service Nut:
- Thread Diameter:
12.0 mm (0.472 in.)
- Thread Pitch:
1.25 mm (0.0492 in.)
Simultaneously rotate the service nut that was installed first counterclockwise and rotate the service nut that was installed second clockwise to lock them.
- NOTICE:
-
Do not apply excess torque to the service nuts by using a tool such as an impact wrench.
- HINT:
-
These nuts are installed to turn the steering main shaft. They should be removed after inspecting the steering main shaft rotating torque.
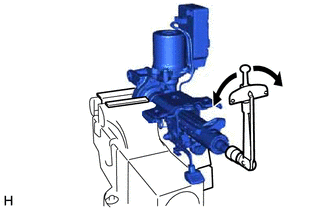
Using a torque wrench, turn the main shaft and measure the preload.
- Preload:
1.3 to 2.0 N*m (14 to 20 kgf*cm, 12 to 17 in.*lbf)
If the preload is not as specified, replace the power steering motor assembly or electric power steering column sub-assembly with a new one.
4520A
2.INSPECT ELECTRIC POWER STEERING COLUMN SUB-ASSEMBLY
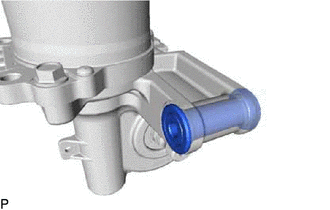
| *1 | Collar |
| *2 | Bushing |
Check that the 2 bushings are securely installed to the steering column assembly.
If the bushings are missing or damaged, replace the electric power steering column sub-assembly with a new one.
Inspect the capsule.
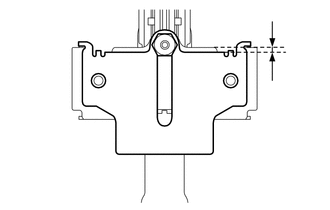
| *1 | Capsule |
Check that the capsule is securely installed to the steering column assembly as shown in the illustration.
- Standard Dimension (A):
4.8 mm (0.189 in.)
If the capsule is not positioned as specified, replace the electric power steering column sub-assembly with a new one.
Check the capsule for deformation and damage.
If the capsule is deformed, loose, missing or damaged, replace the electric power steering column sub-assembly with a new one.
3.INSPECT STEERING LOCK OPERATION (w/o Smart Entry and Start System)
Check that the steering lock mechanism is activated when the key is removed.
Check that the steering lock mechanism is deactivated when the key is inserted and turned to the ACC position.
If there is any abnormality, replace the ignition switch lock cylinder assembly or steering column upper bracket assembly.