EXTERIOR PANELS / TRIM REAR BUMPER REASSEMBLY
PROCEDURE

 52171A
1.INSTALL NO. 1 REAR BUMPER REINFORCEMENT
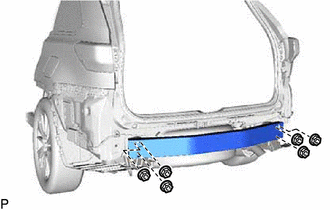
Install the No. 1 rear bumper reinforcement with the 6 nuts.
- Torque:
- 43 N*m (438 kgf*cm, 32 ft.*lbf)
52592
2.INSTALL REAR BUMPER SIDE SEAL LH
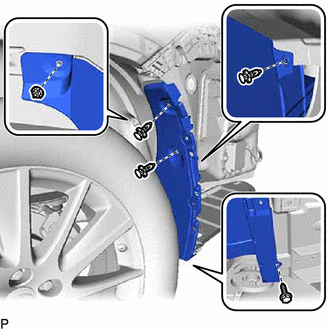
| *A | w/o Mudguard |
w/o Mud guard:
Install the screw.
Install the rear bumper side seal LH with the 4 clips.
52591
3.INSTALL REAR BUMPER SIDE SEAL RH
- HINT:
-
Use the same procedure as for the LH side.
52156A
4.INSTALL REAR BUMPER SIDE SUPPORT LH
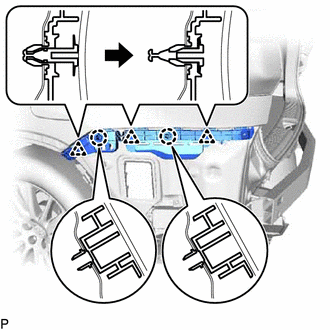
Engage the 2 claws.
Engage the 3 clips as shown in the illustration.
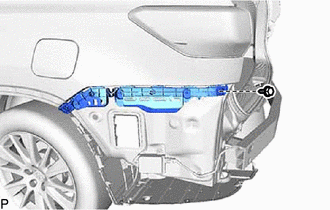
Install the rear bumper side support LH with the screw.
52155A
5.INSTALL REAR BUMPER SIDE SUPPORT RH
- HINT:
-
Use the same procedure as for the LH side.
75895B
6.INSTALL NO. 2 MOULDING TAPE
Clean off any tape adhesive residue with cleaner.
Using a brush or sponge, coat the application area of No. 2 moulding tape with primer.
- NOTICE:
- ·
Do not apply too much primer.
·Allow the primer to dry for 3 minutes or more.
·Throw away any leftover primer.
- HINT:
-
If an area other than specified is coated by accident, wipe off the primer with a clean piece of cloth before it dries.
Remove the release paper from a new No. 2 moulding tape.
- HINT:
-
After removing the release paper, keep the exposed adhesive free from foreign matter.
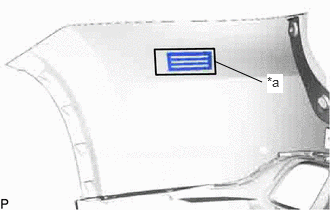
| *a | Line |
Install the No. 2 moulding tape as shown in the illustration.
- HINT:
- ·
Apply the No. 2 moulding tape along the line marked on the rear bumper cover.
·Use the same procedure for the RH side and LH side.
52169C
7.INSTALL LOWER REAR BUMPER COVER
Engage the 14 claws.
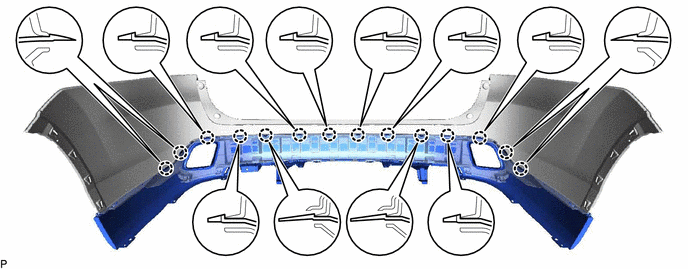
Install the 2 clips.
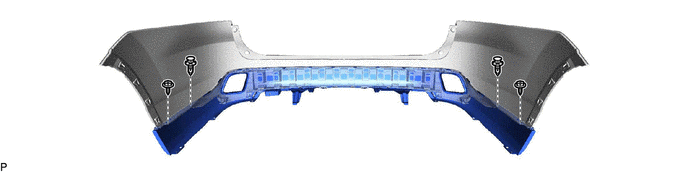
Install the lower rear bumper cover with the 2 screws.
52151G
8.INSTALL REAR BUMPER EXTENSION
Engage the 2 guides and 10 claws.
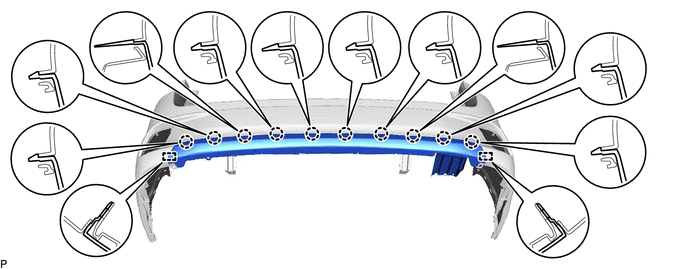
Install the 5 clips.
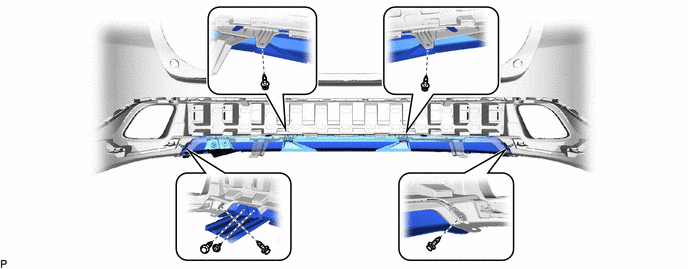
Install the rear bumper extension with the screw.
52615
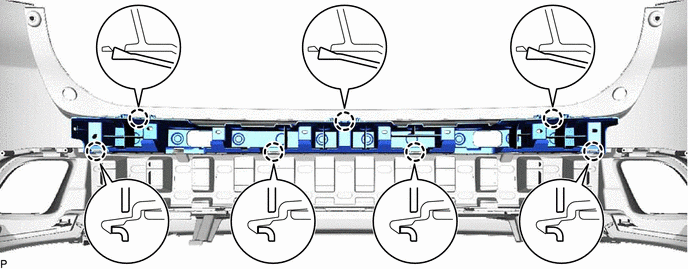
9.INSTALL REAR BUMPER ENERGY ABSORBER
Engage the 7 claws to install the rear bumper energy absorber.
81490E
10.INSTALL REFLEX REFLECTOR ASSEMBLY LH (w/o Rear Fog Light)
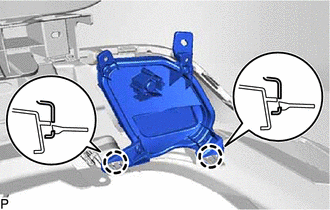
Engage the 2 claws.
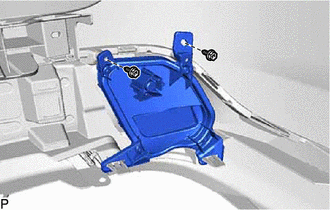
Install the reflex reflector assembly LH with the 2 screws.
81480D
11.INSTALL REFLEX REFLECTOR ASSEMBLY RH (w/o Rear Fog Light)
- HINT:
-
Use the same procedure as for the LH side.
82183
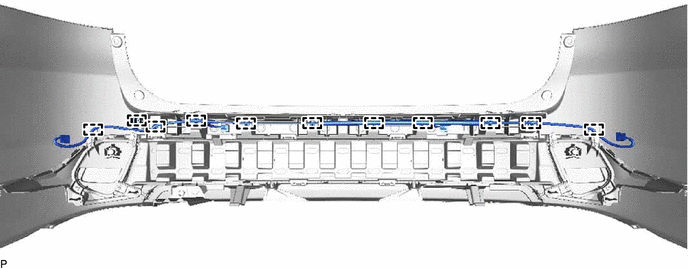
12.INSTALL NO. 3 LUGGAGE ROOM WIRE (w/ TOYOTA Parking Assist-sensor System)
Engage the 11 clamps to install the No. 3 luggage room wire.
89359
13.INSTALL ULTRASONIC SENSOR BEZEL (w/ TOYOTA Parking Assist-sensor System)
Click hereAudio / Visual / Telematics>PARK ASSIST / MONITORING>ULTRASONIC SENSOR(for Rear Side)>INSTALLATION
- HINT:
-
Use the same procedure for all the ultrasonic sensor bezels.
89341A
14.INSTALL NO. 1 ULTRASONIC SENSOR (w/ TOYOTA Parking Assist-sensor System)
Click hereAudio / Visual / Telematics>PARK ASSIST / MONITORING>ULTRASONIC SENSOR(for Rear Side)>INSTALLATION
- HINT:
-
Use the same procedure for all the No. 1 ultrasonic sensors.
82183
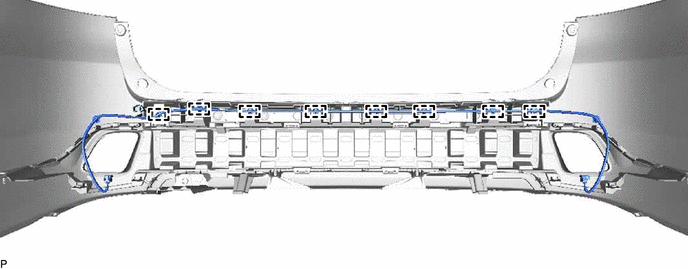
15.INSTALL NO. 3 LUGGAGE ROOM WIRE (w/ Rear Fog Light)
Engage the 8 clamps to install the No. 3 luggage room wire.
81490C
16.INSTALL REAR FOG LIGHT ASSEMBLY LH (w/ Rear Fog Light)
81480A
17.INSTALL REAR FOG LIGHT ASSEMBLY RH (w/ Rear Fog Light)
- HINT:
-
Use the same procedure as for the LH side.