2GR-FE ENGINE MECHANICAL CYLINDER HEAD REASSEMBLY
CAUTION / NOTICE / HINT
- HINT:
-
Perform "Inspection After Repair" after replacing the cylinder head sub-assembly.
-
Click hereEngine / Hybrid System>2GR-FE ENGINE CONTROL>SFI SYSTEM>INITIALIZATION
PROCEDURE

 1.INSTALL SPARK PLUG TUBE
- HINT:
-
When using a new cylinder head sub-assembly, the spark plug tubes must be replaced.
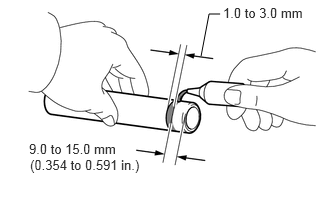
Apply adhesive to a new spark plug tube as shown in the illustration.
- Adhesive:
Toyota Genuine Adhesive 1324, Three Bond 1324 or equivalent.
- Standard Application Width:
1.0 to 3.0 mm (0.0394 to 0.118 in.)
- NOTICE:
- ·
Install the spark plug tube within 3 minutes of applying adhesive.
·Be careful not to deform the spark plug tube.
·Do not expose the spark plug tube to engine oil for at least 1 hour after installing it.
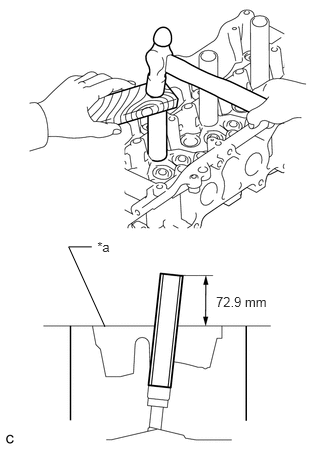
| *a | Cylinder Head Top Surface |
Using a wooden block and hammer, tap in the spark plug tube.
- Standard Protrusion Height:
72.9 mm (2.87 in.)
- NOTICE:
-
To avoid tapping in the spark plug tube too far, measure the protrusion height while tapping it.
11117E
2.INSTALL NO. 1 STRAIGHT SCREW PLUG
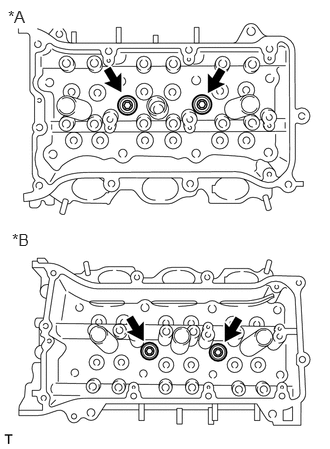
| *A | for Bank 1 |
| *B | for Bank 2 |
Using a 10 mm hexagon wrench, install 4 new gaskets and the 4 No. 1 straight screw plugs.
- Torque:
- 44 N*m (449 kgf*cm, 32 ft.*lbf)
11117F
3.INSTALL NO. 2 STRAIGHT SCREW PLUG
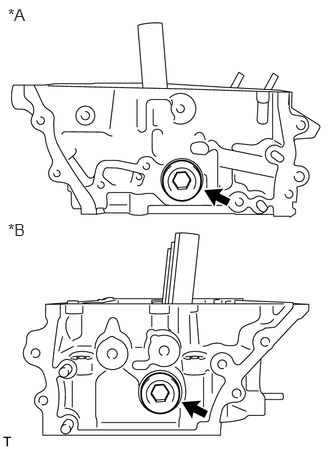
| *A | for Bank 1 |
| *B | for Bank 2 |
Using a 14 mm hexagon wrench, install 2 new gaskets and the 2 No. 2 straight screw plugs.
- Torque:
- 80 N*m (816 kgf*cm, 59 ft.*lbf)
13734
4.INSTALL VALVE SPRING SEAT
Install the valve spring seat to the cylinder head sub-assembly.
5.INSTALL VALVE STEM OIL SEAL
Apply a light coat of engine oil to new valve stem oil seals.
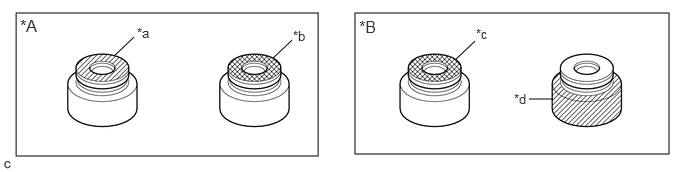
| *A | for Intake Side | *B | for Exhaust Side |
| *a | Gray
(for Intake Side) |
*b | Black
(for Intake Side) |
| *c | Black
(for Exhaust Side) |
*d | Gray
(for Exhaust Side) |
- NOTICE:
-
Pay attention when installing the valve stem oil seals. For example, installing an intake side valve stem oil seal to the exhaust side or installing an exhaust side valve stem oil seal to the intake side can cause installation problems later.
- HINT:
- ·
for Intake Side
The intake side valve stem oil seals is gray or black.
·for Exhaust Side
The exhaust side valve stem oil seals is black or gray.
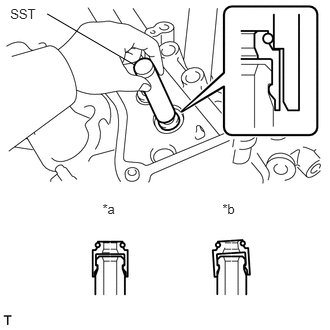
| *a | Correct |
| *b | Incorrect |
Using SST, push in the valve stem oil seals.
- SST
- 09201-41020
- NOTICE:
-
Failure to use SST will cause the valve stem seal to be damaged or improperly seated.
13715
6.INSTALL EXHAUST VALVE
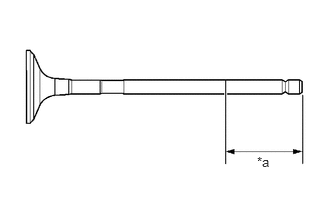
| *a | 30 mm (1.18 in.) or more |
Sufficiently apply engine oil to the tip area of the exhaust valve shown in the illustration.
Install the exhaust valve, inner compression spring and valve spring retainer to the cylinder head sub-assembly.
- NOTICE:
-
Install the same parts in the same combination to their original locations.
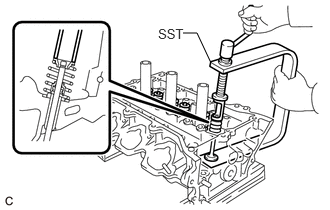
Using SST, compress the inner compression spring and install the 2 valve spring retainer locks.
- SST
- 09202-70020 09202-00020
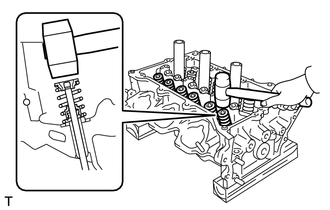
Using a plastic hammer, lightly tap the valve stem tip to ensure a proper fit.
- NOTICE:
-
Be careful not to damage the retainer.
13711
7.INSTALL INTAKE VALVE
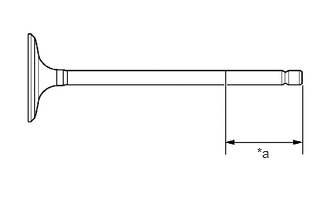
| *a | 30 mm (1.18 in.) or more |
Sufficiently apply engine oil to the tip area of the intake valve shown in the illustration.
Install the intake valve, inner compression spring and valve spring retainer to the cylinder head sub-assembly.
- NOTICE:
-
Install the same parts in the same combination to their original locations.
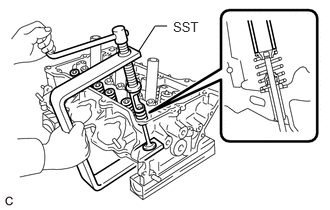
Using SST, compress the inner compression spring and install the 2 valve spring retainer locks.
- SST
- 09202-70020 09202-00020
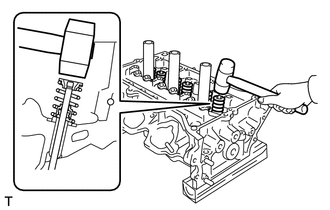
Using a plastic hammer, lightly tap the valve stem tip to ensure a proper fit.
- NOTICE:
-
Be careful not to damage the valve spring retainer.
13716
8.INSTALL VALVE STEM CAP
Apply a light coat of engine oil to the valve stem caps.
Install the valve stem caps on the valves.