INTERIOR PANELS / TRIM FRONT CONSOLE BOX INSTALLATION
PROCEDURE

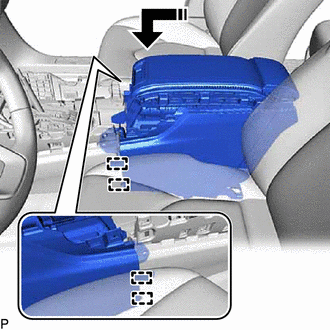
 1.INSTALL CONSOLE BOX ASSEMBLY

|
Install in this Direction |
Engage the 4 guides as shown in the illustration.
Connect each connector.
Install the console box assembly with the 4 bolts and 2 screws.
58849
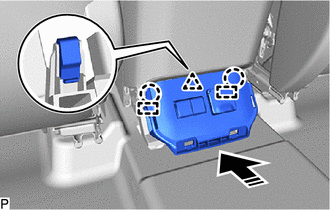
2.INSTALL NO. 2 CONSOLE BOX HOLE COVER
w/o Rear Seat Entertainment System:
Connect the connector.
|
|
Install in this Direction |
Engage the 2 guides, clip and 2 claws as shown in the illustration to install the No. 2 console box hole cover.
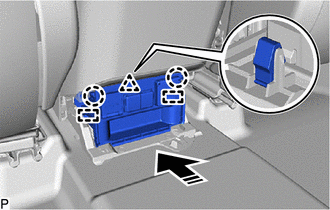
w/ Rear Seat Entertainment System:
Engage the 2 claws.
Connect the connector.
|
|
Install in this Direction |
Engage the 2 guides, clip and 2 claws as shown in the illustration to install the No. 2 console box hole cover.
58912B
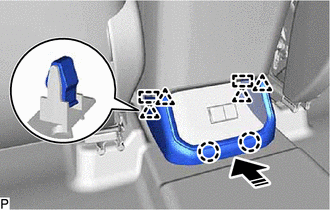
3.INSTALL REAR CONSOLE LOWER BOX
w/o Rear Seat Entertainment System:
|
|
Install in this Direction |
Engage the 2 guides, 4 clips and 2 claws as shown in the illustration to install the rear console lower box.
w/ Rear Seat Entertainment System:
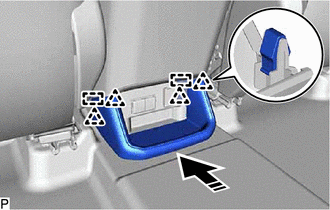
|
|
Install in this Direction |
Engage the 2 guides and 4 clips as shown in the illustration to install the rear console lower box.
55012B
4.INSTALL NO. 2 INSTRUMENT PANEL GARNISH SUB-ASSEMBLY
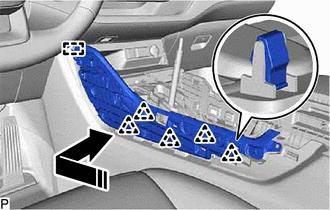
|
|
Install in this Direction |
Engage the guide and 5 clips as shown in the illustration.
Install the No. 2 instrument panel garnish sub-assembly with the screw.
55011B
5.INSTALL NO. 1 INSTRUMENT PANEL GARNISH SUB-ASSEMBLY
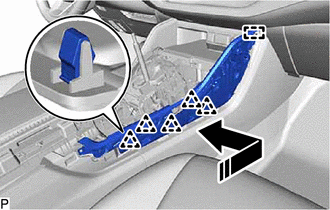
|
|
Install in this Direction |
Engage the guide and 5 clips as shown in the illustration.
Install the No. 1 instrument panel garnish sub-assembly with the screw.
55403G
6.INSTALL NO. 2 LOWER INSTRUMENT PANEL PAD SUB-ASSEMBLY
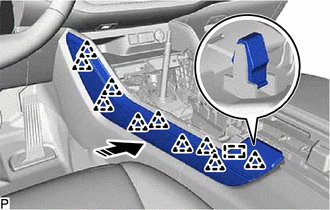
|
|
Install in this Direction |
Engage the guide and 10 clips as shown in the illustration to install the No. 2 lower instrument panel pad sub-assembly.
55402E
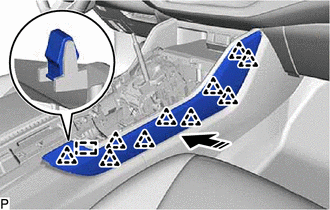
7.INSTALL NO. 1 LOWER INSTRUMENT PANEL PAD SUB-ASSEMBLY
|
|
Install in this Direction |
Engage the guide and 10 clips as shown in the illustration to install the No. 1 lower instrument panel pad sub-assembly.
55618A
8.INSTALL CONSOLE BOX CUP HOLDER
Engage the 2 claws.
Install the console box cup holder with the 4 screws.
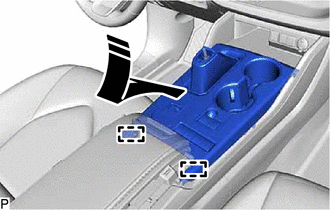
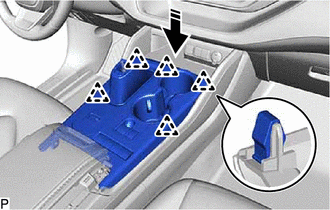
9.INSTALL CONSOLE PANEL SUB-ASSEMBLY
Connect each connector.
|
|
Install in this Direction |
Engage the 2 guides as shown in the illustration.
Engage the 2 clips.
|
|
Install in this Direction |
Engage the 5 clips as shown in the illustration to install the console panel sub-assembly.
33504F
10.INSTALL SHIFT LEVER KNOB SUB-ASSEMBLY
for UA80F: Click hereDrivetrain>UA80F (AUTOMATIC TRANSMISSION / TRANSAXLE)>SHIFT LEVER KNOB>INSTALLATION
for P810: Click hereDrivetrain>P810 (HYBRID TRANSMISSION / TRANSAXLE)>SHIFT LEVER KNOB>INSTALLATION
58818A
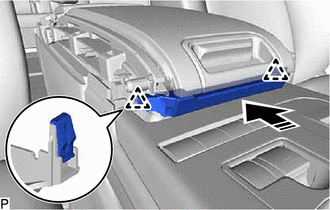
11.INSTALL FRONT CONSOLE BOX COVER
|
|
Install in this Direction |
Engage the 2 clips as shown in the illustration to install the front console box cover.
58871
12.INSTALL CONSOLE BOX CUSHION
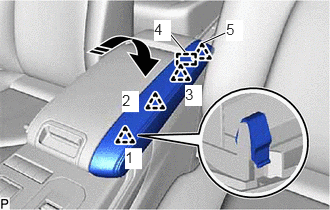
|
|
Install in this Direction |
Engage the guide and 4 clips in the order shown in the illustration to install the console box cushion.
58872A
13.INSTALL NO. 2 CONSOLE BOX CUSHION
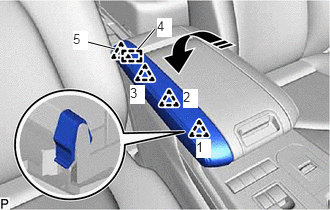
|
|
Install in this Direction |
Engage the guide and 4 clips in the order shown in the illustration to install the No. 2 console box cushion.