HEATING / AIR CONDITIONING REAR AIR CONDITIONING UNIT REASSEMBLY
CAUTION / NOTICE / HINT
- NOTICE:
-
To prevent loss of heater effectiveness, make sure the heater radiator unit sub-assembly and air conditioning hose and accessory is filled with coolant before installing.
PROCEDURE

 88501R
1.INSTALL REAR EVAPORATOR SUB-ASSEMBLY

|
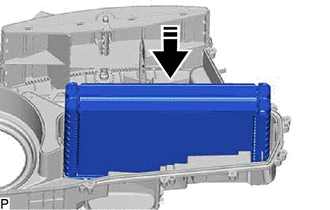
Install in this Direction |
Install the rear evaporator sub-assembly as shown in the illustration.
82210L
2.INSTALL NO. 2 AIR CONDITIONING HARNESS ASSEMBLY
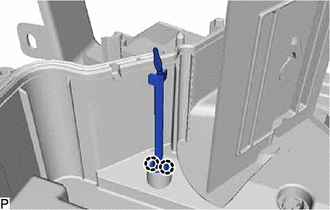
Engage the 2 claws.
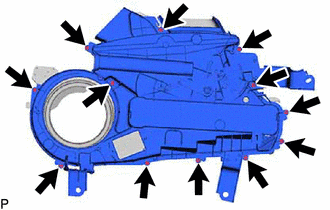
Install the rear cooling unit cover LH with the 12 screws.
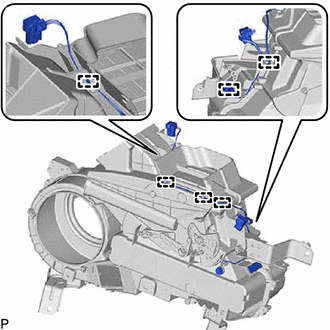
Engage each clamp to install the No. 2 air conditioning harness assembly.
87106W
3.INSTALL REAR AIR MIX DAMPER SERVO SUB-ASSEMBLY
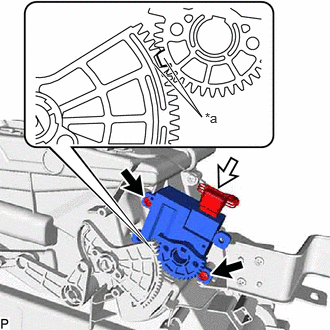
| *a | Reference Point |
Using the reference points, install the rear air mix damper servo sub-assembly with the 2 screws.
Connect the connector.
87106X
4.INSTALL REAR MODE DAMPER SERVO SUB-ASSEMBLY
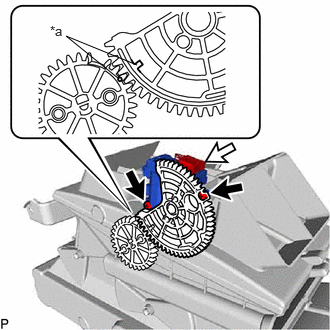
| *a | Reference Point |
Using the reference points, install the rear mode damper servo sub-assembly with the 2 screws.
Connect the connector.
87165C
5.INSTALL BLOWER MOTOR CONTROL
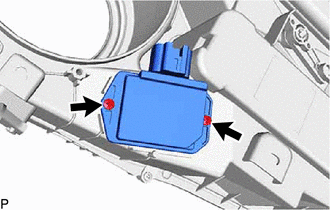
Install the blower motor control with the 2 screws.
87103D
6.INSTALL REAR BLOWER MOTOR WITH FAN SUB-ASSEMBLY
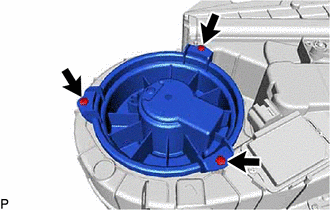
Install the rear blower motor with fan sub-assembly with the 3 screws.
- NOTICE:
-
Replace the rear blower motor with fan sub-assembly if it has been dropped or subjected to a severe impact.
87107B
7.INSTALL HEATER RADIATOR UNIT SUB-ASSEMBLY
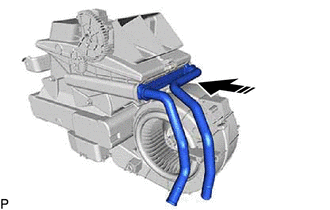
|
|
Install in this Direction |
Install the heater radiator unit sub-assembly as shown in the illustration.
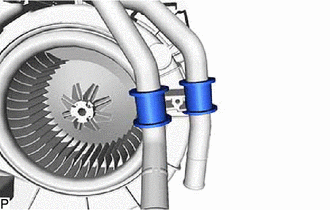
Install the 2 bushes.
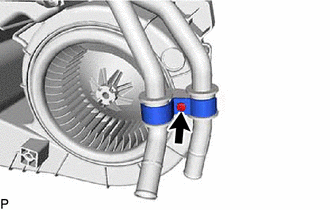
Install the clamp with the screw.
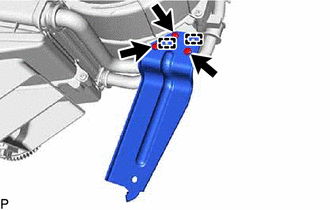
Engage the 2 guides.
Install the bracket with the 3 screws.
8.INSTALL REAR COOLING UNIT EXPANSION VALVE
Remove the vinyl tape from the rear cooling unit expansion valve and rear evaporator sub-assembly.
Sufficiently apply compressor oil to 2 new O-rings and the fitting surfaces of the rear evaporator sub-assembly.
| Refrigerant | Compressor Oil |
|---|---|
| for Gasoline Model | ND-OIL 12 or equivalent |
| for HV Model | ND-OIL 11 or equivalent |
Install the 2 O-rings to the rear evaporator sub-assembly.
- NOTICE:
-
Keep the O-rings and O-ring fitting surface free of foreign matter.
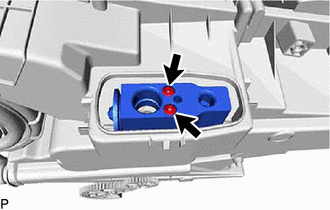
Using a 4 mm hexagon socket wrench, install the rear cooling unit expansion valve with the 2 hexagon bolts.
- Torque:
- 3.1 N*m (32 kgf*cm, 27 in.*lbf)
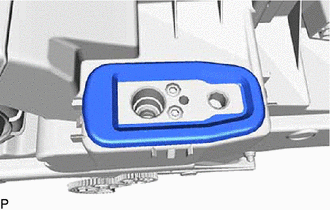
Install the grommet.
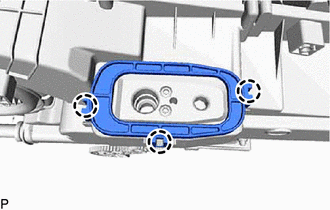
Engage the 3 claws to install the plate.
88720B
9.INSTALL AIR CONDITIONING HOSE AND ACCESSORY
Remove the vinyl tape from the air conditioning hose and accessory and rear cooling unit expansion valve.
Sufficiently apply compressor oil to 2 new O-rings and the fitting surface of the air conditioning hose and accessory.
| Refrigerant | Compressor Oil |
|---|---|
| for Gasoline Model | ND-OIL 12 or equivalent |
| for HV Model | ND-OIL 11 or equivalent |
Install the 2 O-rings to the air conditioning hose and accessory.
- NOTICE:
-
Keep the O-rings and O-ring fitting surfaces free of foreign matter.
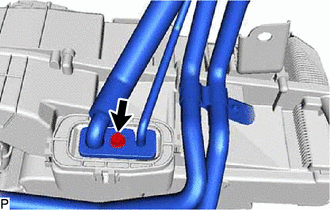
Insert the hose joint into the fitting hole securely and install the bolt.
- Torque:
- 9.8 N*m (100 kgf*cm, 87 in.*lbf)
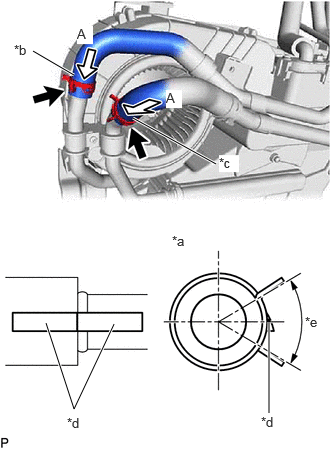
| *a | View A |
| *b | Inlet |
| *c | Outlet |
| *d | Inlet:
Marking (White) Outlet: Marking (Yellow) |
| *e | Clip Installation Angle (60°) |
Connect the air conditioning hose and accessory and engage the 2 clips within the area shown in the illustration.
- NOTICE:
-
Do not apply excessive force to the air conditioning hose and accessory.
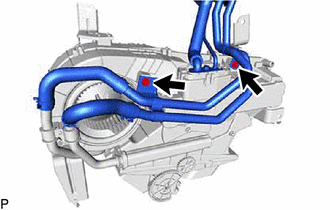
Install the air conditioning hose and accessory with the 2 screws.
87417A
10.INSTALL AIR DUCT PACKING
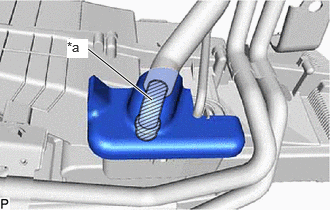
| *a | Cold Point |
Install a new air duct packing as shown in the illustration.
88539K
11.INSTALL DRAIN COOLER HOSE
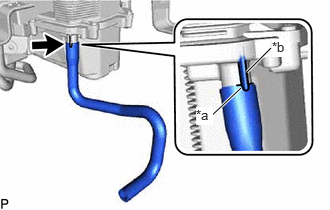
| *a | Hose Notch |
| *b | Rear Cooling Unit Assembly Rib |
Align the hose notch with the rear cooling unit assembly rib as shown in the illustration and install the drain cooler hose.