Drive Belt
Engine Mechanical
COMPONENTS
ON-VEHICLE INSPECTION
1. INSPECT V-RIBBED BELT
(a) Visually check the V-ribbed belts for excessive wear, frayed cords, etc.
If any defect is found, replace the belt(s).
HINT:
Cracks on the rib side of a V-ribbed belt are considered acceptable.
If the drive belt has chunks missing from the ribs, it should be replaced.
-
2. INSPECT V-RIBBED BELT TENSIONER
(a) Check that nothing is caught in the tensioners by turning them clockwise and counterclockwise.
If a malfunction exists, replace the tensioner.
-
REMOVAL
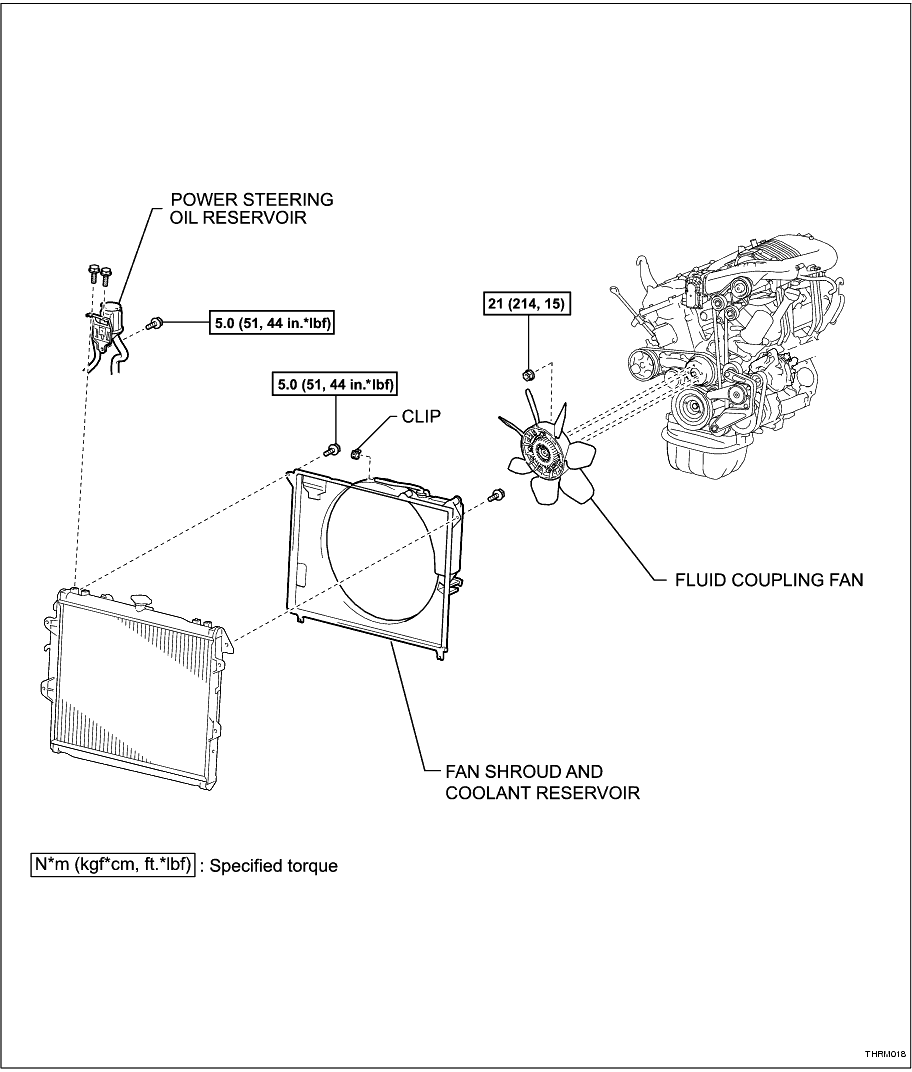
1. REMOVE RADIATOR FAN AND SHROUD
(a) Remove the 3 bolts and move the power steering oil reservoir to one side.
-
(b) Disconnect the radiator reservoir hose from the radiator tank upper.
-
(c) Loosen the 4 nuts attaching the radiator fan fluid coupling.
-
(d) Remove the 2 bolts attaching the fan shroud.
-
(e) Remove the 4 fluid coupling nuts, and then remove the shroud together with the fan.
NOTICE:
Be careful not to damage the radiator core.
HINT:
Temporarily reinstall 2 of the fluid coupling nuts to secure the water pump pulley.
-
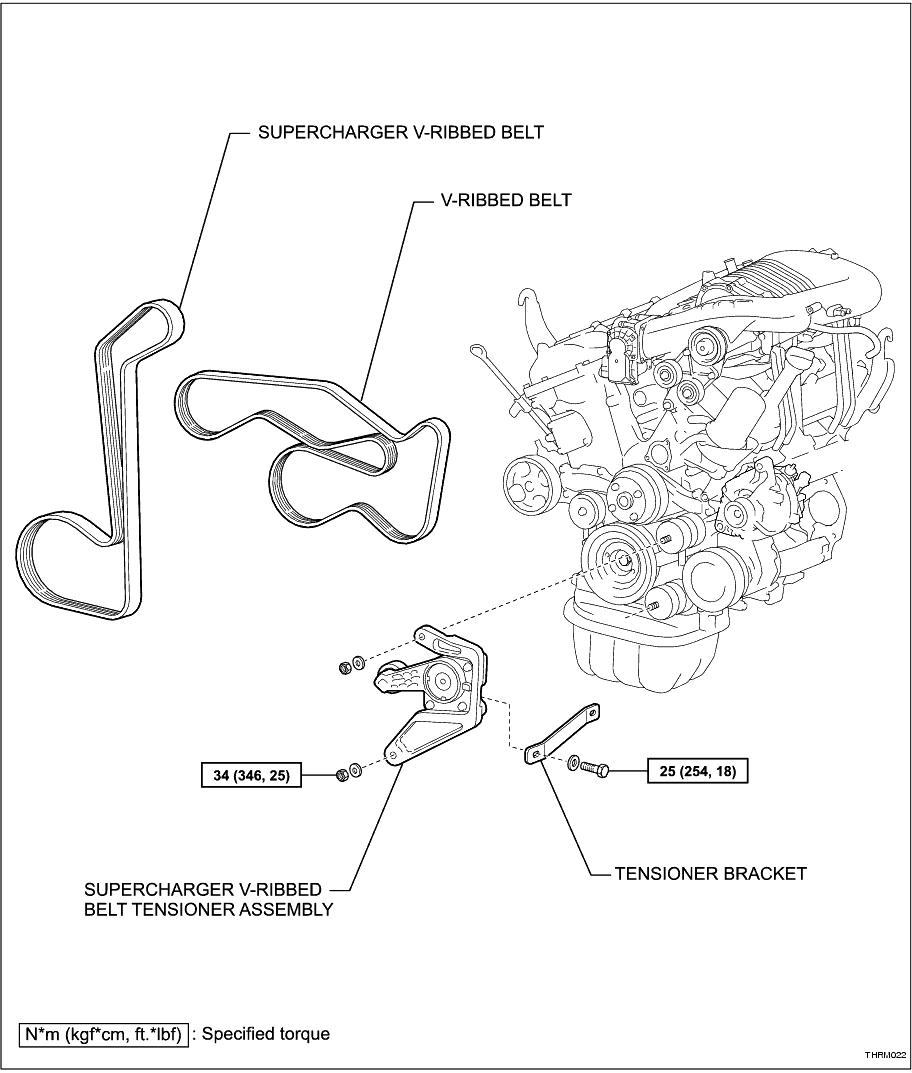
2. REMOVE SUPERCHARGER V-RIBBED BELT
(a) Release belt tension by turning the tensioner clockwise.
-
(b) Hold the tensioner and remove the supercharger V-ribbed belt from the supercharger pulley.
-
(c) Slowly release the tensioner.
-
(d) Remove the bolt, 2 nuts and washers and the supercharger V-ribbed belt tensioner assembly.
HINT:
Temporarily reinstall the 2 nuts to secure the idler pulleys.
-
(e) Remove the supercharger V-ribbed belt from the remaining pulleys.
-
3. REMOVE V-RIBBED BELT
(a) Turn the V-ribbed belt tensioner counterclockwise and align its holes. Insert a 5mm bi-hexagon wrench into the holes to lock the tensioner.
-
(b) Remove the V-ribbed belt from the pulleys.
-
INSTALLATION
1. INSTALL V-RIBBED BELT
(a) Turn the V-ribbed belt tensioner counterclockwise and align its holes. Insert a 5mm bi-hexagon wrench into the holes to lock the tensioner.
-
(b) Install the V-ribbed belt ensuring it is seated correctly on each pulley.
-
(c) While turning the belt tensioner counterclockwise, remove the bi-hexagon wrench.
-
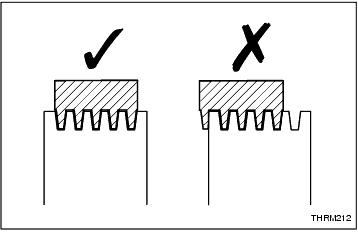
(d) If it is difficult to install the V-ribbed belt, perform the following procedure.
(1) Fit the V-ribbed belt on all pulleys except the power steering pump.
(2) While releasing the belt tension by turning the belt tensioner counterclockwise, fit the belt on the power steering pump pulley.
NOTICE:
Ensure the belt is correctly located on all pulleys.
-
2. INSTALL SUPERCHARGER V-RIBBED BELT
(a) Install the supercharger V-ribbed belt to all pulleys except the supercharger, ensuring it is seated correctly on each pulley.
HINT:
Tensioner is installed in the next step.
-
(b) Remove the temporarily installed nuts and install the supercharger V-ribbed belt tensioner assembly with the bolt, 2 nuts and washers.
HINT:
Route the belt around the tensioner pulley as previously shown.
Torque:
Bolt
25 N*m
(254 kgf*cm,
18 ft.*lbf)
Nut
34 N*m
(346 kgf*cm,
25 ft.*lbf)
-
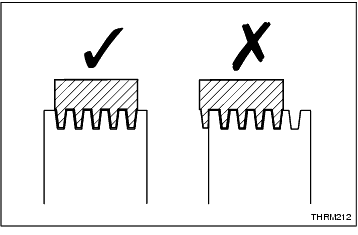
(c) Turn the tensioner clockwise and install the supercharger V-ribbed belt around the supercharger pulley. Slowly release the tensioner.
NOTICE:
Ensure the belt is correctly located on all pulleys. Pay particular attention to the No. 1 idler pulley (lower pulley) as the belt can easily dislodge when the tensioner is released.
-
3. INSTALL RADIATOR FAN AND SHROUD
(a) Remove the 2 temporary nuts from the water pump pulley.
-
(b) Place the shroud together with the fluid coupling fan between the radiator and engine.
NOTICE:
Be careful not to damage the radiator core.
-
(c) Install the coupling fan to the water pump with 4 nuts. Tighten the nuts as much as possible by hand.
-
(d) Attach the shroud's claws to the radiator as shown in the illustration.
-
(e) Install the shroud with the 2 bolts.
Torque:
5.0 N*m
(51 kgf*cm,
44 in.*lbf)
-
(f) Connect the reservoir hose to the radiator tank upper.
-
(g) Tighten the 4 fluid coupling nuts.
Torque:
21 N*m
(214 kgf*cm,
15 ft.*lbf)
-
(h) Install the power steering oil reservoir with the 3 bolts.
Torque:
5.0 N*m
(51 kgf*cm,
44 in.*lbf)
-