Side Step
Exterior
COMPONENTS
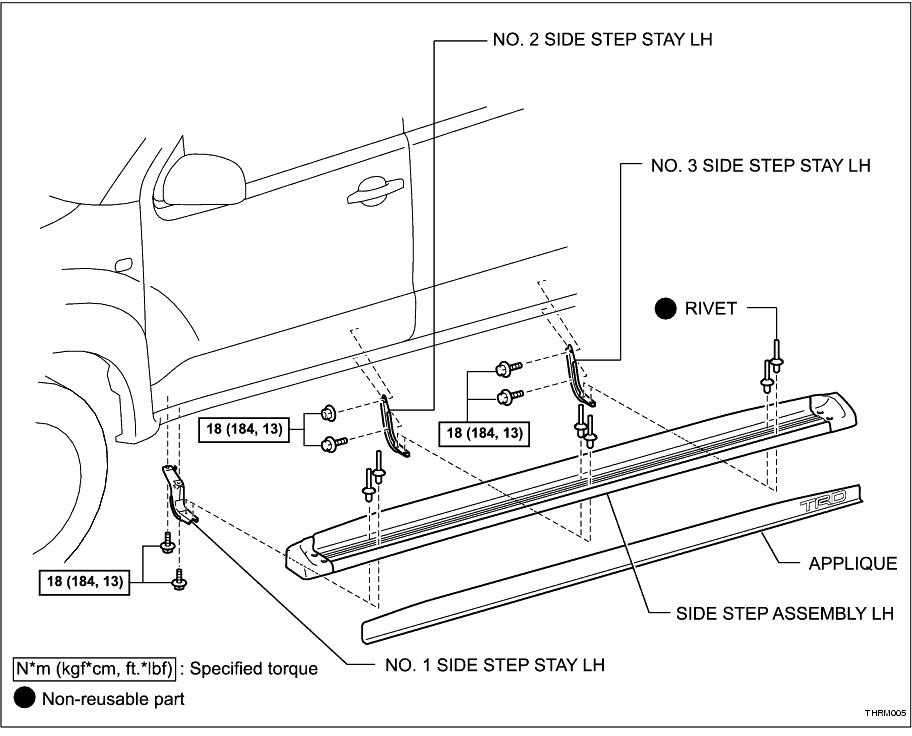
REMOVAL
HINT:
• Use the same procedures for the RH side and LH side.
• The procedures listed below are for the LH side.
1. REMOVE SIDE STEP ASSEMBLY LH
(a) Remove the 2 bolts attaching the No. 1 side step stay (A).
-
(b) Remove the 2 bolts attaching the No. 3 side step stay (C).
-
(c) Remove the bolt and nut attaching the No. 2 step stay (B) and remove the side step assembly.
-
DISASSEMBLY
1. REMOVE SIDE STEP STAYS
(a) Using a drill bit with a diameter of less than 4 mm, drill off the 6 rivet heads and remove the side step stays from the side step.
NOTICE:
• Do not drill the rivet at an angle as this will cause damage to the drill and drill hole. Line up the drill and rivet, and carefully drill out the rivet head.
• Be careful as the cut rivet will be very hot.
-
(b) Continue drilling and push out the remaining rivet fragments.
-
2. REMOVE SIDE STEP BLACK OUT TAPE
HINT:
When removing the black out tape, heat the tape and side step using a heat light.
(a) Beginning at one end, carefully peel the black out tape from the side step.
-
REASEMBLY
1. INSTALL SIDE STEP BLACK OUT TAPE
HINT:
• Partially remove the moulded end caps to enable the tape to sit behind the caps.
• Ensure the side step surface is clean and dry.
• When installing the black out tape, heat the tape and side step using a heat lamp.
(a) Partially remove the upper section of the backing paper at the top front corner.
-
(b) Align the corner radius of the black out tape with the corner radius of the side step and lightly affix the tape to the step.
-
(c) Continue removing the backing paper while aligning the tape with the top edge of the step and pressing the tape.
-
(d) When the upper section is affixed to the step, begin removing the lower backing paper from the centre and affix the remaining tape to the step, working to the front and then back, top to bottom.
HINT:
Work out any air bubbles as you go.
-
(e) When the backing paper is completely removed, firmly press and smooth the tape, working from the centre to the edges.
-
(f) Refit the end caps in their original locations ensuring the tape is correctly seated behind.
-
(g) Remove the application tape form the logo.
-
2. INSTALL SIDE STEP STAYS LH
(a) Install the side step to the side step stays.
-
(b) Using a riveter, install the side step with 6 new rivets.
-
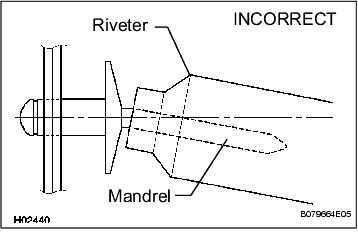
NOTICE:
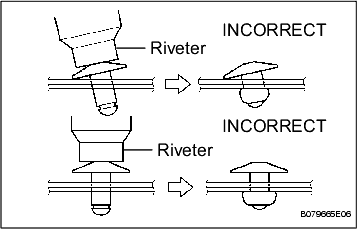
• Do not prise the rivet with the riveter as this will cause damage to the riveter and mandrel.
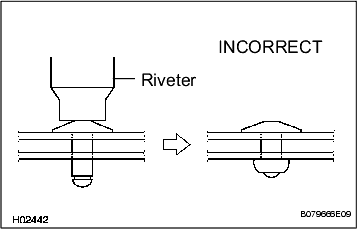
• Confirm the rivets are seated correctly against the side step.
• Do not tilt the riveter when installing the rivet to the side step.
• Do not leave any space between the rivet and side step.
• Do not leave any space between the side step and stay. Firmly hold the 2 items together while installing the rivet.
-
INSTALLATION
1. REMOVE SIDE STEP ASSEMBLY LH
(a) Install the side step assembly LH by attaching the No. 2 step stay LH (B) with the bolt and nut. Do not tighten.
-
(b) Attach the No. 3 side step stay LH (C) with the 2 bolts. Do not tighten.
-
(c) Attach the No. 1 side step stay LH (A) with the 2 bolts. Do not tighten.
-
(d) Tighten the bolts and nut.
Torque:
18 N*m
(184 kgf*cm,
13 ft.*lbf)
-