Decals
Exterior
COMPONENTS
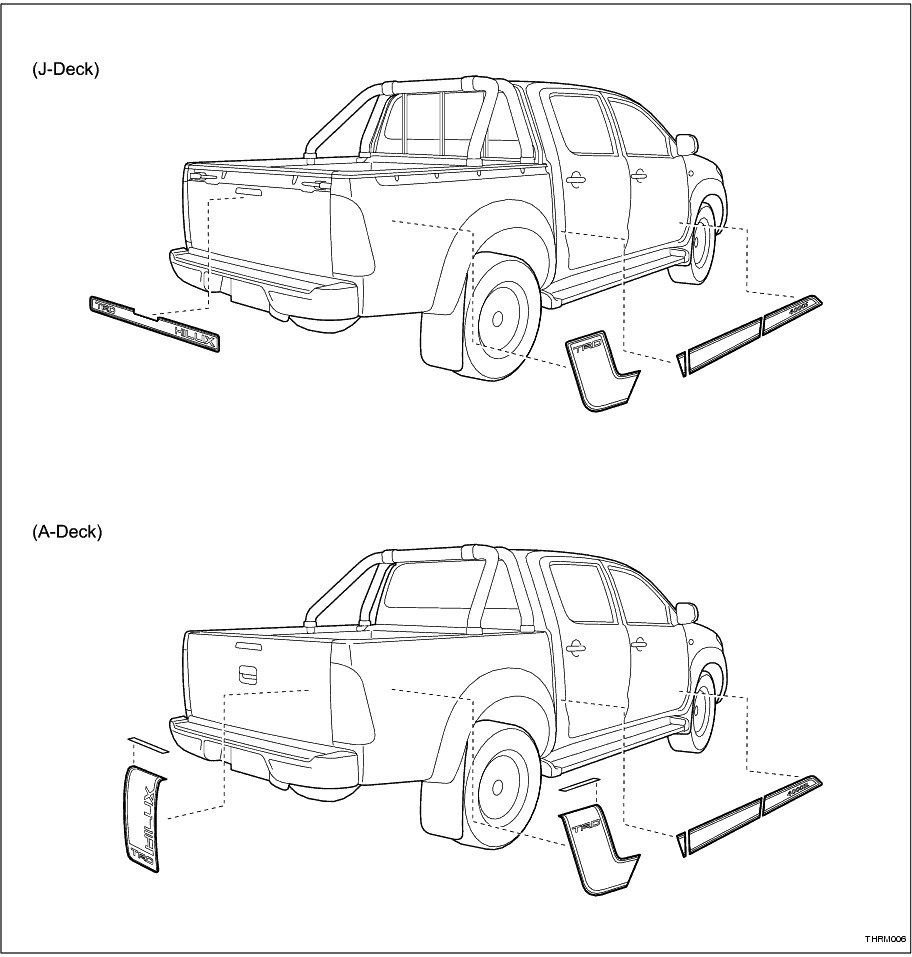
REMOVAL
1. REMOVE DECAL
HINT:
Use the same procedure for all decals.
(a) Use a heat gun to warm the edge of the decal (1).
NOTICE:
Do not overheat the decal.
-
(b) Peel back the corner of the decal and move the heat gun along the decal to warm the area ahead of where it is being removed (2).
CAUTION:
Take care not to burn your fingers.
-
(c) Continue to slowly remove the decal, while moving the heat gun along the decal (3).
-
INSTALLATION
NOTICE:
• The decal installation area must be clean.
• Prepare and install one decal at a time.
• Perform the decal installation procedure continuously from start to end: Do not allow a prepared decal to stand longer than necessary.
1. PREPARE VEHICLE
(a) Clean the panels with a suitable cleaner, removing all traces of dirt, wax and grease. Dry thoroughly.
-
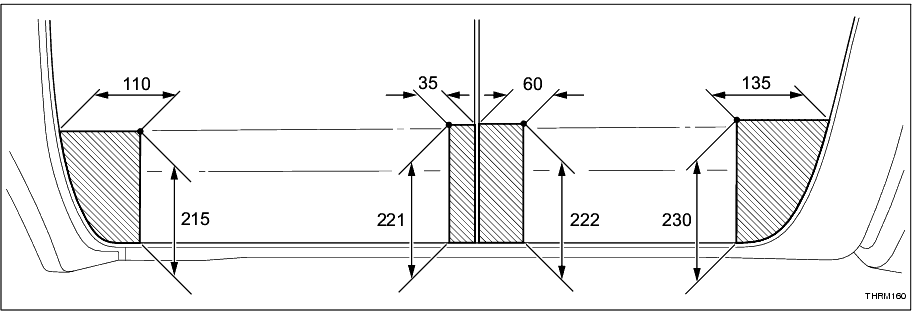
(b) For the door decals, mark the door panels as shown in the illustration.
-
(c) Wipe the panel where the decal is to be affixed with an alcohol wipe or equivalent.
HINT:
Do not clean the area with a wax and grease remover or similar as these products leave a residue.
-
2. PREPARE DECAL
(a) Prepare a solution of 50% water and 50% alcohol with 3 drops of detergent in a spray bottle.
-
(b) Place the decal on a clean bench, face down.
-
(c) Remove the decal backing paper.
-
3. INSTALL DECAL
(a) Spray the solution liberally to the back of the decal and the panel.
-
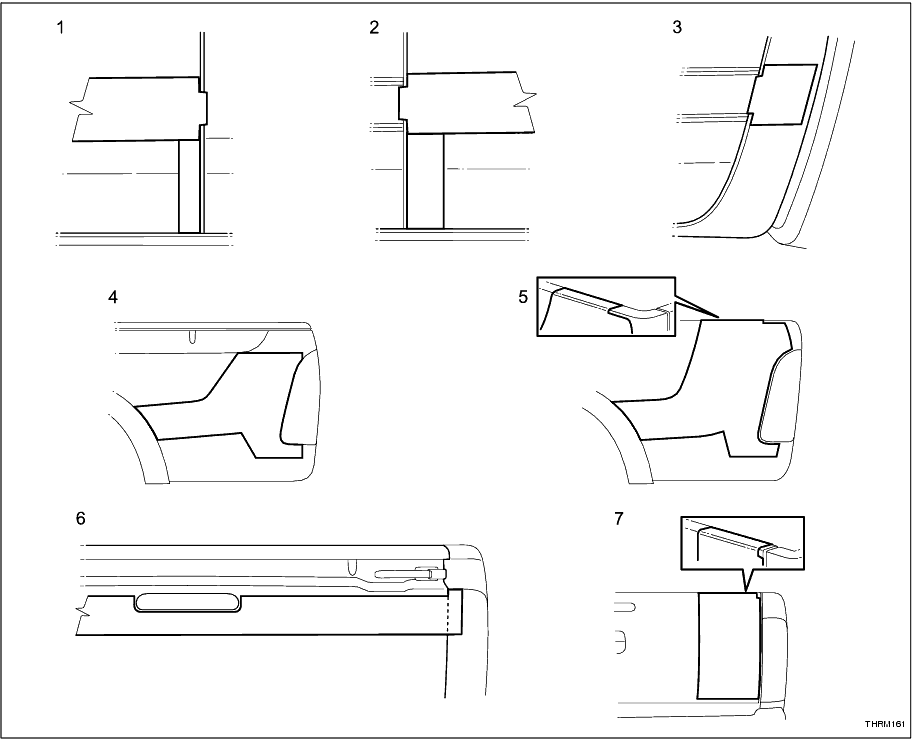
(b) Place the decal on the panel, aligning as follows:
(1) Front door: Align the notch to the rear edge of the door and to the marks.
(2) Rear door: Align the notch to the front edge of the door and to the marks.
(3) Rear side panel: Align the notch to the front edge of the panel and to the rear door decal.
(4) Rear body side (J-Deck): Align to the recess line of the body, the tail light and the fender extension seal.
(5) Rear body side (A-Deck): Align to the top edge of the body, the tail light and the fender extension seal.
(6) Tailgate (J-Deck): Align to the outer edge of the tailgate, upper edge of the tail lamp and the high mount stop light.
-
(c) Beginning from the centre, gently smooth the decal toward the outer edges using a rubber applicator.
-
(d) Using firm pressure, work the decal toward the outer edges until no air bubbles are visible.
-
(e) Carefully remove the cover paper, taking care near the edges of the decal.
-
(f) Inspect the decal for air bubbles and continue working them from the decal while spraying solution onto surface of the decal.
-
(g) Carefully wipe the surface to remove residual solution and allow the decal to dry.
-
4. INSTALL PROTECTIVE FILM (A-DECK)
(a) Prepare a solution of 50% water and 50% alcohol with 3 drops of detergent in a spray bottle.
-
(b) Place the protective film on a clean bench, face down.
-
(c) Remove the backing paper from the film.
-
(d) Spray the solution liberally to the back of the film and the rear body side panel or tailgate panel and decal surface.
-
(e) Place the protective film on the panel, aligning it centrally over the TRD decal and allowing enough to wrap over each edge.
-
(f) Smooth the film toward the outer edges until no air bubbles are visible.
-