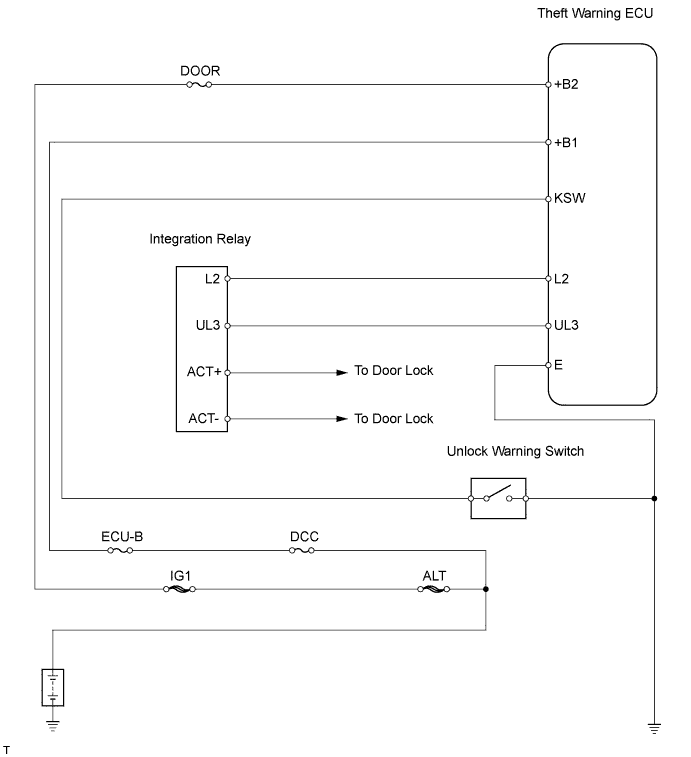
WIRELESS DOOR LOCK CONTROL SYSTEM (for Built-in Type Door Control Receiver) > Only Wireless Control Function is Inoperative |
| 1.CHECK WIRELESS DOOR LOCK CONTROL FUNCTIONS |
|
| ||||
| NG | |
 |
| 2.CHECK THAT TRANSMITTER LED ILLUMINATES |
Check that the transmitter's LED illuminates 3 times when the switch is pressed 3 times.
|
| ||||
| OK | |
|
| 3.REPLACE TRANSMITTER BATTERY |
After replacing the transmitter battery (Click here), check that the doors can be locked and unlocked using the transmitter switches.
|
| ||||
| OK | ||
 | ||
| ||
| 4.CHECK WIRELESS DOOR LOCK CONTROL FUNCTION (STANDARD OPERATION FUNCTION) |
Hold the transmitter approximately 1 m (3.28 ft.) from the driver side door outside handle. The transmitter must be parallel to the ground and perpendicular to the side of the vehicle.
Press and hold either the LOCK or UNLOCK transmitter switch for 1 second, and check that the doors lock or unlock, respectively.
|
| ||||
| OK | ||
| ||
| ||
| 5.INSPECT FUSE (ECU-B, DCC, DOOR) |
Remove the ECU-B and DCC fuses from the engine room relay block.
Remove the DOOR fuse from the No. 3 relay block.
Measure the resistance of the fuses.
|
| ||||
| OK | |
|
| 6.INSPECT UNLOCK WARNING SWITCH ASSEMBLY |
Remove the switch.
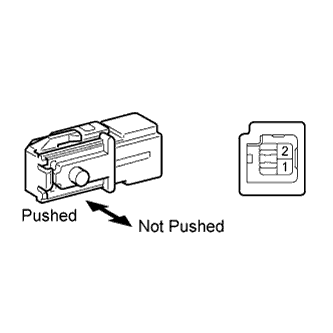 |
Measure the resistance of the switch.
| Tester Connection | Condition | Specified Condition |
| 1 - 2 | Not pushed | 10 kΩ or higher |
| Pushed | Below 1 Ω |
|
| ||||
| OK | |
|
| 7.CHECK WIRE HARNESS (UNLOCK WARNING SWITCH - THEFT WARNING ECU AND BODY GROUND) |
Disconnect the U1 switch connector.
Disconnect the T16 ECU connector.
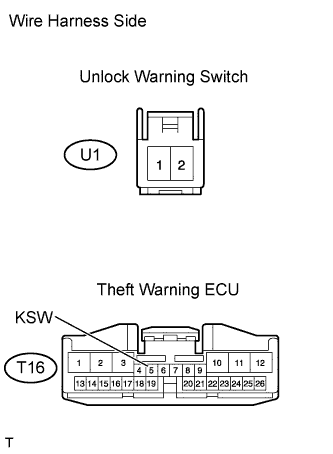 |
Measure the resistance of the wire harness side connectors.
| Tester Connection | Specified Condition |
| U1-1 - T16-5 (KSW) | Below 1 Ω |
| U1-2 - Body ground |
|
| ||||
| OK | |
|
| 8.REGISTER RECOGNITION CODE |
Check that the system can be switched to rewrite mode or add mode, and that a recognition code can be registered.
|
| ||||
| NG | |
|
| 9.CHECK WIRE HARNESS (THEFT WARNING ECU - INTEGRATION RELAY) |
Disconnect the T16 ECU connector.
Disconnect the 2A and 2D junction block connectors.
Measure the resistance of the wire harness side connectors.
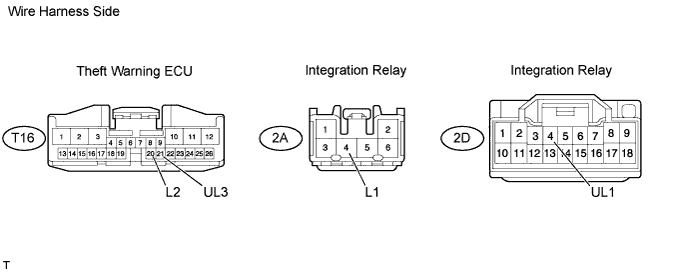
| Tester Connection | Specified Condition |
| T16-20 (L2) - 2A-4 (L1) | Below 1 Ω |
| T16-21 (UL3) - 2D-4 (UL1) |
|
| ||||
| OK | |
|
| 10.CHECK WIRE HARNESS (THEFT WARNING ECU - BATTERY AND BODY GROUND) |
Disconnect the T16 ECU connector.
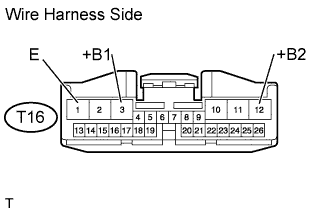 |
Measure the resistance and voltage of the wire harness side connector.
| Tester Connection | Specified Condition |
| T16-1 (E) - Body ground | Below 1 Ω |
| Tester Connection | Specified Condition |
| T16-3 (+B1) - Body ground | 10 to 14 V |
| T16-12 (+B2) - Body ground |
|
| ||||
| OK | ||
| ||
| ||

