Home › ENGINE ยท 5L-E › ENGINE MECHANICAL › CYLINDER HEAD

CYLINDER HEAD > REASSEMBLY

for Preparation Click here


1. INSTALL TIGHT PLUG

NOTICE:
If water leaks from the tight plug or the plug, or the plug corrodes, replace it.


    A058129E01
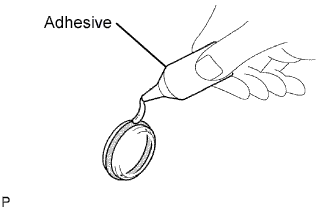
  1. Apply adhesive to a new tight plug.

    Adhesive:
    Toyota Genuine Adhesive 1324, Three Bond 1324 or equivalent


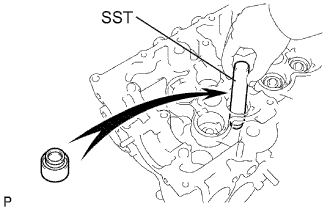
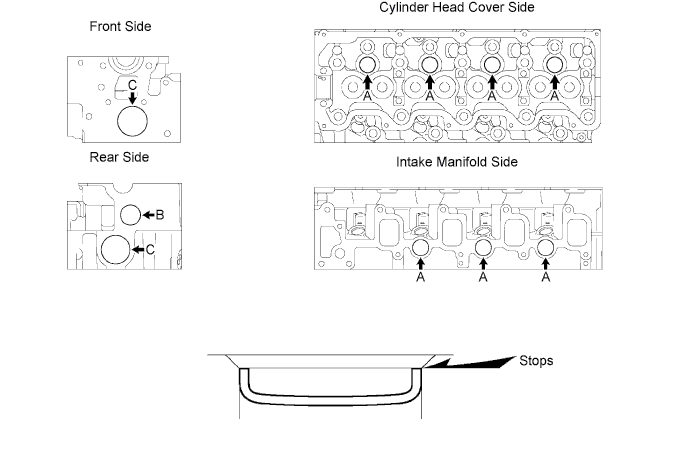
  1. Using SST and a hammer, tap in the tight plug as shown in the illustration.

    A071262E03

    Position A
    SST
    09950-60010   (09951-00250)
    09950-70010   (09951-07100)
    Position B
    SST
    09950-60010   (09951-00300)
    09950-70010   (09951-07100)
    Position C
    SST
    09950-60010   (09951-00450)
    09950-70010   (09951-07100)


2. INSTALL STUD BOLT

NOTICE:
If the stud bolt is deformed or the threads are damaged, replace it.


  1. Install the stud bolts as shown in the illustration.
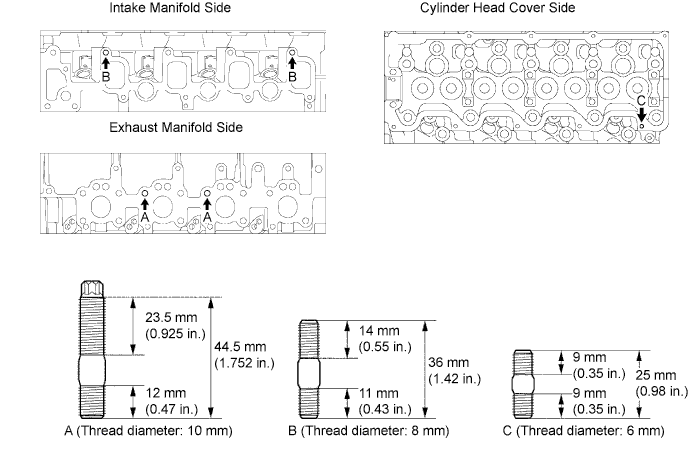

    A071263E03

    Torque:
    26 N*m{ 265 kgf*cm , 19 ft.*lbf } for bolt A
    12 N*m{ 120 kgf*cm , 9 ft.*lbf } for bolt B
    6.0 N*m{ 60 kgf*cm , 53 in.*lbf } for bolt C


3. INSTALL RING PIN

NOTICE:
It is not necessary to remove the ring pin unless it is being replaced.


  1. Using a plastic hammer, tap in a new ring pin until it stops.
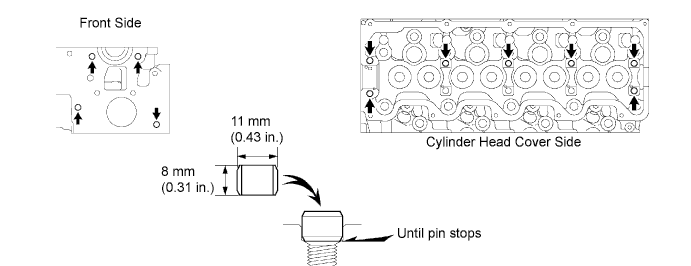

    A071264E04


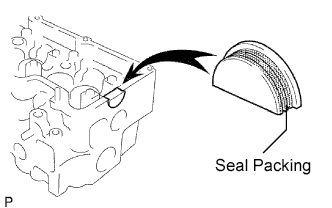
4. INSTALL SEMICIRCULAR PLUG
  1. Remove any old packing (FIPG) material.


    A056910E02
  1. Apply seal packing to the semicircular plug as shown in the illustration.

    Seal packing:
    Toyota Genuine Seal Packing Black, Three Bond 1207B or equivalent

    NOTICE:
    1. The semicircular plug must be installed within 3 minute from the completion of applying the seal packing.
    2. Prevent FIPG from being stuck to the camshaft thrust groove.

  1. Install the semicircular plug to the cylinder head.


5. INSTALL COMBUSTION CHAMBER SUB-ASSEMBLY


    A057263E03
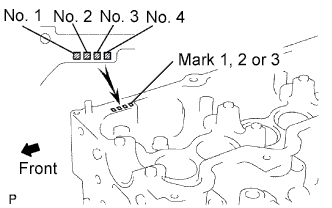
  1. Select the number of shim, depending on the table below.
    Select the number of shim 
    Number Mark of Cylinder Head
    Number of Shim
    1
    0
    2
    0
    1
    3
    1
    2

    Shim thickness:
    0.03 mm (0.0012 in.)

  1. Align the combustion chamber knock pin with the cylinder head notch.
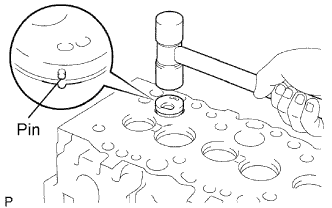


    A057261E02
  1. Using a plastic-faced hammer, tap in the combustion chamber.


    A057260E01
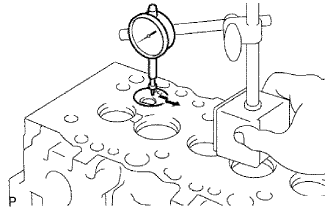
  1. Using a dial indicator, check the combustion chamber protrusion.

    Combustion chamber protrusion:
    Minus 0.03 to Plus 0.03 mm (Minus 0.0012 to Plus 0.0012 in.)

    If the protrusion is less than the specified, adjust with shims.
    If the protrusion is greater than the specified, replace the chamber and recheck the protrusion.


6. INSTALL VALVE STEM OIL SEAL


A059919E01
  1. Using SST, push in a new oil seal.

    SST
    09201-41020  


7. INSTALL INTAKE VALVE
  1. Install the valve, spring seat plate washer, valve spring and spring retainer.
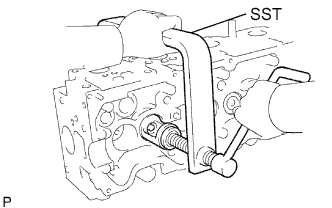


    A056915E02
  1. Using SST, compress the valve spring and place the 2 retainer locks around the valve stem.
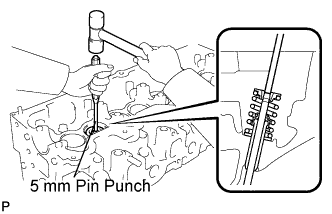
    SST
    09202-70020   (09202-00030)


    A122913E01
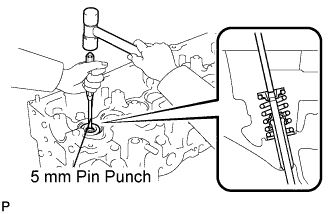
  1. Using a 5 mm pin punch and plastic-faced hammer, lightly tap the valve stem tip to ensure a proper fit.

    NOTICE:
    Be careful not to damage the valve stem tip.


8. INSTALL EXHAUST VALVE
  1. Install the valve, spring seat, valve spring and spring retainer.
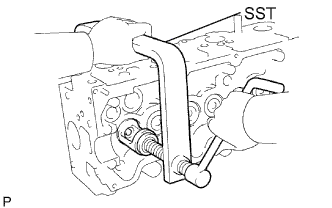


    A056916E02
  1. Using SST, compress the valve spring and place the 2 retainer locks around the valve stem.
    SST
    09202-70020   (09202-00030)


    A122914E01
  1. Using a 5 mm pin punch and plastic-faced hammer, lightly tap the valve stem tip to ensure a proper fit.

    NOTICE:
    Be careful not to damage the valve stem tip.


9. INSTALL VALVE LIFTER
  1. Install the valve lifter and shim.

  1. Check that the valve lifter rotates smoothly by hand.