CYLINDER HEAD > REMOVAL |
| 1. DISCONNECT CABLE FROM NEGATIVE BATTERY TERMINAL |
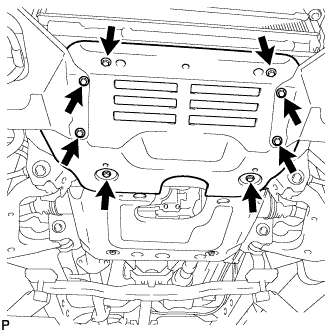
| 2. REMOVE NO. 1 ENGINE UNDER COVER (for 4WD) |
|
Remove the 8 bolts and under cover.
| 3. REMOVE NO. 2 ENGINE UNDER COVER (for 4WD) |
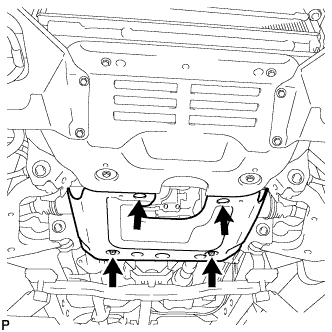 |
Remove the 4 bolts and under cover.
| 4. LOOSEN FUEL TANK CAP ASSEMBLY |
| 5. DRAIN ENGINE OIL |
Remove the oil filler cap.
Remove the oil drain plug, and drain the oil into a container.
Clean the drain plug, and install it with a new gasket.
| 6. DRAIN FUEL |
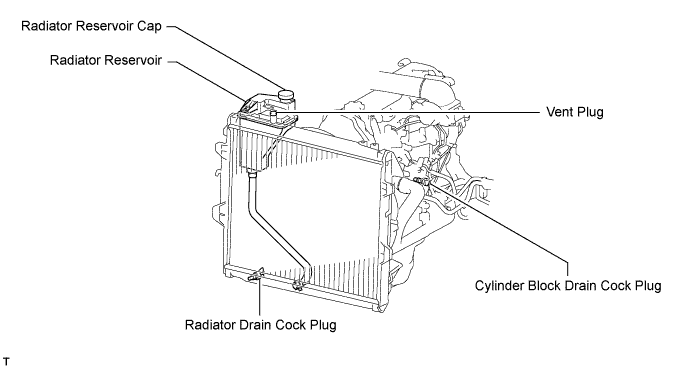
| 7. DRAIN ENGINE COOLANT |
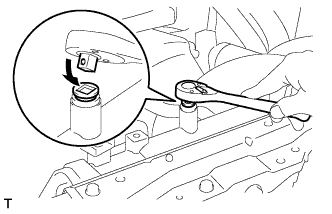 |
Remove the reservoir cap and, using a wrench, remove the vent plug.
Loosen the cylinder block drain cock plug and the radiator drain cock plug and then drain the coolant.
| 8. REMOVE FRONT EXHAUST PIPE ASSEMBLY |
Remove the 2 bolts from the transmission.
Remove the 5 clips and front fender seal LH.
Remove the 3 nuts from the exhaust manifold.
Disconnect the front exhaust pipe from the exhaust manifold and remove the gasket.
Remove the bolt, clamp and pipe support from the front exhaust pipe.
| 9. REMOVE RADIATOR HOSE INLET |
| 10. REMOVE FAN SHROUD |
Remove the fan shroud (Click here).
| 11. REMOVE AIR CLEANER ASSEMBLY |
Disconnect the IAT sensor connector.
Loosen the air cleaner hose clamp.
Remove the 3 bolts and air cleaner.
| 12. DISCONNECT COMPRESSOR AND MAGNET CLUTCH (w/ Air Conditioning System) |
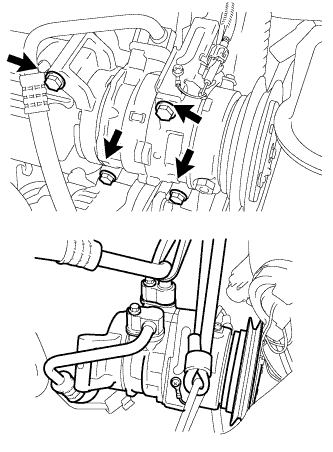 |
Remove the 4 bolts and disconnect the cooler compressor.
| 13. REMOVE COMPRESSOR MOUNTING BRACKET (w/ Air Conditioning System) |
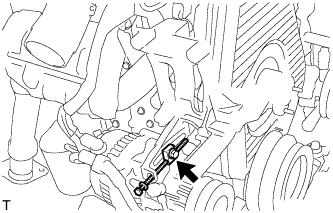 |
Remove the bolt and spacer.
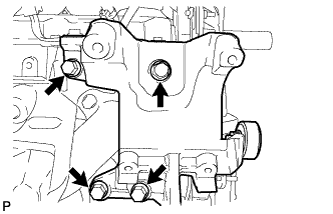 |
Remove the 4 bolts and compressor mounting bracket.
| 14. DISCONNECT HEATER WATER HOSE INLET A |
Disconnect the inlet hose .
| 15. DISCONNECT HEATER WATER OUTLET HOSE A |
Disconnect the outlet hose .
| 16. REMOVE TIMING BELT |
Remove the timing belt (Click here).
| 17. REMOVE INTAKE PIPE ASSEMBLY |
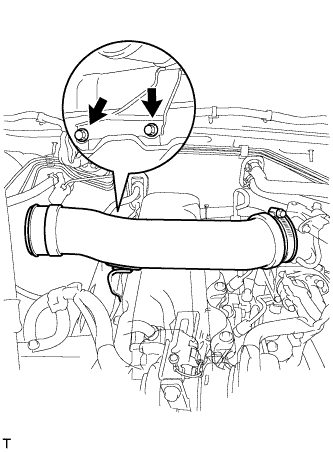 |
Loosen the intake pipe clamp.
Remove the 2 bolts and intake pipe.
| 18. REMOVE VENTURI ASSEMBLY |
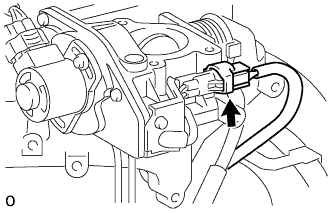 |
Disconnect the throttle open switch connector.
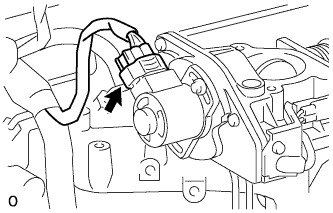 |
Disconnect the throttle control motor connector.
Remove the venturi and gasket.
| 19. REMOVE NO. 1 EXHAUST MANIFOLD HEAT INSULATOR |
Remove the 3 bolts and heat insulator.
| 20. REMOVE INJECTION PIPE SET |
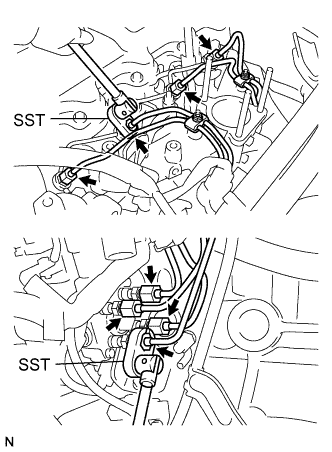 |
Using SST, loosen the 8 union nuts of the 4 injection pipes.
Remove the 2 nuts, 2 upper pipe clamps and 4 injection pipes with lower pipe clamps.
| 21. REMOVE NO. 1 GLOW PLUG CONNECTOR |
Remove the nut and wire harness.
Remove the 4 screw grommets, 4 nuts and glow plug connector.
| 22. REMOVE WATER OUTLET HOUSING |
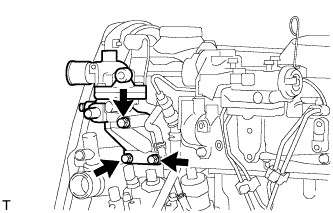 |
Remove the 3 bolts, outlet housing and gasket.
| 23. REMOVE INTAKE MANIFOLD |
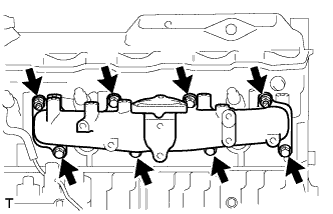 |
Remove the 6 bolts, 2 nuts, intake manifold and gasket.
| 24. REMOVE EXHAUST MANIFOLD |
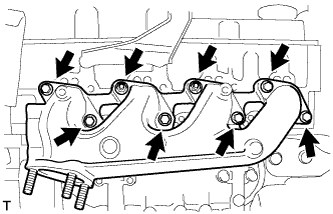 |
Remove the 6 bolts, 2 nuts and manifold.
Remove the manifold gasket from the cylinder head.
| 25. REMOVE CYLINDER HEAD COVER SUB-ASSEMBLY |
Remove the 9 bolts, nut, cylinder head cover and gasket.
| 26. REMOVE CAMSHAFT TIMING PULLEY |
Set the No. 1 cylinder to approx. 90° BTDC/compression.
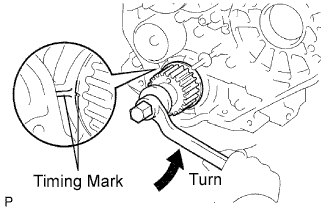 |
Using the crankshaft pulley bolt, turn the crankshaft 90°counterclockwise, and put the timing mark of the crankshaft timing pulley with the protrusion of the timing belt case.
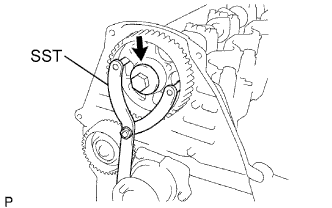 |
Using SST, loosen the pulley bolt.
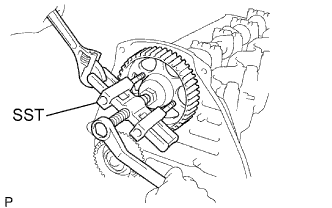 |
Using SST, disconnect the timing pulley from the camshaft.
Remove the pulley bolt and timing pulley.
Remove the timing pulley woodruff key.
| 27. REMOVE NO. 2 TIMING BELT COVER |
Remove the 4 bolts and timing belt cover.
| 28. REMOVE CAMSHAFT OIL SEAL RETAINER |
Remove the 4 bolts, retainer and gasket.
| 29. REMOVE CAMSHAFT |
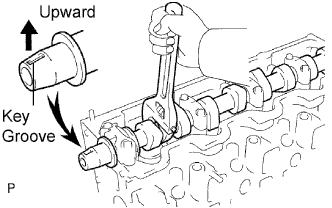 |
Turn the camshaft with a wrench so that the key groove faces upward.
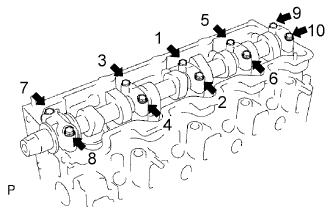 |
Uniformly loosen and remove the 10 bearing cap bolts, in several steps, in the sequence shown.
Remove the 5 bearing caps and camshaft.
Remove the 10 bearings from the bearing caps and cylinder head.
| 30. REMOVE CYLINDER HEAD SUB-ASSEMBLY |
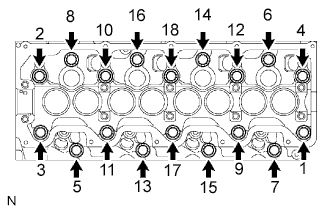 |
Uniformly loosen and remove the 18 cylinder head bolts, in several steps, in the sequence shown.
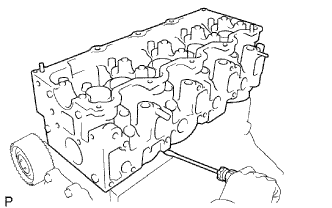 |
Lift the cylinder head from the dowels on the cylinder block, and place the cylinder head on wooden blocks on a bench.
| 31. REMOVE CYLINDER HEAD GASKET |
Remove the cylinder gasket from the cylinder head.