for LH Side:
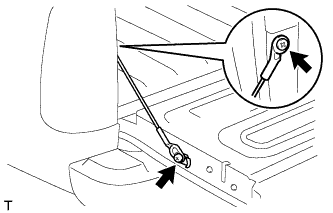
Install the stay with the 2 screws.
- Torque:
- 27 N*m{ 275 kgf*cm , 20 ft.*lbf }
 |
TAIL GATE > INSTALLATION |
| 1. INSTALL TAIL GATE STAY ASSEMBLY |
for LH Side:
|
Install the stay with the 2 screws.
for RH Side:
| 2. INSTALL CENTER STOP LIGHT ASSEMBLY (w/ Center Stop Light) |
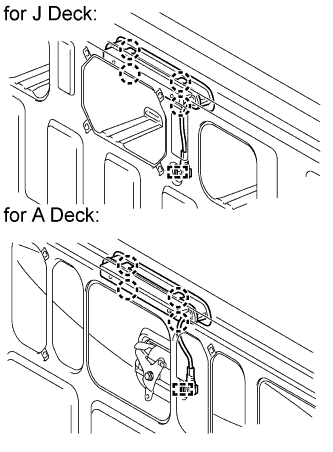 |
Attach the 4 claws to install the center stop light.
Attach the clamp.
Connect the connector.
| 3. INSTALL TAIL GATE LOCK CONTROL LINK (for A Deck, w/ Key Cylinder) |
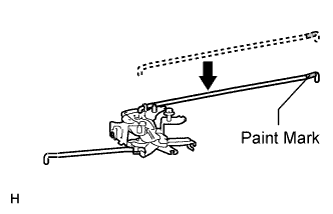 |
Install the tail gate lock control link to the tail gate lock control assembly as shown in the illustration.
| 4. INSTALL REAR DOOR NO. 2 LOCK REMOTE CONTROL CABLE ASSEMBLY (for A Deck, w/ Key Cylinder) |
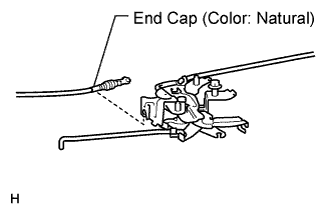 |
Install the cable to the tail gate lock control assembly.
| 5. INSTALL REAR DOOR NO. 1 LOCK REMOTE CONTROL CABLE ASSEMBLY (for A Deck, w/ Key Cylinder) |
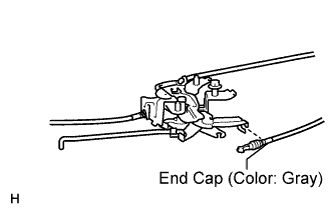 |
Install the cable to the tail gate lock control assembly.
| 6. INSTALL TAIL GATE PROTECTOR RH (for A Deck, w/ Key Cylinder) |
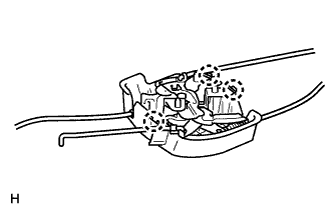 |
Attach the 3 claws to install the tail gate protector.
| 7. INSTALL TAIL GATE LOCK CONTROL ASSEMBLY (for A Deck, w/ Key Cylinder) |
Temporarily install the bolt to the tail gate lock control assembly.
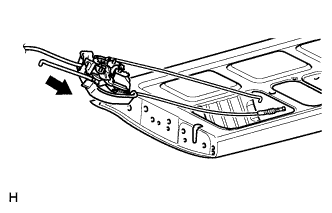 |
Insert the tail gate lock control assembly with the tail gate lock control link and 2 cables connected into the tail gate panel. Use the bolt to hang the tail gate lock control assembly on the tail gate panel.
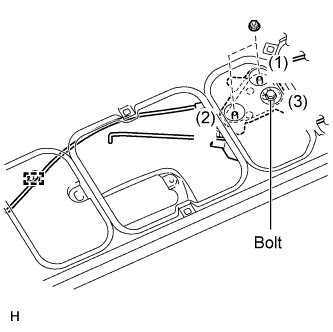 |
Temporarily install the tail gate lock control assembly with the 2 nuts.
Tighten the 2 nuts and bolt in the order shown in the illustration.
Attach the cable clamp to the tail gate panel.
| 8. INSTALL TAIL GATE HANDLE ASSEMBLY (for A Deck, w/ Key Cylinder) |
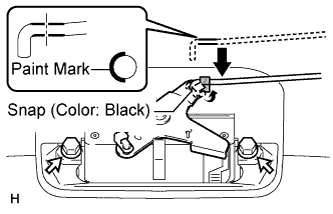 |
Install the 2 bolts and tail gate handle.
Install the control rod with the paint mark as shown in the illustration.
| 9. INSTALL TAIL GATE LOCK ASSEMBLY LH (for A Deck) |
w/ Key Cylinder:
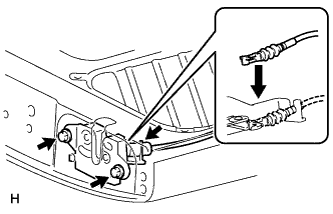 |
Install the cable to the tail gate lock assembly.
Install the lock with the 2 bolts.
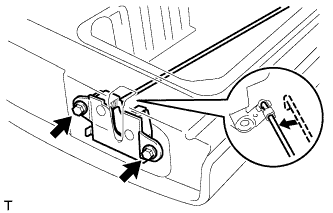 |
w/o Key Cylinder:
Install the control rod.
Install the lock with the 2 bolts.
| 10. INSTALL TAIL GATE LOCK ASSEMBLY RH (for A Deck) |
| 11. INSTALL LUGGAGE COMPARTMENT LOCK CYLINDER RETAINER (for A Deck, w/ Key Cylinder) |
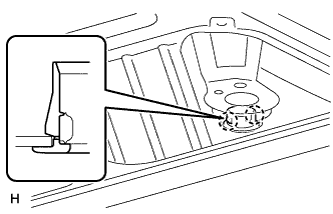 |
Attach the 2 claws to install the retainer.
| 12. INSTALL KEY CYLINDER (for A Deck, w/ Key Cylinder) |
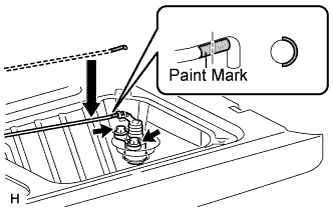 |
Install the key cylinder to the tail gate panel with the 2 bolts.
Install the tail gate lock control link with the paint mark as shown in the illustration.
| 13. INSTALL TAIL GATE HANDLE ASSEMBLY (for A Deck, w/o Key Cylinder) |
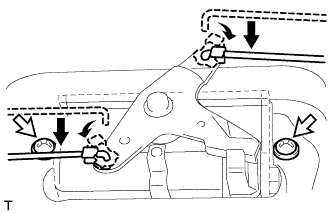 |
Install the 2 control rods.
Install the tail gate handle with the 2 screws.
| 14. INSTALL REAR BODY TAIL GATE LATCH ASSEMBLY (for J Deck) |
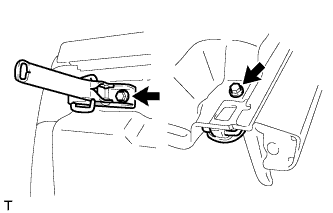 |
for LH Side:
Install the rear body tail gate latch with the 2 bolts.
for RH Side:
| 15. INSTALL TAIL GATE SERVICE HOLE COVER |
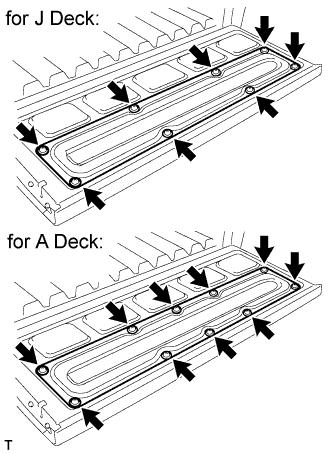 |
for J Deck:
Install the cover with the 8 screws.
for A Deck:
Install the cover with the 10 screws.