FRONT BUMPER > INSTALLATION |
| 1. INSTALL FRONT BUMPER REINFORCEMENT EXTENSION LH (for 4WD and Pre-Runner) |
Attach the claws to install the reinforcement extension.
| 2. INSTALL FRONT BUMPER REINFORCEMENT EXTENSION RH (for 4WD and Pre-Runner) |
Attach the claws to install the reinforcement extension.
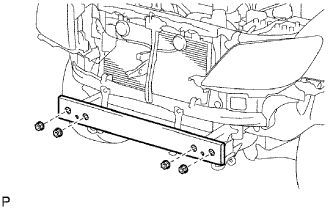
| 3. INSTALL FRONT BUMPER REINFORCEMENT SUB-ASSEMBLY |
|
Install the reinforcement with the 4 nuts.
| 4. INSTALL FRONT BUMPER SIDE RETAINER LH |
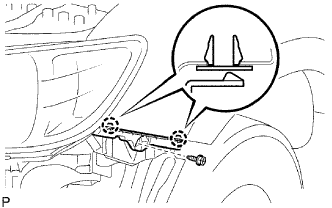 |
Attach the 2 claws to install the retainer.
Install the screw.
| 5. INSTALL FRONT BUMPER SIDE RETAINER RH |
| 6. INSTALL FRONT BUMPER COVER |
w/ Fog Light:
Connect the 2 fog light connectors.
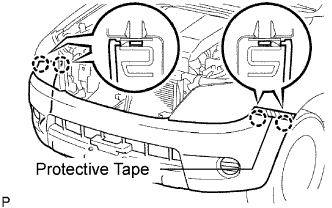 |
Put protective tape under the front fender.
Attach the 4 claws to install the cover.
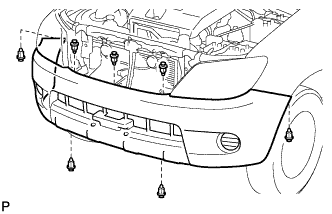 |
Install the 7 clips.
| 7. INSTALL ENGINE SIDE COVER SUB-ASSEMBLY LH (for 4WD and Pre-Runner) |
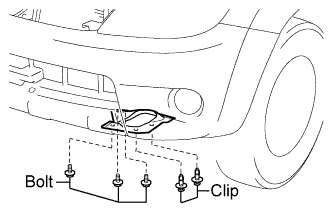 |
Install the engine side cover with the 3 bolts and 2 clips.
| 8. INSTALL ENGINE SIDE COVER SUB-ASSEMBLY RH (for 4WD and Pre-Runner) |
| 9. INSTALL FRONT FENDER LINER LH |
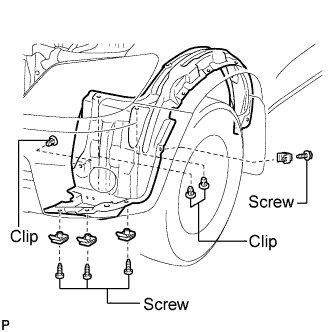 |
Install the fender liner with the 3 clips and 4 screws.
| 10. REMOVE FRONT FENDER LINER RH |
| 11. INSTALL FRONT WHEEL OPENING EXTENSION PAD NO. 1 |
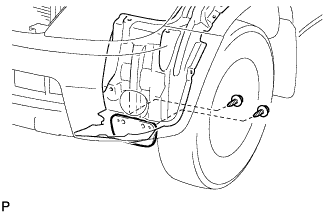 |
Install the extension pad with the 2 screws.
| 12. INSTALL RADIATOR GRILLE |
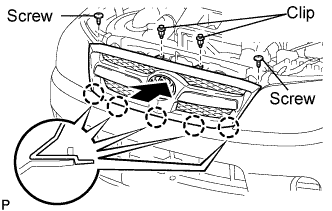 |
Push the radiator grille in the direction indicated by the arrow in the illustration to attach the 5 claws and install the radiator grille.
Install the 2 screws and 2 clips.
| 13. CONNECT CABLE TO NEGATIVE BATTERY TERMINAL |
| 14. PERFORM INITIALIZATION |
Perform the initialization (Click here).