 |
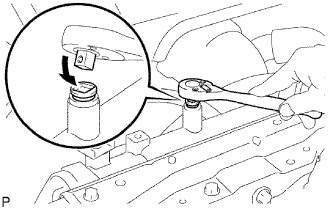
Drain the coolant by removing the reservoir cap and, using a wrench, remove the vent plug.
TURBOCHARGER (w/ EGR Cooler) > REMOVAL |
| 1. DISCONNECT CABLE FROM NEGATIVE BATTERY TERMINAL |
| 2. DRAIN ENGINE COOLANT (for Motor Controlled Actuator) |
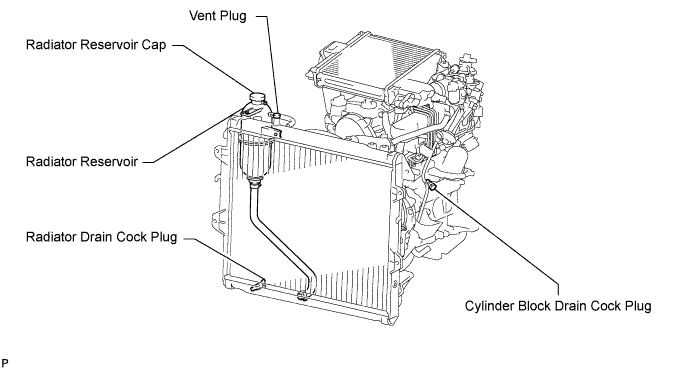
Loosen the radiator drain cock plug.
|
Drain the coolant by removing the reservoir cap and, using a wrench, remove the vent plug.
Loosen the cylinder block drain cock plug.
| 3. REMOVE FRONT WHEEL RH |
| 4. REMOVE FRONT FENDER APRON SEAL UPPER |
for 2WD:
Remove the 6 clips and front fender apron seal upper.
for 4WD:
Remove the 5 clips and front fender apron seal upper.
| 5. REMOVE FRONT FENDER SEAL |
Remove the 5 clips and front fender seal.
| 6. REMOVE FRONT EXHAUST PIPE ASSEMBLY |
Remove the 2 bolts and 2 compression springs.
Disconnect the front pipe from the outlet pipe and remove the gasket.
Remove the front pipe from the pipe support.
| 7. REMOVE AIR CLEANER ASSEMBLY |
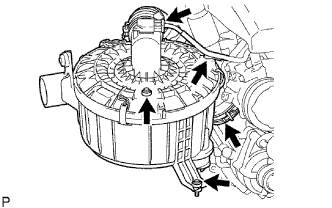 |
Disconnect the MAF meter connector and detach the wire harness clamp.
Loosen the hose clamp of the compressor inlet elbow.
for Ventilation Hose Type:
Disconnect the ventilation hose.
Remove the 2 bolts and air cleaner.
| 8. REMOVE NO. 1 ENGINE COVER SUB-ASSEMBLY |
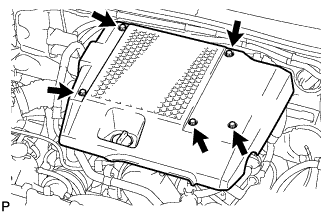 |
Remove the 3 bolts, 2 nut and engine cover.
| 9. REMOVE INTERCOOLER ASSEMBLY WITH INTAKE AIR CONNECTOR |
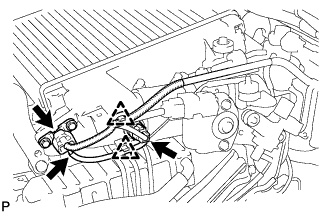 |
Detach the 2 clamps.
Disconnect the vacuum hose from the manifold absolute pressure sensor.
Disconnect the IAT sensor connector and manifold absolute diesel pressure sensor connector.
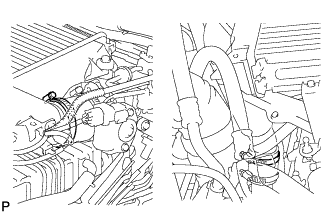 |
Loosen the 2 clamps.
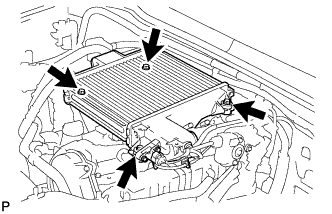 |
Remove the 4 bolts and intercooler.
| 10. REMOVE COMPRESSOR INLET ELBOW |
for Vacuum Controlled Actuator:
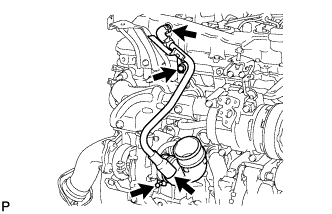 |
for Ventilation Pipe Type:
Remove the bolt and disconnect the 2 ventilation hoses and ventilation pipe.
for Ventilation Pipe Type:
Loosen the clamp, and then remove the compressor inlet elbow and air cleaner hose from the turbocharger.
for Motor Controlled Actuator:
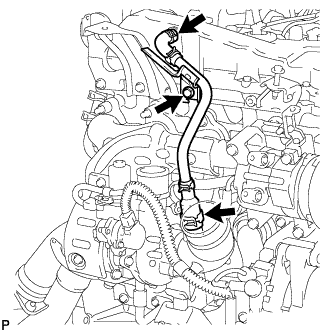 |
for Ventilation Pipe Type:
Remove the bolt and disconnect the 2 ventilation hoses and ventilation pipe.
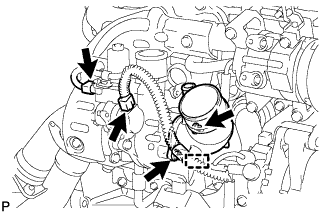 |
Disconnect the 2 connectors from the turbocharger.
Detach the wire harness clamp.
Remove the 2 nuts, inlet elbow and gasket.
| 11. REMOVE NO. 1 EXHAUST MANIFOLD HEAT INSULATOR (for Vacuum Controlled Actuator) |
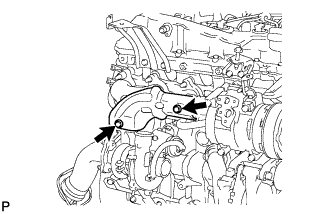 |
Remove the 2 bolts and No. 1 exhaust manifold heat insulator.
| 12. REMOVE NO. 1 TURBO INSULATOR (for Motor Controlled Actuator) |
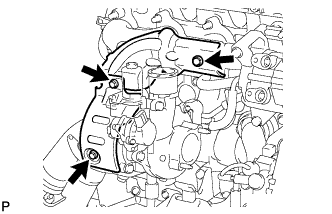 |
Remove the 2 bolts and No. 1 turbo insulator.
| 13. REMOVE NO. 1 EXHAUST MANIFOLD HEAT INSULATOR (for Motor Controlled Actuator) |
Remove the bolt and No. 1 exhaust manifold heat insulator.
| 14. REMOVE NO. 1 TURBO WATER HOSE (for Motor Controlled Actuator) |
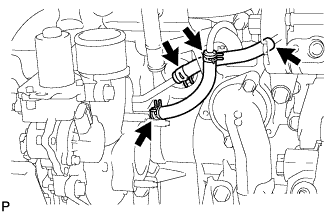 |
Remove the 2 No. 1 turbo water hoses.
| 15. REMOVE TURBINE OUTLET ELBOW |
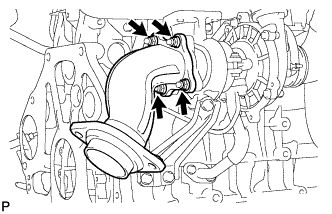 |
for Vacuum Controlled Actuator:
Remove the 4 nuts, turbine outlet elbow and gasket.
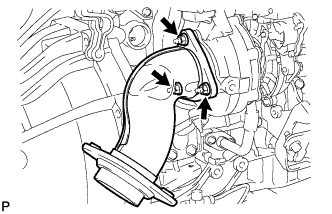 |
for Motor Controlled Actuator:
Remove the 3 nuts, turbine outlet elbow and gasket.
| 16. REMOVE TURBOCHARGER STAY |
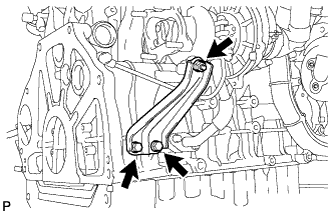 |
for Vacuum Controlled Actuator:
Remove the 2 bolts, nut and turbocharger stay.
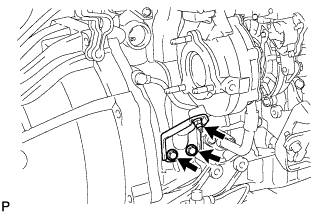 |
for Motor Controlled Actuator:
Remove the 2 bolts, nut and turbocharger stay.
| 17. REMOVE TURBO OIL INLET PIPE SUB-ASSEMBLY |
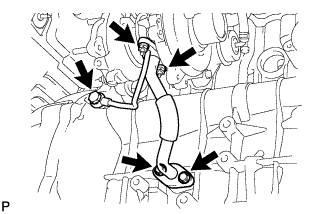 |
for Vacuum Controlled Actuator:
Remove the 2 bolts, 2 nuts, union bolt, turbo oil inlet pipe and 3 gaskets.
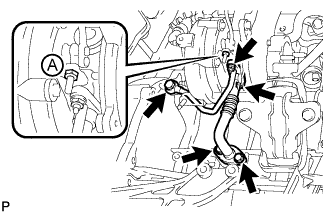 |
for Motor Controlled Actuator:
Remove the 2 bolts, 2 nuts, union bolt, turbo oil inlet pipe and 3 gaskets.
| 18. REMOVE TURBOCHARGER SUB-ASSEMBLY |
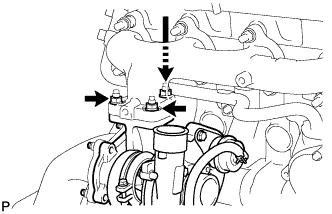 |
for Vacuum Controlled Actuator:
Remove the 3 nuts, turbocharger and gasket.
 |
for Motor Controlled Actuator:
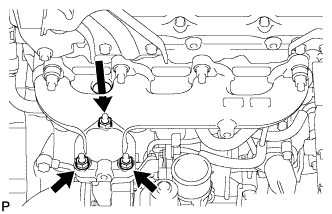
Remove the 3 nuts, turbocharger and gasket.
| 19. REMOVE NO. 1 TURBO WATER PIPE SUB-ASSEMBLY (for Motor Controlled Actuator) |
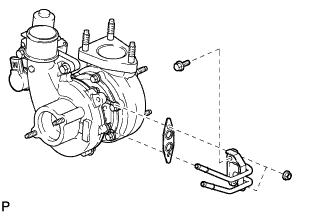 |
Remove the 2 nuts, bolt, No. 1 turbo water pipe and gasket.