 |
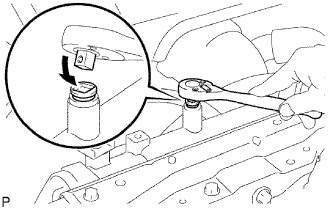
Drain the coolant by removing the reservoir cap and, using a wrench, remove the vent plug.
ENGINE OIL COOLER (w/ EGR Cooler) > REMOVAL |
| 1. DISCONNECT CABLE FROM NEGATIVE BATTERY TERMINAL |
| 2. REMOVE NO. 1 ENGINE UNDER COVER (for 4WD) |
Remove the 8 bolts and under cover.
| 3. REMOVE NO. 2 ENGINE UNDER COVER (for 4WD) |
Remove the 4 bolts and under cover.
| 4. DRAIN ENGINE COOLANT |
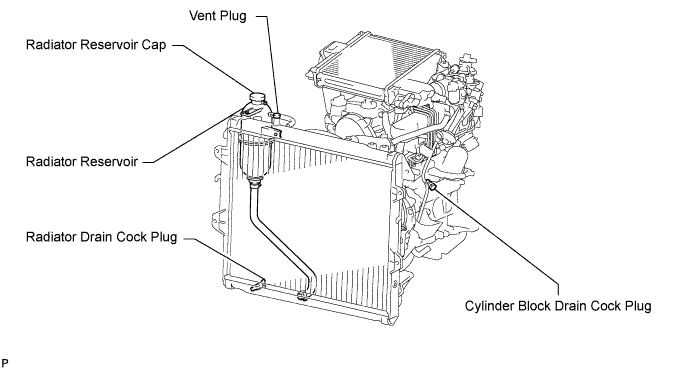
Loosen the radiator drain cock plug.
|
Drain the coolant by removing the reservoir cap and, using a wrench, remove the vent plug.
Loosen the cylinder block drain cock plug.
| 5. DRAIN ENGINE OIL |
Remove the oil filler cap.
Remove the oil drain plug, and drain the engine oil from the oil pan.
| 6. LOOSEN FUEL TANK CAP ASSEMBLY |
| 7. DRAIN FUEL |
| 8. REMOVE EGR COOLER WITH ELECTRIC EGR CONTROL VALVE AND NO. 2 EGR VALVE |
Remove the EGR cooler with electric EGR control valve and No. 2 EGR valve (Click here).
| 9. REMOVE NO. 4 INJECTION PIPE |
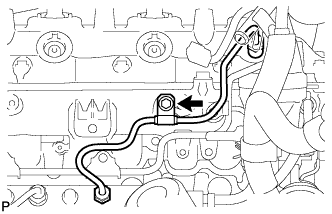 |
Remove the bolt and disconnect the injection pipe clamp.
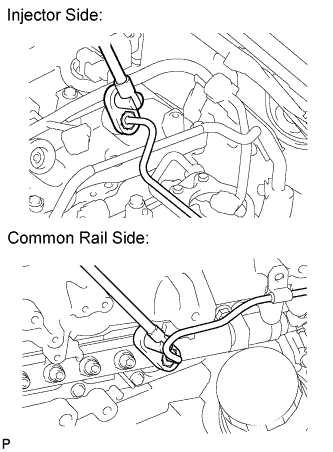 |
Using a 17 mm union nut wrench, loosen the union nuts and remove the No. 4 injection pipe.
| 10. REMOVE OIL DIPSTICK GUIDE |
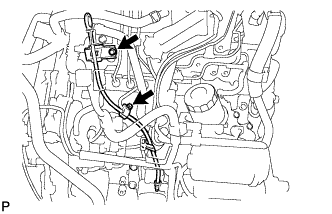 |
Remove the bolt and injection pipe clamp.
Remove the bolt and guide.
Remove the O-ring from the guide.
| 11. REMOVE MANIFOLD STAY |
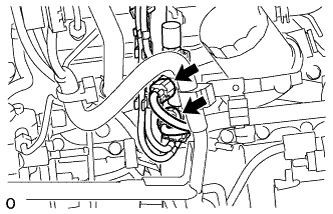 |
Disconnect the 2 connectors.
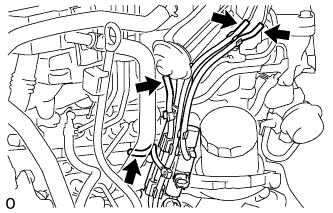 |
Disconnect the 4 vacuum hoses.
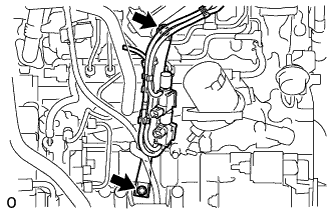 |
Remove the 2 bolts and manifold stay with VSV.
| 12. REMOVE NO. 2 NOZZLE LEAKAGE PIPE ASSEMBLY |
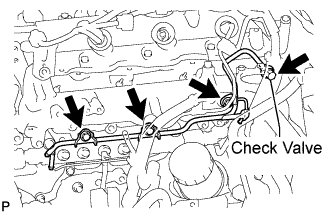 |
Disconnect the 3 fuel hoses.
Remove the check valve, 3 bolts, leakage pipe and gasket.
| 13. REMOVE FUEL INLET PIPE SUB-ASSEMBLY |
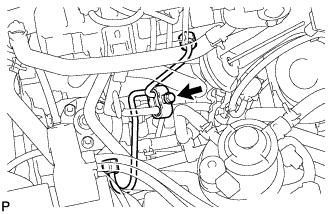 |
Remove the bolt and clamp.
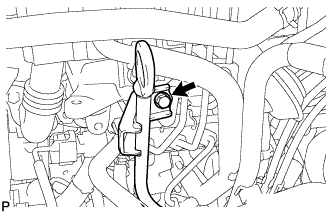 |
Remove the bolt and oil level gauge guide.
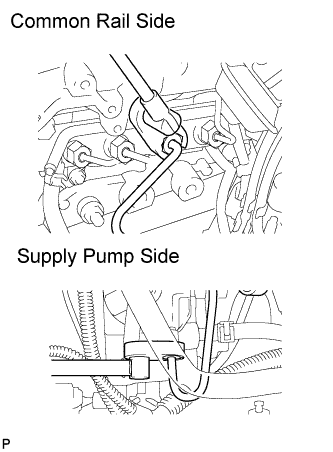 |
Using a 17 mm union nut wrench, loosen the union nuts and remove the fuel inlet pipe.
| 14. REMOVE NO. 2 INTAKE MANIFOLD INSULATOR |
| 15. REMOVE COMMON RAIL ASSEMBLY |
w/o Pressure Discharge Valve:
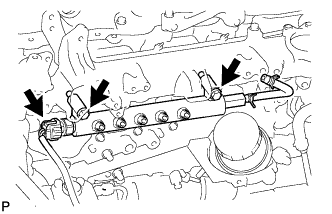 |
Disconnect the connector.
Remove the 2 bolts, common rail and No. 2 intake manifold insulator.
w/ Pressure Discharge Valve:
Disconnect the 2 connectors.
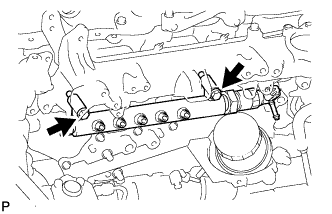 |
Remove the 2 bolts, common rail and No. 2 intake manifold insulator.
| 16. REMOVE OIL FILTER SUB-ASSEMBLY |
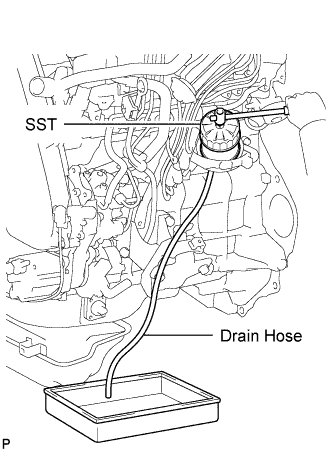 |
Using SST, remove the oil filter.
| 17. REMOVE STARTER ASSEMBLY |
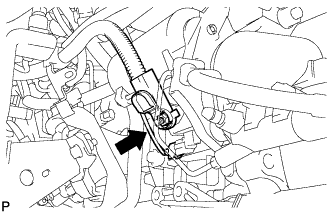 |
Disconnect the starter connector.
Remove the nut and disconnect the starter wire.
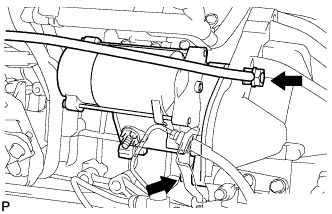 |
Remove the nut, bolt, and disconnect the ground cable.
Remove the starter.
| 18. REMOVE FUEL SUPPLY PUMP ASSEMBLY |
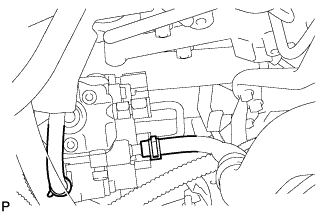 |
Disconnect the 2 fuel hoses.
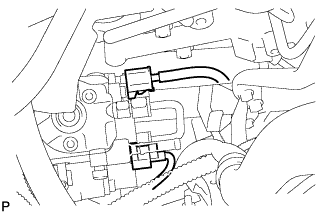 |
Disconnect the 2 connectors.
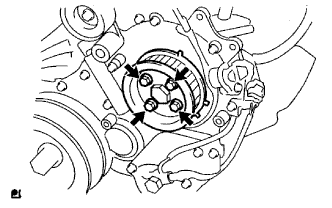 |
Remove the 4 bolts indicated by the arrows in the illustration.
Remove the No. 2 camshaft timing pulley flange and pump drive shaft pulley.
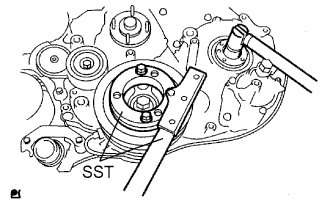 |
Remove the set nut and O-ring while holding the crankshaft pulley by using SST.
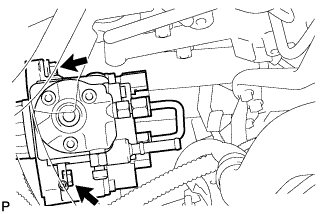 |
Loosen the 2 nuts.
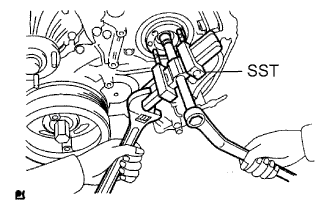 |
Using SST, disconnect the pump from the injection gear.
Remove the 2 nuts and pump.
Remove the O-ring.
| 19. REMOVE OIL COOLER COVER SUB-ASSEMBLY |
 |
Disconnect the oil pressure switch connector and wire harness.
Remove the 2 nuts and No. 2 vacuum transmitting pipe.
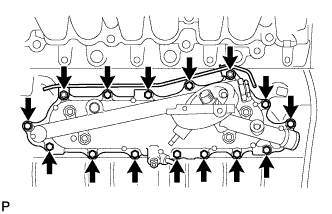
Remove the 13 bolts and oil cooler cover.
| 20. REMOVE OIL COOLER ASSEMBLY |
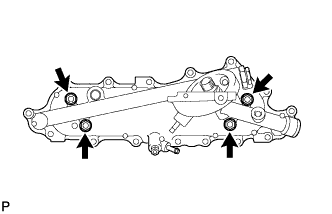 |
Loosen the 4 nuts first.
Partially tap out the oil cooler by tapping each nut head with a plastic-faced hammer.
Remove the 4 nuts, oil cooler and 2 gaskets.