COMPRESSOR AND MAGNETIC CLUTCH (for TR Series Engine) > REASSEMBLY |
| 1. INSTALL MAGNET CLUTCH ASSEMBLY |
|
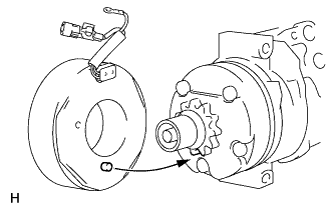
Install the magnet clutch stator with the parts aligned as shown in the illustration.
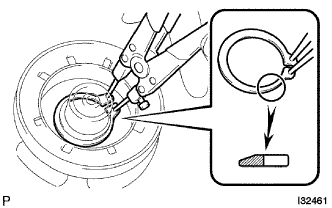 |
Using a snap ring expander, install a new snap ring with the chamfered side facing outward.
Attach the connector clamp.
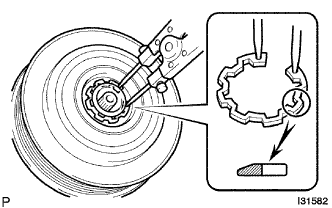 |
Using a snap ring expander, install the magnet clutch rotor and a new snap ring with the chamfered side facing outward.
Install the magnet clutch washer(s) and magnet clutch hub.
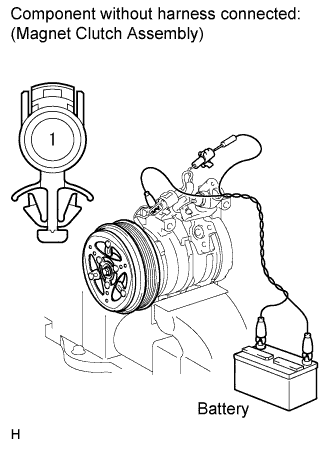
Connect the battery to the magnet clutch assembly as shown in the illustration to fix the hub and rotor in place.
Wrap the drive belt around the rotor and securely hold it in place by hand.
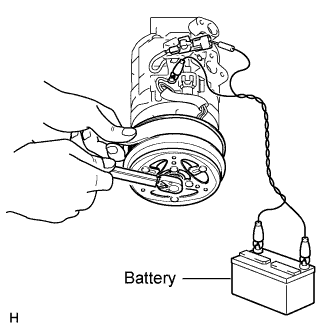 |
Install the bolt.
| 2. INSTALL COOLER BRACKET |
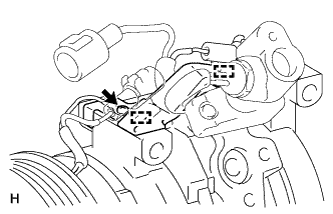 |
Connect the ground wire and install the cooler bracket with the screw.
Attach the 2 clamps.
| 3. INSPECT MAGNET CLUTCH CLEARANCE |
 |
Clamp the cooler compressor in a vise between aluminum plates.
Set a dial indicator to the magnet clutch hub.
Connect the battery positive (+) lead to terminal 1 of the magnet clutch connector. Turn the magnet clutch on and off by connecting and disconnecting the battery negative (-) lead to and from the ground wire, and measure the clearance.
Remove the cooler compressor from the vise.