 |
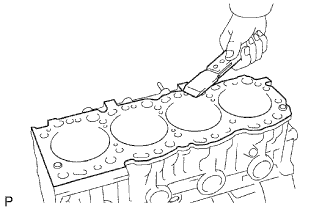
Using a gasket scraper, remove all the gasket material from the top surface of the cylinder block.
ENGINE UNIT > INSPECTION |
| 1. CLEAN CYLINDER BLOCK SUB-ASSEMBLY |
|
Using a gasket scraper, remove all the gasket material from the top surface of the cylinder block.
Using a soft brush and solvent, thoroughly clean the cylinder block.
| 2. INSPECT CYLINDER BLOCK SUB-ASSEMBLY |
Inspect for flatness.
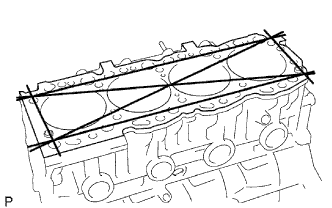 |
Using a precision straightedge and feeler gauge, measure the surfaces contacting the cylinder head and main bearing cap for warpage.
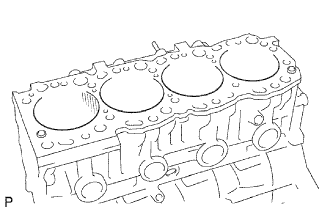 |
Visually check the cylinder for vertical scratches. If deep scratches are present, rebore all 4 cylinders . If necessary, replace the cylinder block.
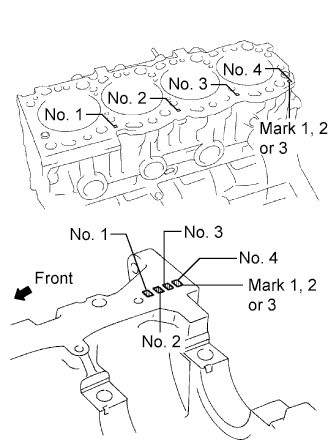 |
Inspect the cylinder bore diameter.
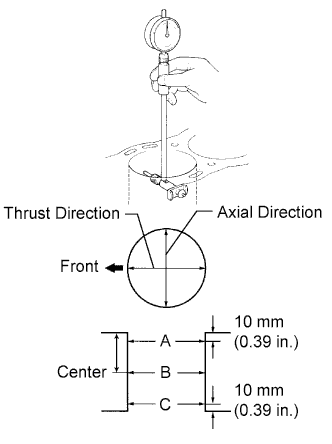 |
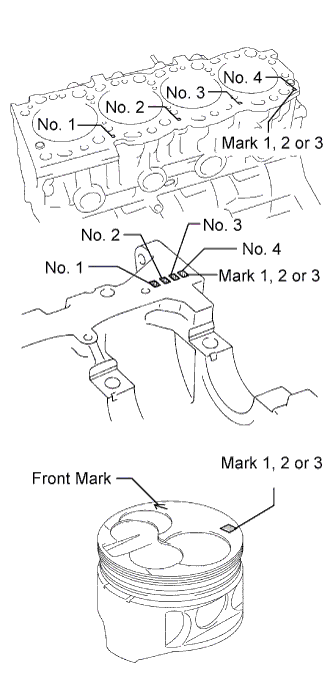
Using a cylinder gauge, measure the cylinder bore diameter at positions A, B and C in the thrust and axial directions.
| Number Mark | Specified Condition |
| Mark 1 | 99.500 to 99.510 mm (3.9173 to 3.9177 in.) |
| Mark 2 | 99.510 to 99.520 mm (3.9177 to 3.9181 in.) |
| Mark 3 | 99.520 to 99.530 mm (3.9181 to 3.9185 in.) |
| Item | Specified Condition |
| STD | 99.73 mm (3.9264 in.) |
| O/S 0.50 | 100.23 mm (3.9461 in.) |
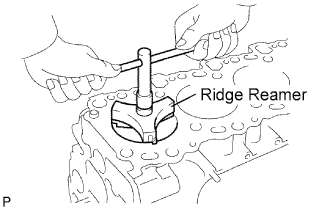 |
Remove the cylinder ridge.
If the wear is less than 0.2 mm (0.008 in.), using a ridge reamer, grind the top of the cylinder.
| 3. CLEAN PISTON SUB-ASSEMBLY WITH PIN |
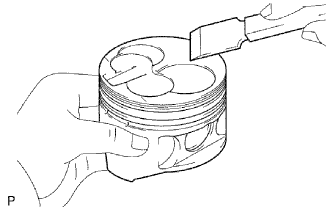 |
Using a gasket scraper, remove the carbon from the piston top.
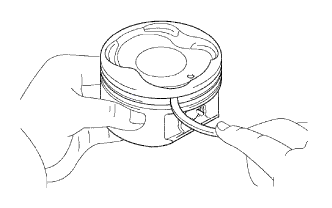 |
Using a groove cleaning tool or broken ring, clean the piston ring grooves.
Using solvent and a brush, thoroughly clean the piston.
| 4. INSPECT PISTON SUB-ASSEMBLY |
Inspect the piston oil clearance.
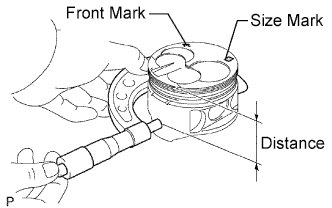 |
Using a micrometer, measure the piston diameter at right angles to the piston center line where the distance from the piston head is as specified.
| Number Mark | Specified Condition |
| Mark 1 | 99.450 to 99.460 mm (3.9153 to 3.9157 in.) |
| Mark 2 | 99.460 to 99.470 mm (3.9157 to 3.9161 in.) |
| Mark 3 | 99.470 to 99.480 mm (3.9161 to 3.9165 in.) |
| O/S 0.50 | 99.950 to 99.980 mm (3.9350 to 3.9362 in.) |
Measure the cylinder bore diameter in the thrust directions.
 |
Subtract the piston diameter measurement from the cylinder bore diameter measurement.
Inspect the piston pin fit.
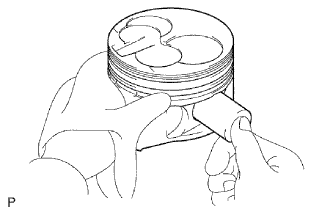 |
Heat the piston to approximately. 60°C (140°F), and push the piston pin into the piston pin hole with your thumb.
If the pin can be installed at a lower temperature, replace the piston and pin as a set.
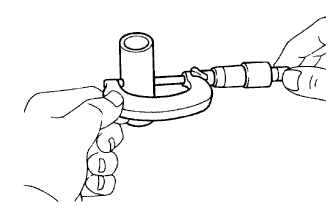 |
Using a micrometer, measure the piston pin diameter.
| 5. INSPECT PISTON RING SET |
Inspect the piston ring groove clearance.
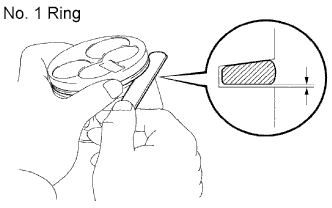 |
No. 1 ring:
Install a new piston ring to the piston. Using a feeler gauge, measure the clearance between the piston ring and the wall of the ring groove.
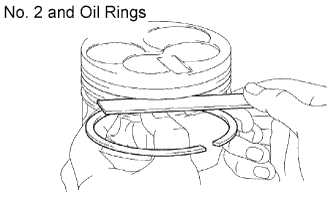 |
No. 2 and oil rings:
Using a feeler gauge, measure the clearance between a new piston ring and the wall of the ring groove.
| Item | Specified Condition |
| No. 2 piston ring | 0.060 to 0.100 mm (0.0024 to 0.0039 in.) |
| Oil ring | 0.030 to 0.070 mm (0.0012 to 0.0028 in.) |
Inspect the piston ring end gap.
Insert the piston ring into the cylinder bore.
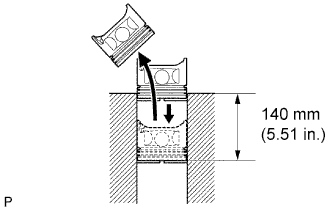 |
Using a piston, push the piston ring a little beyond the bottom of the ring travel, 140 mm (5.15 in.) from the top of the cylinder block.
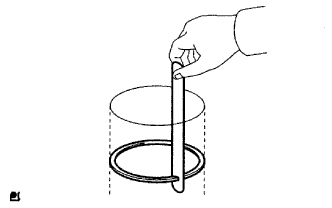 |
Using a feeler gauge, measure the end gap.
| Item | Specified Condition |
| No. 1 piston ring | 0.350 to 0.590 mm (0.0138 to 0.0232 in.) |
| No. 2 piston ring | 0.470 to 0.720 mm (0.0185 to 0.0283 in.) |
| Oil ring | 0.200 to 0.520 mm (0.0079 to 0.0205 in.) |
| Item | Specified Condition |
| No. 1 piston ring | 1.29 mm (0.0508 in.) |
| No. 2 piston ring | 1.42 mm (0.0559 in.) |
| Oil ring | 1.22 mm (0.0480 in.) |
| 6. INSPECT CONNECTING ROD SUB-ASSEMBLY |
Using a rod aligner and feeler gauge, check the connecting rod alignment.
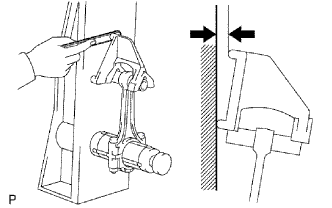 |
Check if the connecting rod is bent.
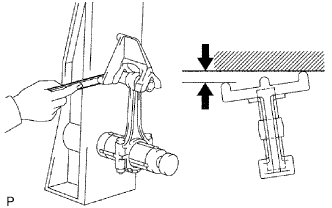 |
Check if the connecting rod is twisted.
| 7. INSPECT PISTON PIN OIL CLEARANCE |
Inspect the piston pin oil clearance.
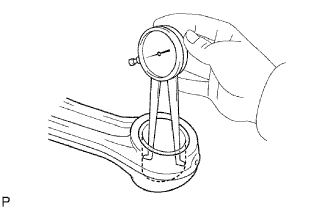 |
Using a caliper gauge, measure the inside diameter of the connecting rod bush.
Subtract the piston pin diameter measurement from the bush inside diameter measurement.
| 8. INSPECT CONNECTING ROD BOLT |
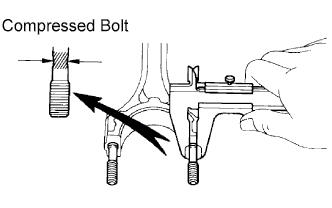 |
Using a vernier caliper, measure the tension portion of the connecting rod bolt.
| 9. INSPECT CRANKSHAFT |
Inspect for circle runout.
Place the crankshaft on V-blocks.
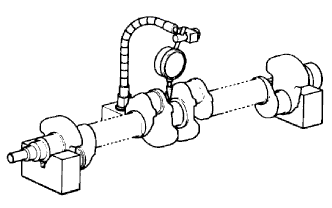 |
Using a dial indicator, measure the circle runout at the center journal.
Inspect the main journals and crank pins.
Using a micrometer, measure the diameter of each main journal and crank pin.
| Size | Specified Condition |
| STD | 61.985 to 62.000 mm (2.4403 to 2.4409 in.) |
| U/S 0.25 | 61.745 to 61.755 mm (2.4309 to 2.4313 in.) |
| U/S 0.50 | 61.495 to 61.505 mm (2.4211 to 2.4215 in.) |
| Size | Specified Condition |
| STD | 54.988 to 55.000 mm (2.1649 to 2.1654 in.) |
| U/S 0.25 | 54.745 to 54.755 mm (2.1553 to 2.1557 in.) |
| U/S 0.50 | 54.495 to 54.505 mm (2.1455 to 2.1459 in.) |
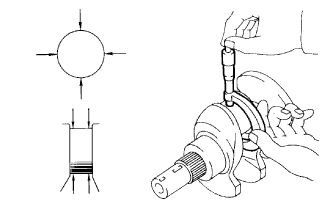 |
Check each main journal and crank pin for taper and out of round as shown in the illustration.
If necessary, grind and hone the main journals and/or crank pins.
Grind and hone the main journals and/or crank pins to the finished undersized diameter.
Install new main journal and/or crankshaft pin undersized bearing.
| 10. INSPECT NO. 1 OIL NOZZLE |
Inspect the check valve
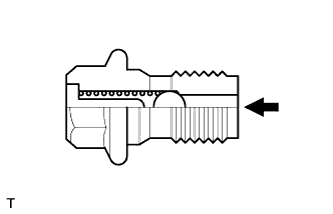 |
Push the valve with a wooden stick to check if it is stuck.
If stuck, replace the check valve.
Inspect the oil nozzle
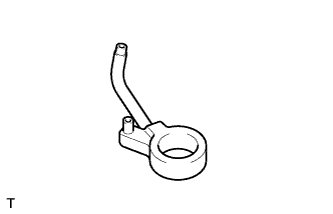 |
Check the oil nozzle for damage or clogging.
If necessary, replace the oil nozzle.