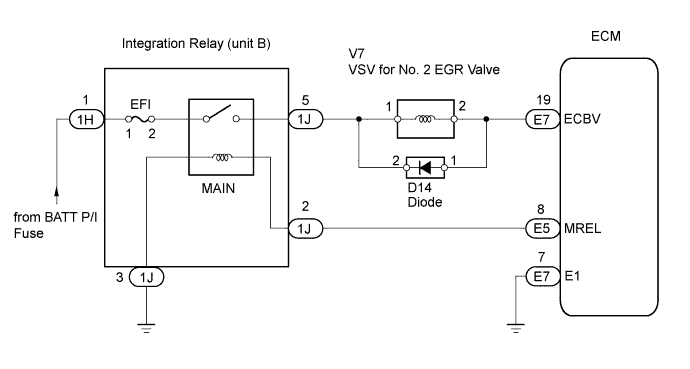
DTC P245C EGR Cooler Bypass Control Circuit Low |
DTC P245D EGR Cooler Bypass Control Circuit High |
| DTC No. | DTC Detection Condition | Trouble Area |
| P245C | Open in VSV for No. 2 EGR valve circuit for 0.5 seconds (1 trip detection logic) |
|
| P245D | Short in VSV for No. 2 EGR valve circuit for 0.5 seconds (1 trip detection logic) |
|
| 1.INSPECT NO. 2 VACUUM SWITCHING VALVE FOR NO. 2 EGR VALVE (RESISTANCE) |
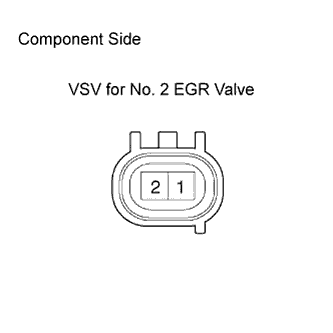 |
Disconnect the V7 VSV for No. 2 EGR valve connector.
Measure the resistance of the VSV for No. 2 EGR valve.
| Tester Connection | Condition | Specified Condition |
| 1 - 2 | 20°C (68°F) | 37 to 44 Ω |
|
| ||||
| OK | |
 |
| 2.INSPECT NO. 2 VACUUM SWITCHING VALVE FOR NO. 2 EGR VALVE (POWER SOURCE VOLTAGE) |
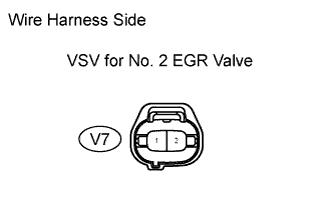 |
Disconnect the V7 VSV for No. 2 EGR valve connector.
Turn the ignition switch ON.
Measure the voltage of the wire harness side connector and body ground.
| Tester Connection | Specified Condition |
| V7-1 - Body ground | 11 to 14 V |
|
| ||||
| OK | |
|
| 3.CHECK HARNESS AND CONNECTOR (VSV FOR NO. 2 EGR VALVE - ECM) |
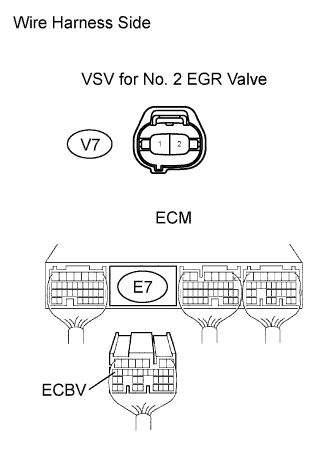 |
Disconnect the V7 VSV for No. 2 EGR valve connector.
Remove the E7 ECM connector.
Measure the resistance of the wire harness side connector.
| Tester Connections | Specified Conditions |
| V7-2 - ECBV (E7-19) | Below 1 Ω |
| Tester Connections | Specified Conditions |
| V7-2 or ECBV (E7-19) - Body ground | 10 kΩ or higher |
|
| ||||
| OK | ||
 | ||
| ||
| 4.CHECK HARNESS AND CONNECTOR (INTEGRATION RELAY (MAIN RELAY) - VSV FOR NO. 2 EGR VALVE) |
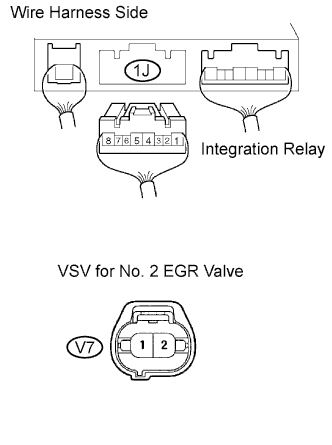 |
Remove the integration relay from the engine room junction block (Click here).
Disconnect the 1J integration relay connector.
Disconnect the V7 VSV for No. 2 EGR valve connector.
Measure the resistance of the wire harness side connector.
| Tester Connection | Specified Condition |
| 1J-5 - V7-1 | Below 1 Ω |
| Tester Connection | Specified Condition |
| 1J-5 or V7-1 - Body ground | 10 kΩ or higher |
|
| ||||
| OK | ||
| ||
| ||

