 |
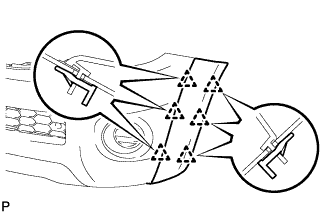
Install the extension with the 6 clips.
FRONT BUMPER > REASSEMBLY |
| 1. INSTALL FRONT BUMPER EXTENSION LH (w/ Over Fender) |
|
Install the extension with the 6 clips.
| 2. INSTALL FRONT BUMPER EXTENSION RH (w/ Over Fender) |
| 3. INSTALL LOWER RADIATOR GRILLE |
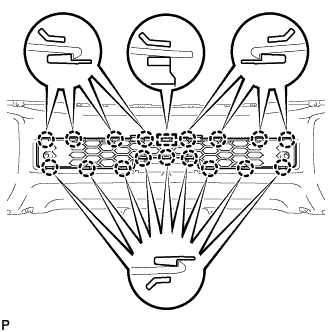 |
Attach the 17 claws and guide to install the lower radiator grille.
 |
w/ Headlight Cleaner System:
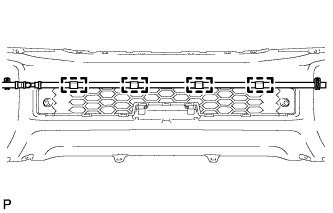
Attach the 4 clamps to install the headlight cleaner hose.
| 4. INSTALL HEADLIGHT WASHER ACTUATOR SUB-ASSEMBLY LH (w/ Headlight Cleaner System) |
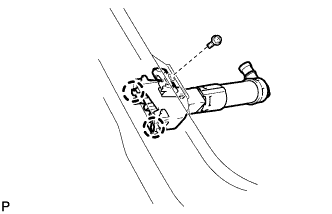 |
Attach the 2 claws to install the headlight washer actuator sub-assembly and install the bolt.
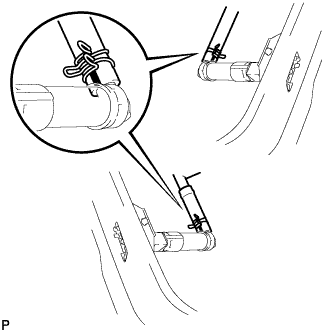 |
Connect the hose as shown in the illustration.
| 5. INSTALL HEADLIGHT WASHER ACTUATOR SUB-ASSEMBLY RH (w/ Headlight Cleaner System) |
| 6. INSTALL TYPE1 HEADLIGHT WASHER NOZZLE SUB-ASSEMBLY LH (w/ Headlight Cleaner System) |
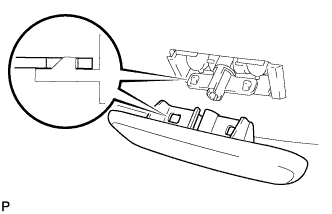 |
Attach the 2 claws to install the headlight washer nozzle.
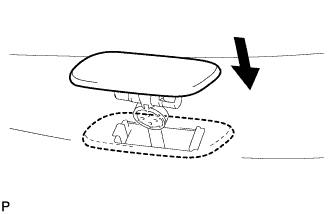 |
Return the headlight washer nozzle to its original position.
| 7. INSTALL TYPE1 HEADLIGHT WASHER NOZZLE SUB-ASSEMBLY RH (w/ Headlight Cleaner System) |
| 8. INSTALL FOG LIGHT ASSEMBLY LH (w/ Fog Light) |
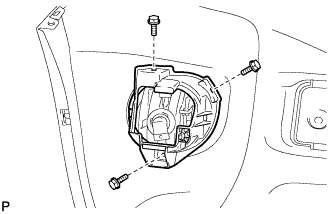 |
Install the fog light with the 3 bolts.
| 9. INSTALL FOG LIGHT ASSEMBLY RH (w/ Fog Light) |
| 10. INSTALL RADIATOR GRILLE OR FRONT PANEL NAME PLATE (for 1GR-FE) |
Clean the lower radiator grille finish plate surface.
Using a heat light, heat the lower radiator grille finish plate surface.
| Item | Specified Condition |
| Lower radiator grille finish plate | 20 to 30°C (68 to 86°F) |
Remove the double-sided tape from the lower radiator grille finish plate.
Wipe off any tape adhesive residue with cleaner.
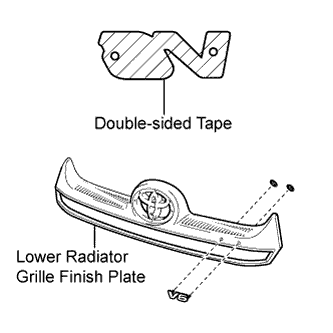 |
Install a new name plate.
Remove the peeling paper from the face of the name plate.
Install the name plate to the lower radiator grille finish plate with 2 new spring nuts.
| 11. INSTALL RADIATOR GRILLE (OR FRONT PANEL) EMBLEM |
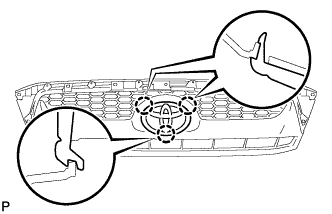 |
for Type A:
Attach the 3 claws to install the emblem to the radiator grille.
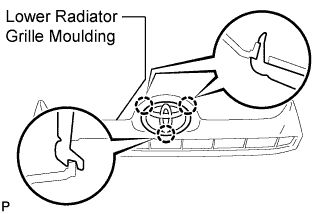 |
for Type B:
Attach the 3 claws to install the emblem to the lower radiator grille moulding.
| 12. INSTALL LOWER RADIATOR GRILLE MOULDING (for Type B) |
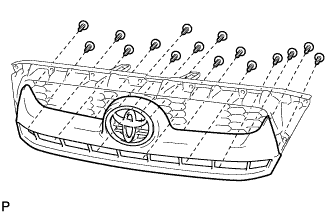 |
Install the lower radiator grille moulding with the 16 screws.
| 13. INSTALL RADIATOR GRILLE MOULDING |
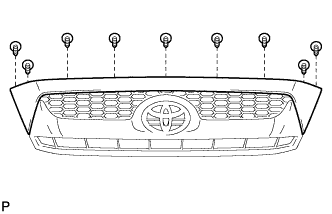 |
Install the radiator grille moulding with the 9 screws.
| 14. INSTALL NO. 1 RADIATOR GRILLE SEAL |
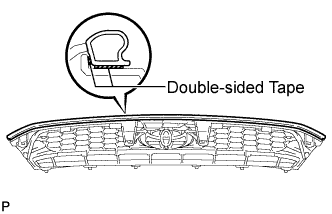 |
Wipe off any tape adhesive residue with cleaner.
Remove the peeling paper from the face of the double-sided tape of a new radiator grille seal.
Install the radiator grille seal.