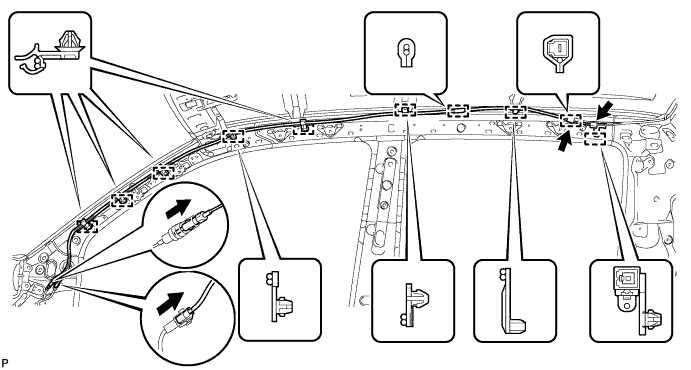
w/o Roof Antenna:
Disconnect the connector.
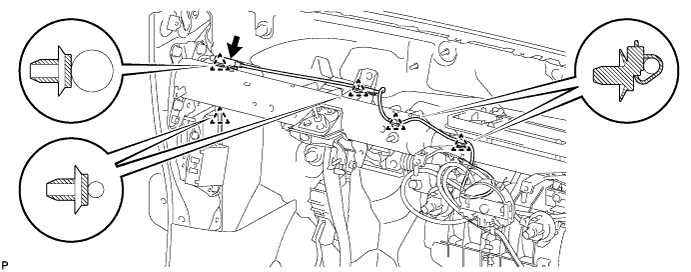
Detach the 5 clamps as shown in the illustration. Then remove the antenna cord.
RADIO ANTENNA CORD > REMOVAL |
| 1. DISCONNECT CABLE FROM NEGATIVE BATTERY TERMINAL |
| 2. REMOVE INSTRUMENT PANEL SUB-ASSEMBLY UPPER |
Remove the instrument panel sub-assembly (Click here).
| 3. REMOVE ANTENNA CORD SUB-ASSEMBLY (for LHD) |
w/o Roof Antenna:
Disconnect the connector.
Detach the 5 clamps as shown in the illustration. Then remove the antenna cord.
w/ Roof Antenna:
Disconnect the connectors.
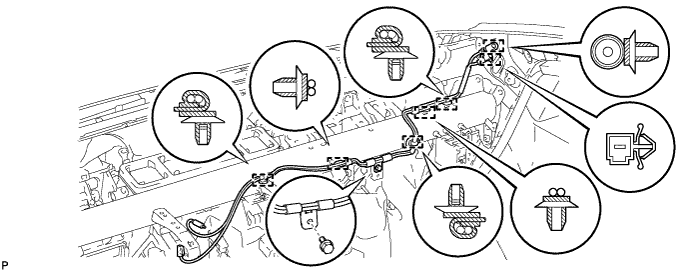
Detach the 7 clamps shown in the illustration.
Remove the clamp bolt and antenna cord.
| 4. REMOVE ANTENNA CORD SUB-ASSEMBLY (for RHD) |
w/o Roof Antenna:
Disconnect the connector.
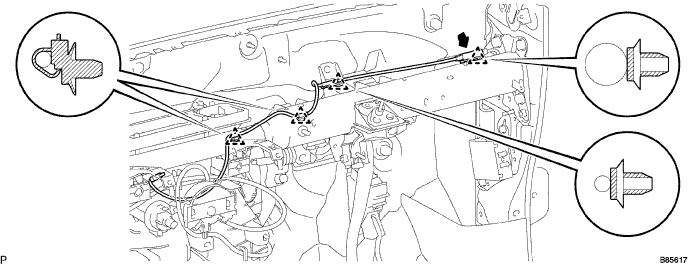
Detach the 4 clamps as shown in the illustration. Then remove the antenna cord.
w/ Roof Antenna:
Disconnect the connectors.
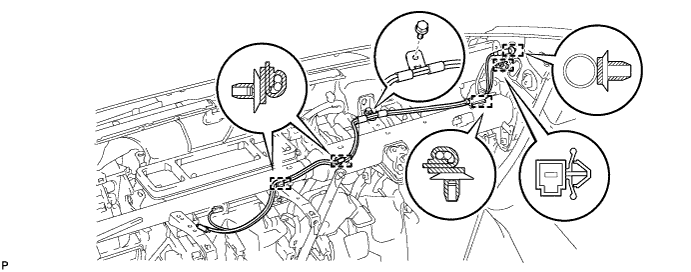
Detach the 5 clamps shown in the illustration.
Remove the clamp bolt and antenna cord.
| 5. REMOVE ROOF HEADLINING ASSEMBLY |
for Single Cab:
Remove the roof headlining (Click here).
for Double Cab:
Remove the roof headlining (Click here).
| 6. REMOVE NO. 2 ANTENNA CORD SUB-ASSEMBLY (for Single Cab) |
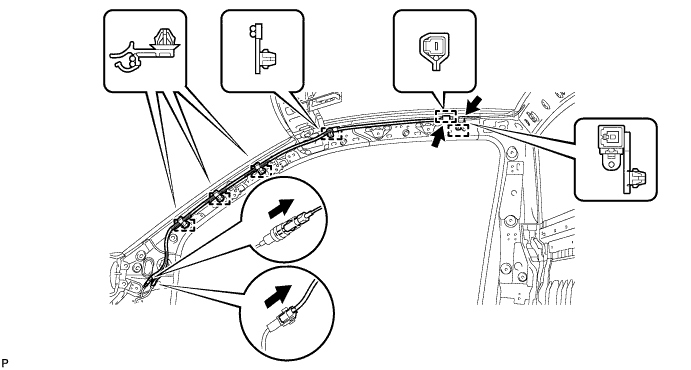
Disconnect the 4 connectors.
Detach the 6 clamps and remove the antenna cord.
| 7. REMOVE NO. 2 ANTENNA CORD SUB-ASSEMBLY (for Double Cab) |
w/ Roof Rail:
Disconnect the 4 connectors.
Detach the 10 clamps and remove the antenna cord.
w/o Roof Rail:
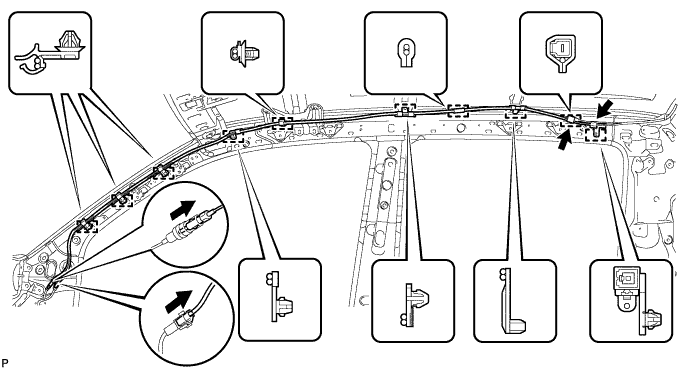
Disconnect the 4 connectors.
Detach the 10 clamps and remove the antenna cord.