 |
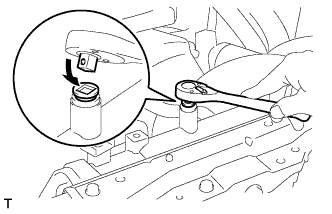
Remove the reservoir cap and, using a wrench, remove the vent plug.
FUEL INJECTION PUMP > REMOVAL |
| 1. DISCONNECT CABLE FROM NEGATIVE BATTERY TERMINAL |
| 2. DRAIN ENGINE COOLANT |
|
Remove the reservoir cap and, using a wrench, remove the vent plug.
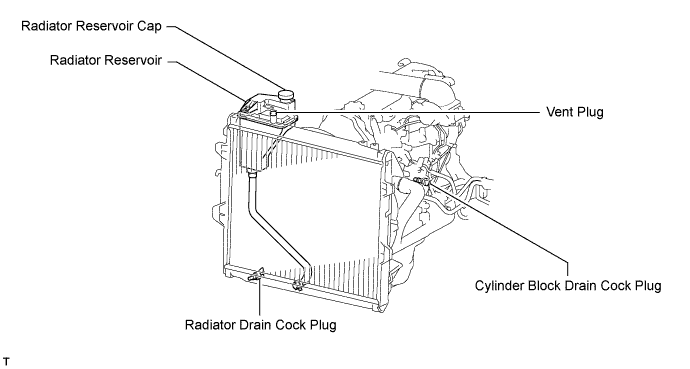
Loosen the cylinder block drain cock plug and the radiator drain cock plug and then drain the coolant.
| 3. REMOVE RADIATOR HOSE INLET |
| 4. REMOVE VANE PUMP V BELT |
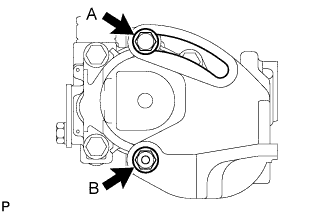 |
Loosen the bolt A and nut B, and remove the V belt.
| 5. REMOVE COOLER COMPRESSOR V BELT (w/ Air Conditioning System) |
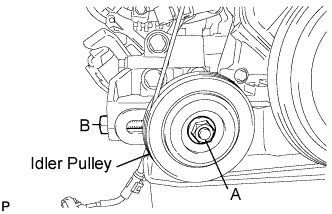 |
Loosen the nut A and bolt B, and remove the V belt.
| 6. REMOVE FAN AND GENERATOR V BELT (w/o Air Conditioning System) |
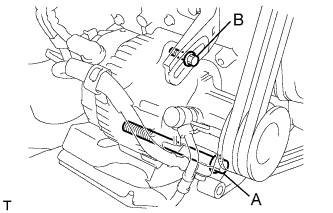 |
Loosen the bolts A and B, and remove the V belt.
| 7. REMOVE FAN AND GENERATOR V BELT (w/ Air Conditioning System) |
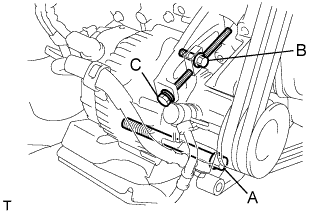 |
Loosen the bolts A and B.
Loosen the adjusting bolt C, and remove the V belt.
| 8. REMOVE FAN SHROUD |
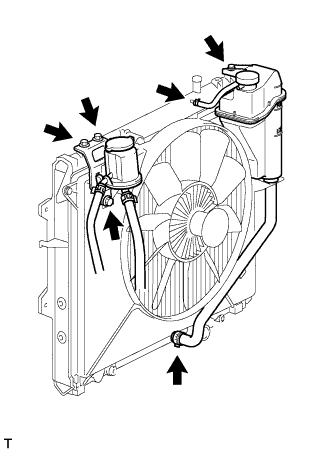 |
Remove the 3 bolts and oil reservoir.
Disconnect the No. 1 and No. 2 water by-pass hoses from the tank upper and lower.
Remove the bolt and radiator reservoir.
Loosen the 4 nuts holding the fluid coupling fan.
Remove the vane pump V belt, cooler compressor V belt and fan and generator V belt (Click here).
Remove the 2 bolts holding the fan shroud.
Remove the 4 nuts of the fluid coupling fan, and then remove the shroud together with the coupling fan.
Remove the fan pulley from the water pump.
| 9. REMOVE FAN PULLEY |
| 10. DISCONNECT COOLER COMPRESSOR (w/ Air Conditioning System) |
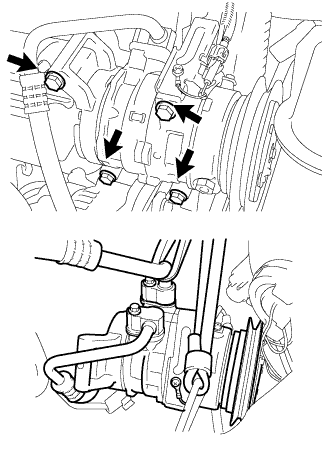 |
Remove the 4 bolts and disconnect the cooler compressor.
| 11. REMOVE COMPRESSOR MOUNTING BRACKET (w/ Air Conditioning System) |
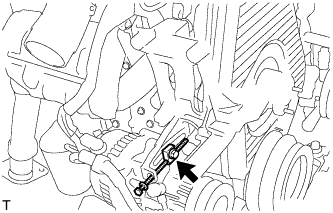 |
Remove the bolt and spacer.
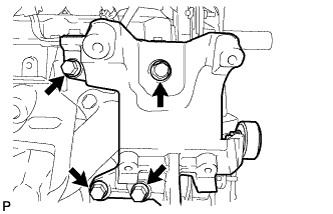 |
Remove the 4 bolts and compressor mounting bracket.
| 12. REMOVE VANE PUMP DRIVE PULLEY |
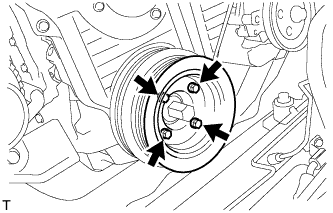 |
w/o Air conditioning:
Remove the 4 bolts, vane pump drive pulley and vane pump drive pulley spacer.
w/ Air conditioning:
Remove the 4 bolts and vane pump drive and No. 2 crankshaft pulleys.
| 13. REMOVE CRANKSHAFT PULLEY |
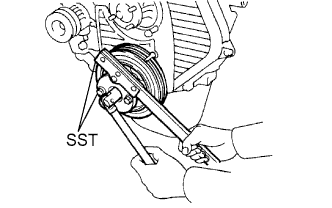 |
Using SST, remove the pulley bolt.
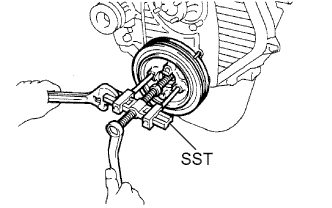 |
Using SST, remove the pulley.
| 14. REMOVE TIMING BELT COVER |
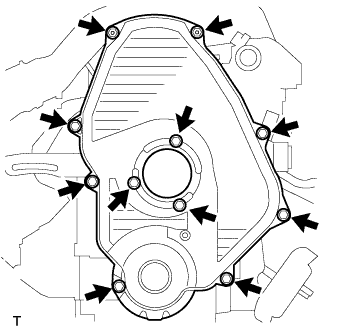 |
Remove the 11 bolts, washers, timing belt cover and 2 gaskets.
| 15. REMOVE TIMING BELT GUIDE |
Remove the timing belt guide.
| 16. SET NO. 1 CYLINDER TO TDC/COMPRESSION |
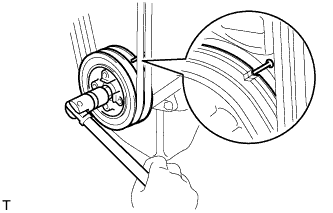 |
Turn the crankshaft pulley and align its groove with the timing pointer.
Check that the valve lifters on the No. 1 cylinder are loose and valve lifters on the No. 4 are tight.
If not, turn the crankshaft one revolution (360°) and align the mark as above.
| 17. REMOVE TIMING BELT |
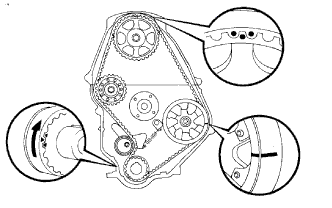 |
Remove the timing belt.
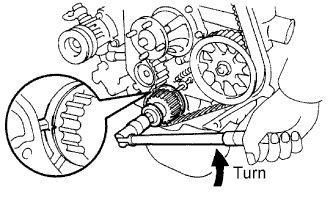 |
Turn the crankshaft 90° counterclockwise, and put the timing mark of the crankshaft timing pulley with the protrusion of the timing gear case.
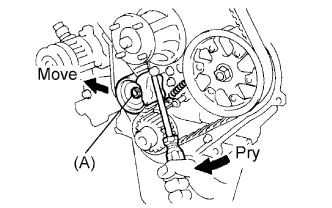 |
Loosen the No. 1 timing belt idler bolt (A), and shift the idler to the left as far as possible.
Temporarily tighten the pulley bolt (A), and then relieve the timing belt tension.
Remove the timing belt.
| 18. REMOVE AIR CLEANER HOSE |
Disconnect the IAT sensor connector.
Detach the clamp of the IAT sensor harness.
Loosen the 2 clamps from the air cleaner hose.
Remove the air cleaner hose.
| 19. REMOVE INTAKE PIPE ASSEMBLY |
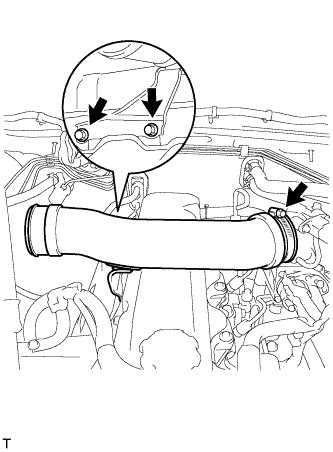 |
Remove the 2 bolts and loosen the hose clamp.
| 20. REMOVE VENTURI |
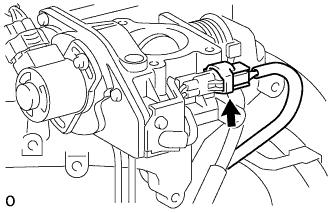 |
Disconnect the throttle open switch connector.
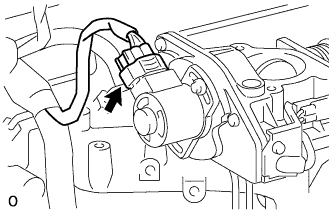 |
Disconnect the throttle control motor connector.
Remove the venturi and gasket.
| 21. REMOVE INJECTION PIPE SET |
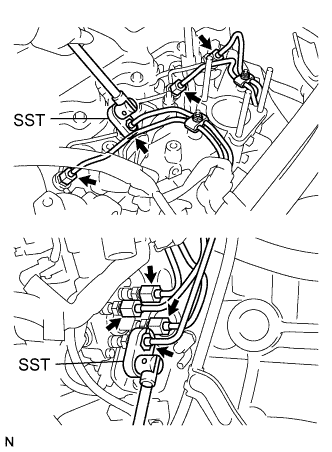 |
Using SST, loosen the 8 union nuts of the 4 injection pipes.
Remove the 2 nuts, 2 upper pipe clamps and 4 injection pipes with lower pipe clamps.
| 22. REMOVE INJECTION PUMP DRIVE PULLEY |
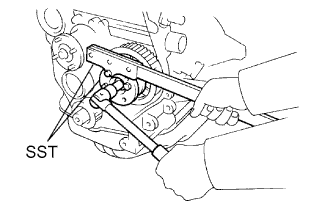 |
Using SST, remove the pulley nut.
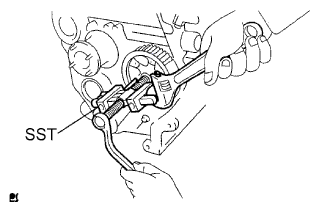 |
Using SST, remove the drive pulley.
| 23. REMOVE INJECTION PUMP ASSEMBLY |
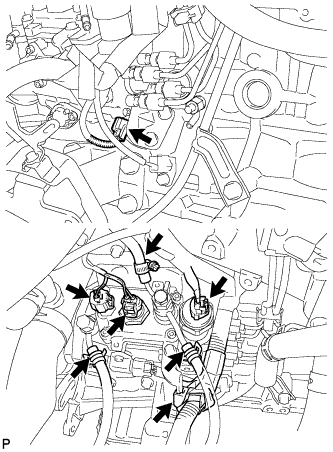 |
Disconnect the engine speed sensor connector.
Disconnect the spill control valve connector.
Disconnect the correction unit connector.
Disconnect the timing control valve connector.
Disconnect the fuel temperature sensor connector.
Disconnect the engine wire clamp.
Disconnect the 3 fuel hoses.
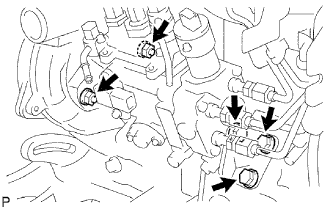 |
Remove the 3 bolts and injection pump stay.
Remove the 2 nuts and injection pump.