CLUTCH MASTER CYLINDER > REMOVAL |
| 1. DRAIN CLUTCH FLUID |
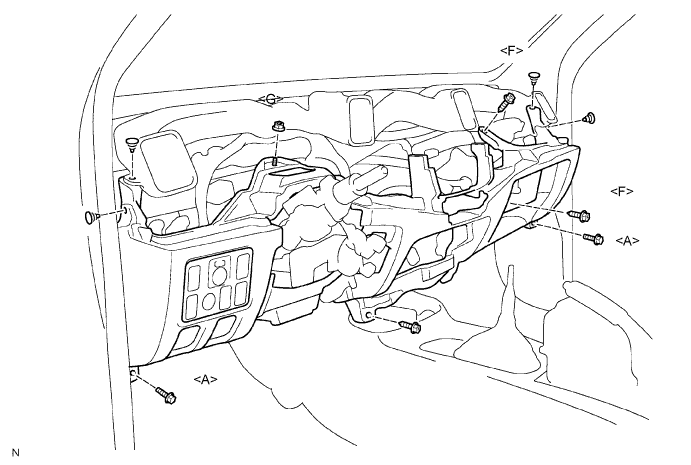
| 2. REMOVE LOWER INSTRUMENT PANEL FINISH PANEL SUB-ASSEMBLY |
Using a clip remover, remove the 4 clips from the duct and instrument panel.
Remove the 2 bolts <A> and nut <G>.
Remove the 3 screws <F>.
Disconnect all connectors and detach all clamps.
Remove the hood lock control cable lever and fuel lid control cable lever.
Remove the instrument panel.
| 3. REMOVE COMBINATION METER ASSEMBLY |
Remove the combination meter assembly (Click here).
| 4. DISCONNECT CLUTCH RESERVOIR HOSE |
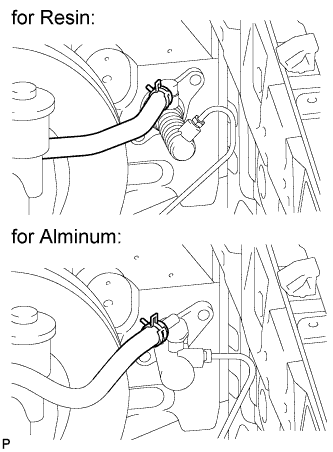 |
Using pliers, grip the claws of the clip and slide the clip, and then disconnect the clutch reservoir hose.
| 5. DISCONNECT CLUTCH MASTER CYLINDER TO FLEXIBLE HOSE TUBE |
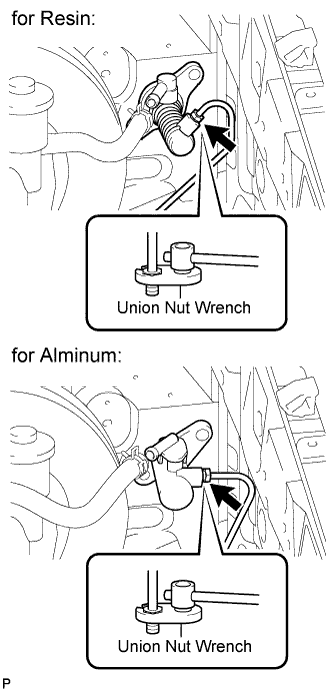 |
Using a union nut wrench, disconnect the tube.
| 6. REMOVE CLUTCH MASTER CYLINDER ASSEMBLY |
for LHD:
Remove the clutch pedal (Click here).
for RHD:
Remove the clutch pedal (Click here).
Remove the 2 nuts, clutch master cylinder assembly and gasket.
| 7. REMOVE CYLINDER PUSH ROD CLEVIS |
Loosen the lock nut, and then remove the clevis.
Remove the lock nut from the master cylinder.