STARTER (for 1.0 kW Type) > REASSEMBLY |
| 1. INSTALL PLANETARY CARRIER SHAFT SUB-ASSEMBLY |
|
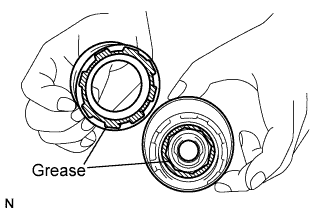
Apply high-temperature grease to the part of the internal gear that contacts the shock absorber and planetary gears, and the part of the shock absorber that contacts the internal gear.
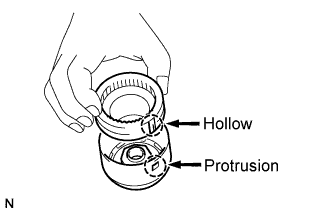 |
Align the hollow of the internal gear with the protrusion inside the shock absorber.
Inset and turn the internal gear so that it interlocks with the shock absorber.
Apply high-temperature grease to the plate washer, and install it to the planetary shaft.
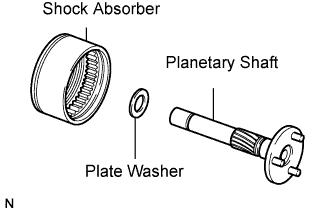 |
Install the planetary shaft to the internal gear with shock absorber.
Apply high-temperature grease to the center bearing.
Install the center bearing.
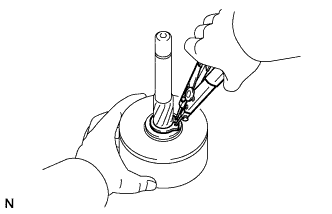 |
Using snap ring pliers, install the plate washer and snap ring.
| 2. INSTALL STARTER CLUTCH SUB-ASSEMBLY |
Apply high-temperature grease to the spline of the starter clutch and the stop collar.
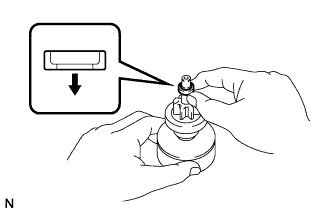 |
Place the starter clutch and stop collar on the planetary shaft.
Apply high-temperature grease to the snap ring, and install it to the planetary shaft groove.
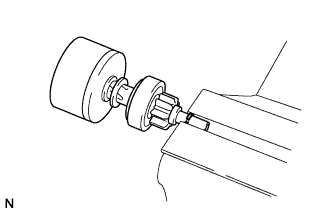 |
Using a vise, compress the snap ring between aluminum plates.
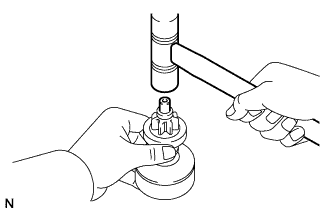 |
Holding the starter clutch, tap the planetary shaft with a plastic-faced hammer to install the stop collar onto the snap ring.
| 3. INSTALL PLANETARY GEAR |
Apply high-temperature grease to the planetary gears and flange pins of the planetary shaft.
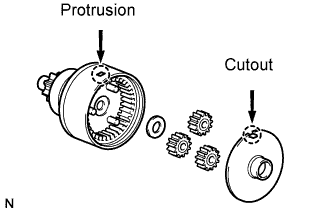 |
Install the plate washer and 3 planetary gears.
Align the cutout of the plate with the protrusion inside the shock absorber, and install the plate.
| 4. INSTALL DRIVE LEVER AND STARTER CLUTCH WITH SHOCK ABSORBER |
Apply high-temperature grease to the bearing of the starter drive housing.
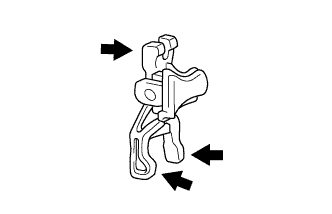 |
Apply high-temperature grease to the starter drive lever as shown in the illustration.
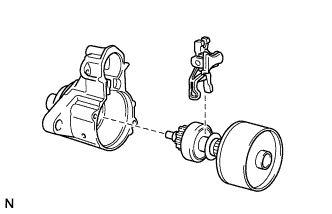 |
Install the starter drive lever to the starter clutch sub-assembly.
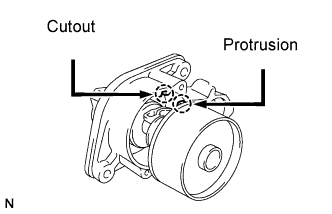 |
Align the protrusion of the shock absorber with the cutout of the starter drive housing and install the drive lever and starter clutch with shock absorber.
| 5. INSTALL STARTER BRUSH HOLDER ASSEMBLY |
Install the starter armature to the starter yoke.
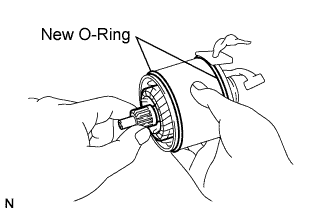 |
Install 2 new O-rings to the starter yoke.
Install the brush holder to the armature.
Install the 4 starter brushes to the starter brush holder.
Using a screwdriver, pull back the spring.
Install the brush to the brush holder.
| 6. INSTALL STARTER COMMUTATOR END FRAME ASSEMBLY |
Apply high-temperature grease to the bearing of the end frame.
Install the end frame with the 2 screws.
| 7. INSTALL STARTER YOKE ASSEMBLY |
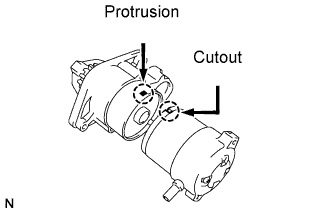 |
Align the cutout of the starter yoke with the protrusion of the shock absorber.
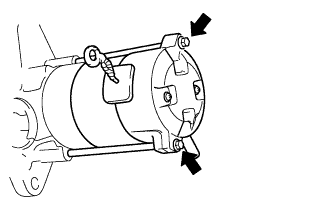 |
Install the starter yoke with armature with the 2 through bolts.
| 8. INSTALL MAGNET STARTER SWITCH ASSEMBLY |
Install the plunger cover to the magnet starter switch assembly.
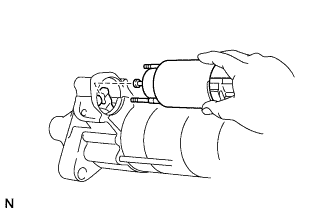 |
Attach the plunger of the magnet starter switch assembly to the drive lever from the upper side.
Install the magnet starter switch assembly with the 2 nuts.
Connect the lead wire to the terminal, and install the nut.