 |
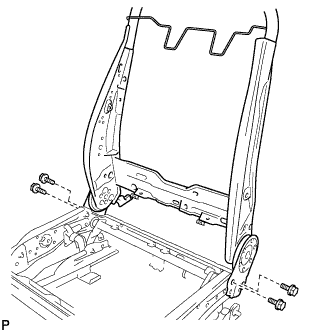
Install the seatback spring with the 4 bolts.
- Torque:
- 42 N*m{ 428 kgf*cm , 31 ft.*lbf }
FRONT SEAT ASSEMBLY (for Power Seat) > REASSEMBLY |
| 1. INSTALL SEPARATE TYPE FRONT SEATBACK SPRING ASSEMBLY |
|
Install the seatback spring with the 4 bolts.
| 2. INSTALL FRONT NO. 2 SEAT WIRE RH |
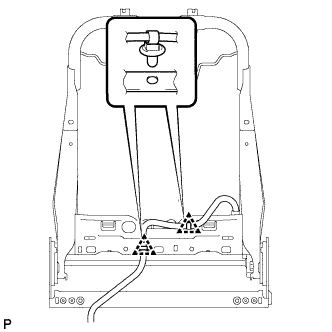 |
Attach the 2 wire harness clamps to install the seat wire.
| 3. INSTALL FRONT SEAT WIRE RH |
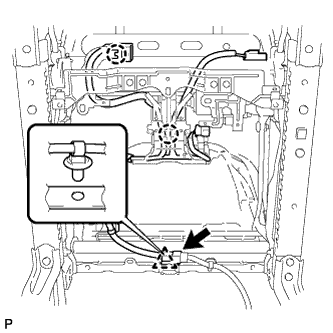 |
Attach the 2 claws to install the seat wire.
Attach the wire harness clamp.
Connect the connector.
| 4. INSTALL FRONT LOWER SEAT CUSHION SHIELD LH |
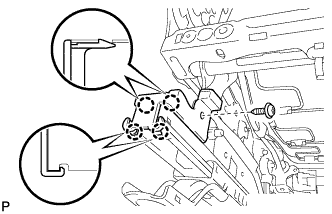 |
Attach the 4 claws to install the lower seat cushion shield.
Install the screw.
| 5. INSTALL FRONT LOWER SEAT CUSHION SHIELD RH |
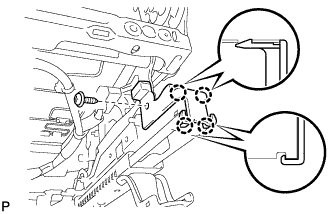 |
Attach the 4 claws to install the lower seat cushion shield.
Install the screw.
| 6. INSTALL FRONT POWER SEAT MOTOR ASSEMBLY (for Rear Lifter) |
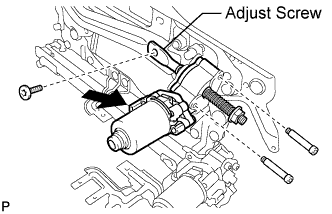 |
Using a 4 mm socket hexagon wrench, install the motor with the 2 bolts.
Clean the threads of the "TORX" bolt for the adjust screw with non-residue solvent (when reusing the "TORX" bolt).
Apply adhesive to the threads of the "TORX" bolt for the adjust screw (when reusing the "TORX" bolt).
Using a T40 "TORX" socket wrench, install the "TORX" bolt.
Connect the connector.
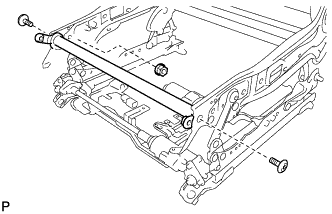 |
Using a T40 "TORX" socket wrench, install the tilt rod with the 2 "TORX" bolts for the tilt rod.
Install the nut.
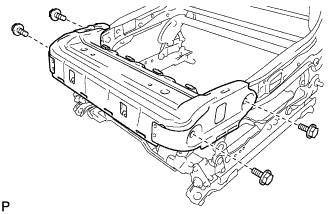 |
Install the seat cushion frame with the 4 bolts.
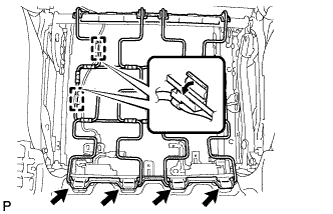 |
Attach the 4 clamps indicated by the arrows in the illustration to install the seat cushion spring.
Attach the 2 wire harness clamps.
| 7. INSTALL FRONT POWER SEAT MOTOR ASSEMBLY (for Slide) |
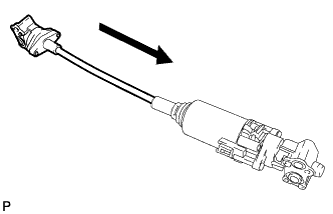 |
Install the slide cable.
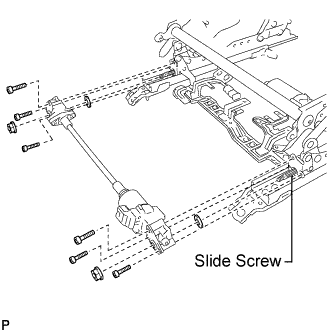 |
Install the front power seat motor assembly with slide cable to the slide screws.
Using a 4 mm socket hexagon wrench, install the 4 bolts.
Using a 5 mm socket hexagon wrench, install the 2 bolts.
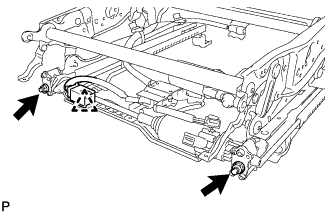 |
Install new 2 nuts.
Attach the claw to connect the connector to the seat frame.
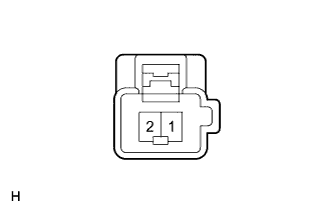 |
Connect the positive (+) battery terminal to terminal 1 of the power seat motor and the negative (-) battery terminal to terminal 2, and then slide the seat and align the matchmarks.
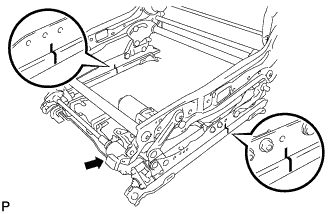 |
Check that the matchmarks are aligned on both sides.
If the matchmarks are not aligned, check the installation condition of the power seat motor assembly, and remove and reinstall the power seat motor assembly if necessary.
Connect the connector.
|
Install the seat cushion frame with the 4 bolts.
|
Attach the 4 clamps indicated by the arrows in the illustration to install the seat cushion spring.
Attach the 2 wire harness clamps.
| 8. INSTALL FRONT POWER SEAT MOTOR ASSEMBLY (for Reclining) |
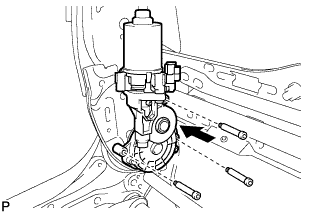 |
Temporarily install the power seat motor with the 3 bolts.
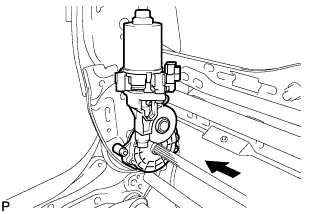 |
Install the reclining rod.
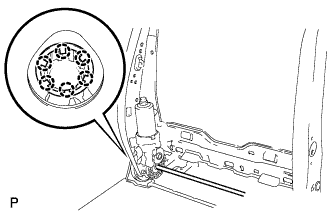 |
Attach the 6 claws to install the push nut to the reclining rod.
Using a 4 mm socket hexagon wrench, tighten the 3 bolts.
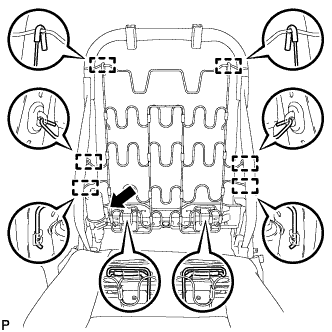 |
Attach the 8 hooks to install the seatback spring.
Connect the connector.
| 9. INSTALL RECLINING ADJUSTER INSIDE COVER LH |
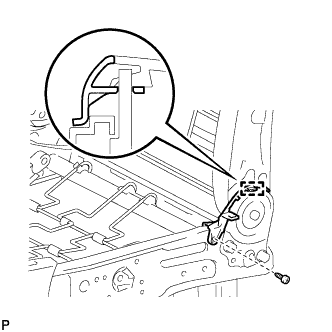 |
Attach the guide to install the reclining adjuster inside cover.
Install the screw.
| 10. INSTALL RECLINING ADJUSTER INSIDE COVER LH |
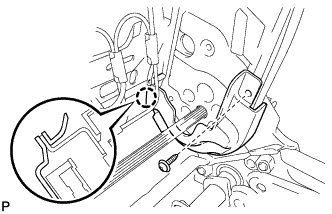 |
Attach the claw to install the reclining adjuster inside cover.
Install the screw.
| 11. INSTALL RECLINING ADJUSTER INSIDE COVER RH |
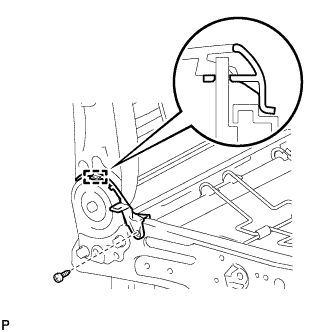 |
Attach the guide to install the reclining adjuster inside cover.
Install the screw.
| 12. INSTALL RECLINING ADJUSTER INSIDE COVER RH |
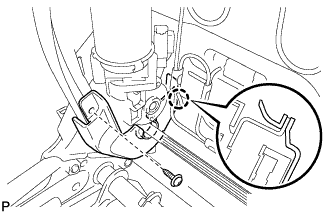 |
Attach the claw to install the reclining adjuster inside cover.
Install the screw.
| 13. INSTALL NO. 1 SEATBACK CLOTH |
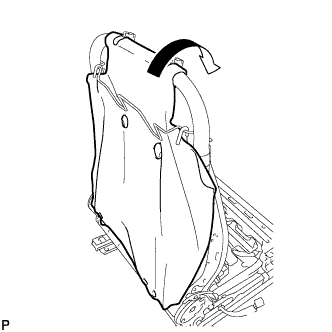 |
Install the seatback cloth.
| 14. INSTALL SEPARATE TYPE FRONT SEATBACK PAD |
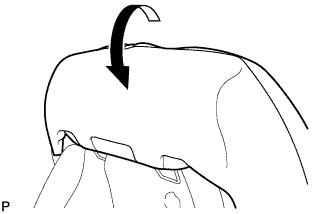 |
Install the seatback pad.
| 15. INSTALL SEPARATE TYPE FRONT SEATBACK COVER |
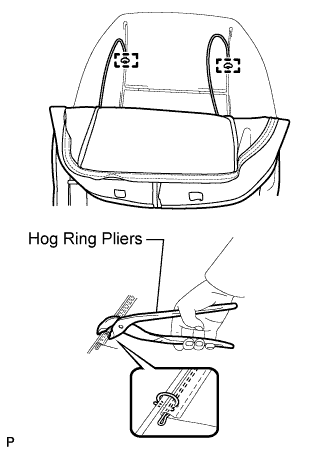 |
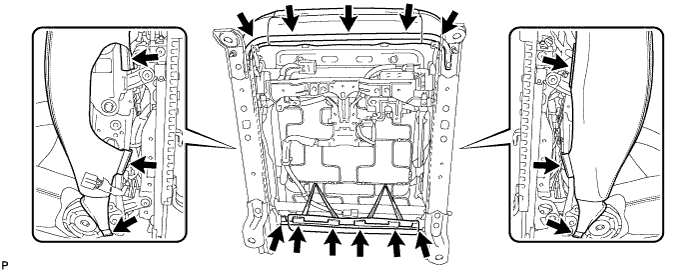
Using hog ring pliers, attach the strap of the seatback cover to the seatback pad with new hog rings.
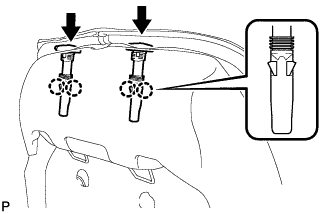 |
Attach the 4 claws to install the 2 headrest supports.
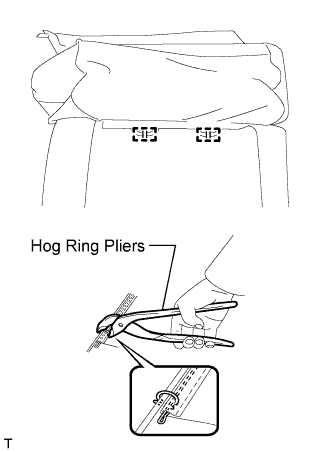 |
Using hog ring pliers, install the upper part of the seatback cover to the seatback pad with new hog rings.
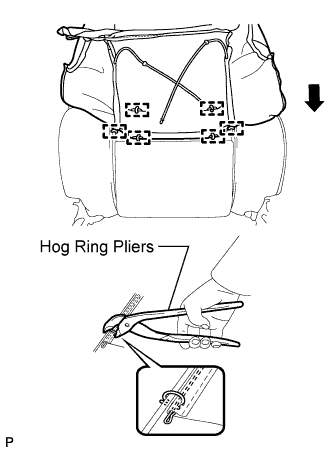 |
Using hog ring pliers, install the center of the seatback cover to the seatback pad with new hog rings.
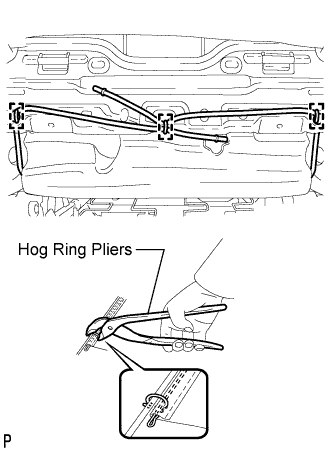 |
Using hog ring pliers, attach the strap of the seatback cover to the seatback frame with new hog rings.
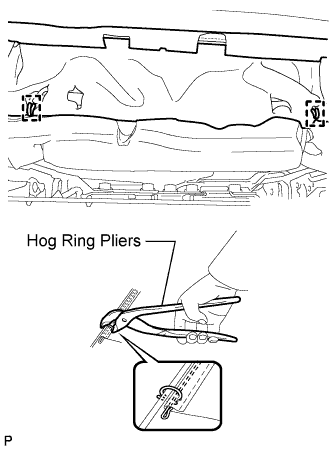 |
Using hog ring pliers, attach the bottom of the seatback cloth to the seatback frame with new hog rings.
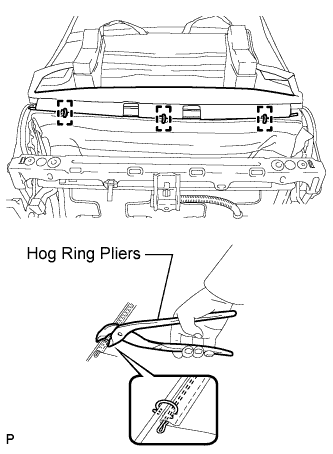 |
Using hog ring pliers, attach the wires at the bottom of the seatback cover with new hog rings.
| 16. INSTALL SEPARATE TYPE FRONT SEAT CUSHION COVER |
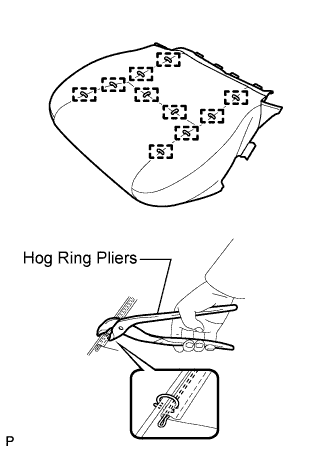 |
Using hog ring pliers, install the seat cushion cover to the seat cushion pad with new hog rings.
| 17. INSTALL SEAT CUSHION COVER WITH PAD |
Set the seat cushion cover with pad in place.
Attach the hooks to install the seat cushion cover with pad.
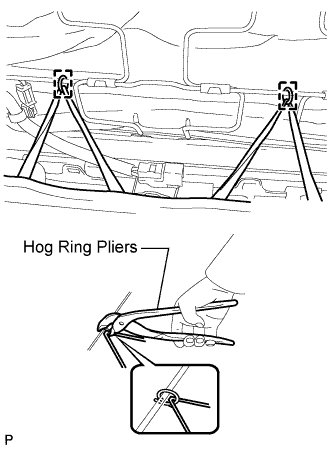 |
Using hog ring pliers, attach the rubber bands of the seatback cover to the seat frame with new hog rings.
| 18. INSTALL FRONT SEAT CUSHION COVER RH |
Install the seat cushion cover.
| 19. INSTALL FRONT SEAT INNER BELT ASSEMBLY RH |
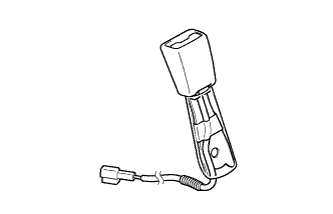 |
Install the buckle cover on the seat belt.
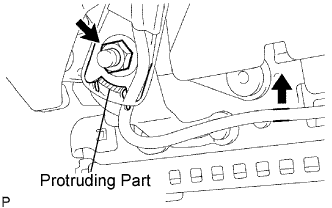 |
Attach the wire harness to the clamp.
Install the seat belt with the nut.
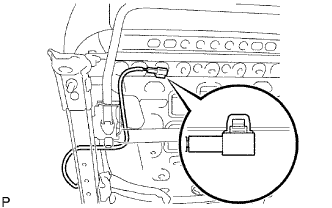 |
Attach the clamp as shown in the illustration.
| 20. INSTALL FRONT SEAT CUSHION INNER SHIELD RH |
Pass the wire harness of the front seat inner belt assembly below the claw and into the front seat cushion inner shield.
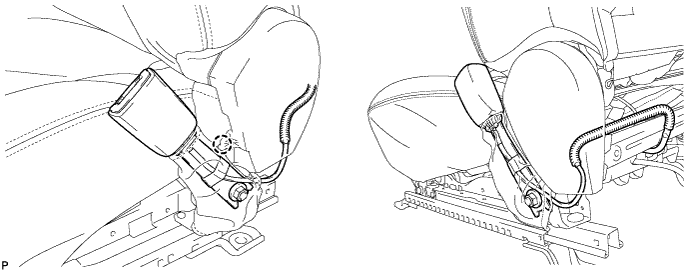
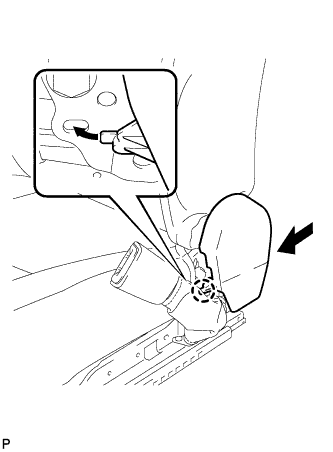 |
Attach the claw to temporarily install the cushion inner shield.
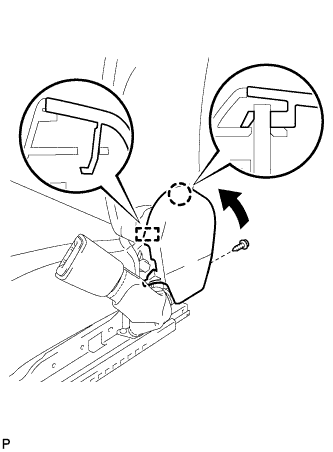 |
Attach the guide and claw.
Install the screw to the cushion inner shield.
| 21. INSTALL FRONT POWER SEAT SWITCH |
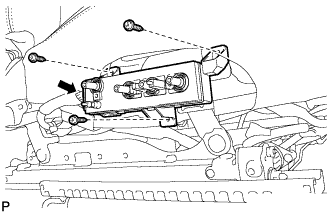 |
Connect the connector.
Install the switch with the 3 screws.
| 22. INSTALL FRONT INNER NO. 1 SEAT CUSHION SHIELD |
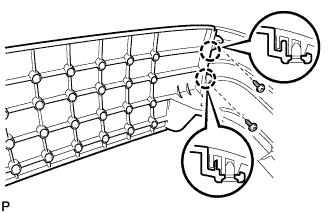 |
Attach the 2 claws to install the cushion shield.
Install the 2 screws.
| 23. INSTALL FRONT SEAT CUSHION SHIELD RH |
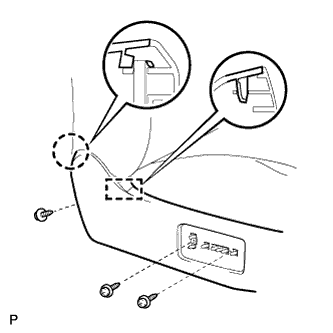 |
Attach the claw and guide to install the cushion shield.
Install the 3 screws.
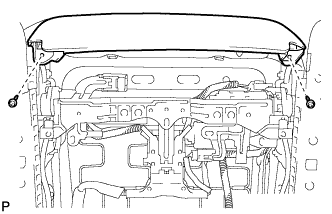 |
Install the 2 screws.
| 24. INSTALL SLIDE AND VERTICAL POWER SEAT SWITCH KNOB |
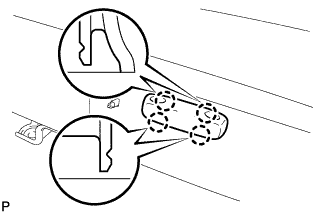 |
Attach the 4 claws to install the knob.
| 25. INSTALL RECLINING POWER SEAT SWITCH KNOB |
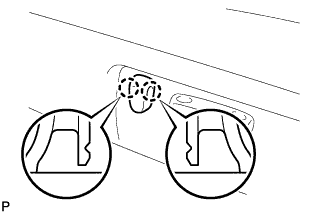 |
Attach the 2 claws to install the knob.