 |
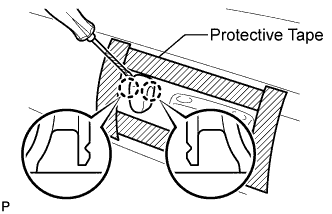
Apply protective tape around the cushion shield.
FRONT POWER SEAT MOTOR ASSEMBLY (for Rear Lifter) > REMOVAL |
| 1. REMOVE FRONT SEAT ASSEMBLY |
Remove the front seat assembly (Click here).
| 2. REMOVE RECLINING POWER SEAT SWITCH KNOB |
|
Apply protective tape around the cushion shield.
Using a screwdriver, detach the 2 claws and remove the knob.
| 3. REMOVE SLIDE AND VERTICAL POWER SEAT SWITCH KNOB |
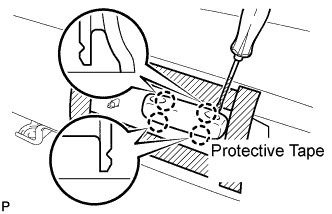 |
Using a screwdriver, detach the 4 claws and remove the knob.
| 4. REMOVE FRONT SEAT CUSHION SHIELD RH |
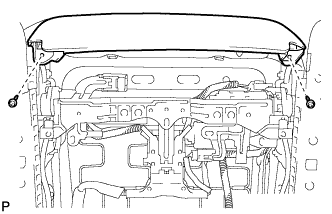 |
Remove the 2 screws.
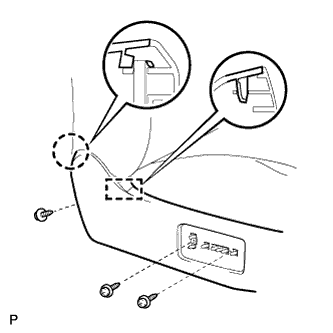 |
Remove the 3 screws.
Detach the claw and guide.
Remove the cushion shield.
| 5. REMOVE FRONT POWER SEAT SWITCH |
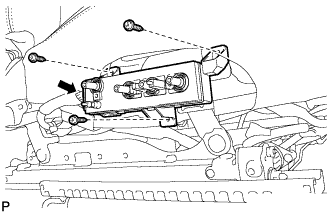 |
Remove the 3 screws.
Disconnect the connector and remove the switch.
| 6. REMOVE FRONT SEAT CUSHION INNER SHIELD RH |
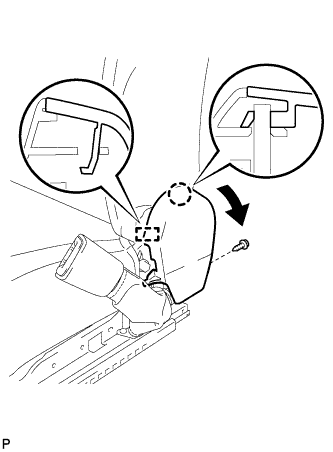 |
Remove the screw.
Pull the cushion inner shield to detach the claw and guide.
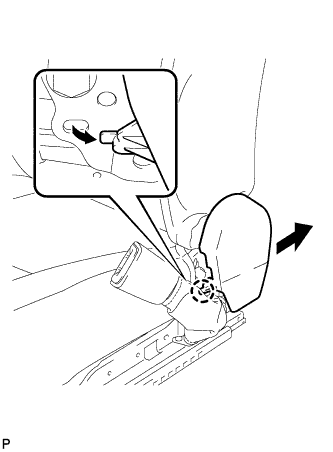 |
Pull the cushion inner shield to detach the claw and remove the cushion inner shield.
| 7. REMOVE FRONT SEAT INNER BELT ASSEMBLY RH |
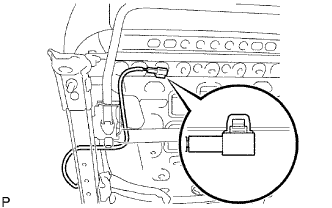 |
Detach the clamp.
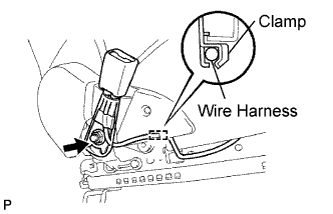 |
Detach the wire harness from the clamp.
Remove the nut and seat belt.
Remove the buckle cover.
| 8. REMOVE SEAT CUSHION COVER WITH PAD |
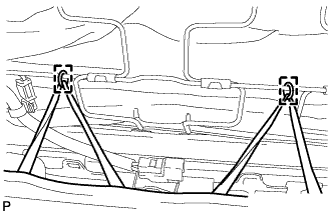 |
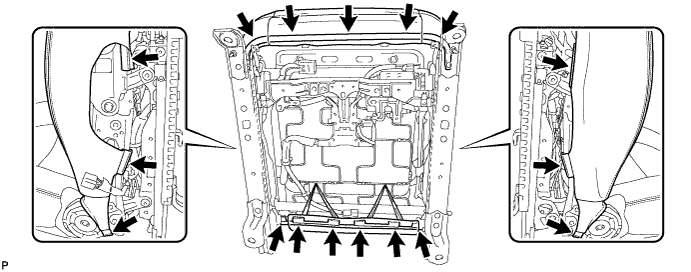
Remove the hog rings.
Detach the hooks and remove the seat cushion cover with pad.
| 9. REMOVE FRONT POWER SEAT MOTOR ASSEMBLY (for Rear Lifter) |
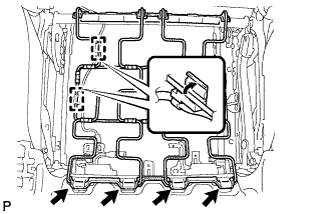 |
Detach the 2 wire harness clamps.
Detach the 4 clamps indicated by the arrows in the illustration and remove the seat cushion spring.
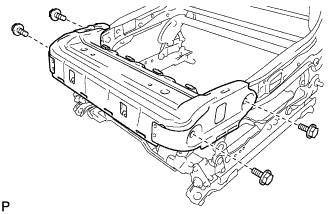 |
Remove the 4 bolts and seat cushion frame.
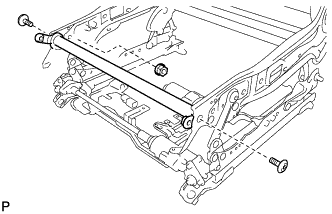 |
Using a T40 "TORX" socket wrench, remove the 2 "TORX" bolts for the tilt rod.
Remove the nut and tilt rod.
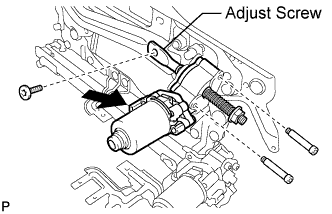 |
Disconnect the connector.
Using a T40 "TORX" socket wrench, remove the "TORX" bolt for the adjust screw.
Using a 4 mm socket hexagon wrench, remove the 2 bolts and motor.