 |
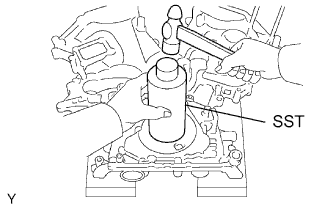
Using SST and a hammer, tap in a new oil seal until its surface is flush with the timing chain cover edge.
- SST
- 09226-10010
OIL PUMP > INSTALLATION |
| 1. INSTALL TIMING CHAIN COVER OIL SEAL |
Using a screwdriver, pry out the oil seal.
|
Using SST and a hammer, tap in a new oil seal until its surface is flush with the timing chain cover edge.
Apply MP grease to the lip of the oil seal.
| 2. INSTALL TIMING CHAIN COVER |
Remove any old seal packing (FIPG material) and be careful not to drop any oil on the contact surfaces of the timing chain cover, cylinder head and cylinder block.
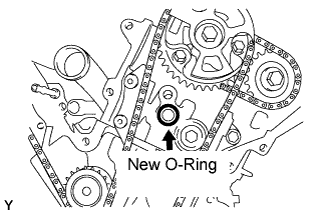 |
Install a new O-ring to the cylinder head LH as shown in the illustration.
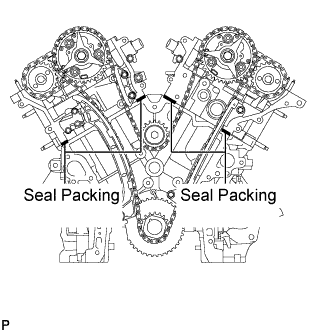 |
Apply seal packing as shown in the illustration.
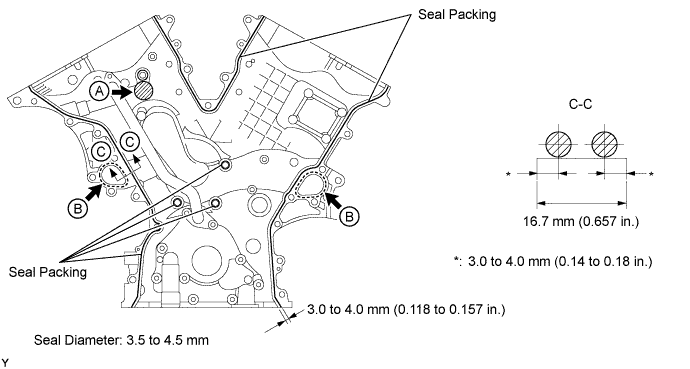
Apply seal packing in a continuous line to the timing chain cover as shown in the illustration.
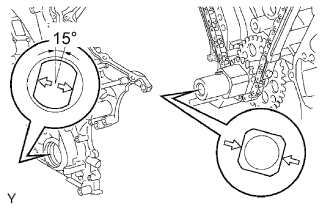 |
Align the hole of the oil pump drive rotor with the rectangular portion of the crankshaft timing sprocket, and slide the timing chain cover into place.
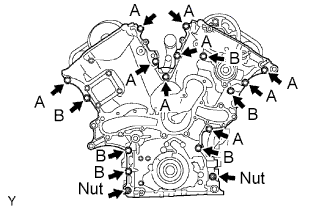 |
Install the timing chain cover with the 15 bolts and 2 nuts. Uniformly tighten the bolts and nuts in several passes.
| 3. INSTALL OIL FILTER BRACKET |
Install a new gasket and the oil filter bracket with the 3 bolts and 2 nuts.
| 4. INSTALL OIL FILTER SUB-ASSEMBLY |
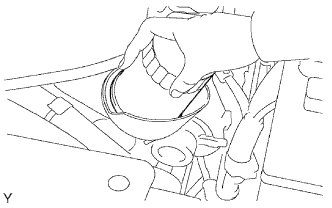 |
Check and clean the oil filter installation surface.
Apply clean engine oil to the gasket of a new oil filter.
Lightly screw the oil filter into place by hand. Tighten it until the gasket contacts the seat.
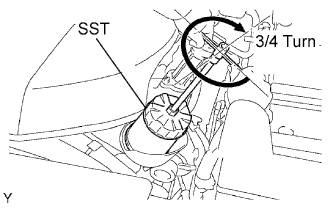 |
Using SST, tighten the oil filter an additional 3/4 turn.
| 5. INSTALL VVT SENSOR |
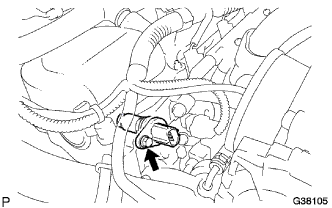 |
Install the sensor with the bolt.
Connect the sensor connector.
| 6. INSTALL CAMSHAFT TIMING OIL CONTROL VALVE (for Bank 1) |
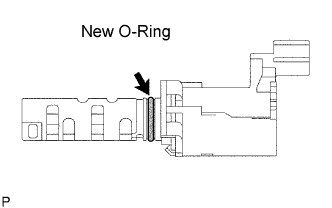 |
Apply a light coat of engine oil to a new O-ring of the oil control valve.
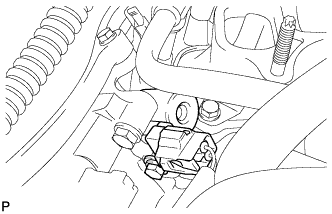 |
Install the oil control valve with the bolt.
Connect the camshaft timing oil control valve connector.
| 7. INSTALL CAMSHAFT TIMING OIL CONTROL VALVE (for Bank 2) |
|
Apply a light coat of engine oil to a new O-ring of the oil control valve.
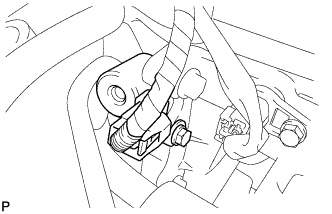 |
Install the oil control valve with the bolt.
Connect the oil control valve connector.
| 8. INSTALL CYLINDER HEAD COVER LH |
Remove any old packing (FIPG) material and be careful not to drop any oil on the contact surfaces of the cylinder head, timing chain cover and cylinder head cover.
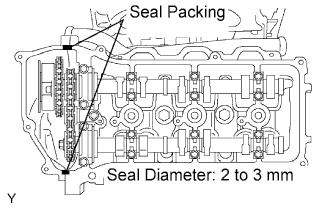 |
Apply seal packing (diameter: 2 to 3 mm (0.08 to 0.12 in.)) to the cylinder head and timing chain cover as shown in the illustration.
Install the seal washers to the bolts.
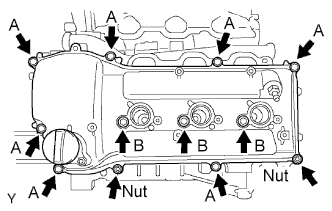 |
Install the cylinder head cover with the 10 bolts and 2 nuts. Uniformly tighten the bolts and nuts in several passes.
| 9. INSTALL CYLINDER HEAD COVER RH |
Remove any old packing (FIPG) material and be careful not to drop any oil on the contact surfaces of the cylinder head, timing chain cover and cylinder head cover.
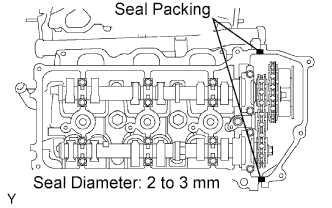 |
Apply seal packing to the cylinder head and timing chain cover as shown in the illustration.
Install the seal washers to the bolts.
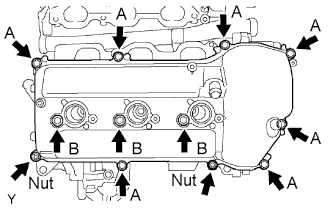 |
Install the cylinder head cover with the 10 bolts and 2 nuts. Uniformly tighten the bolts and nuts in several passes.
| 10. INSTALL IGNITION COIL |
Install the 6 ignition coils with the 6 bolts.
| 11. INSTALL NO. 1 OIL PAN |
Remove any old seal packing (FIPG material) and be careful not to drop any oil on the contact surfaces of the cylinder block, rear oil seal retainer and oil pan.
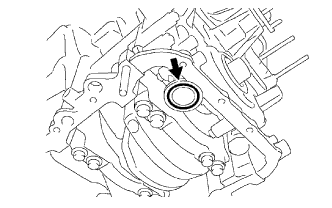 |
Install a new O-ring to the oil pump.
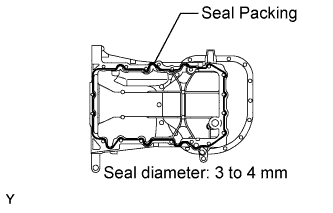 |
Apply seal packing in a continuous line as shown in the illustration.
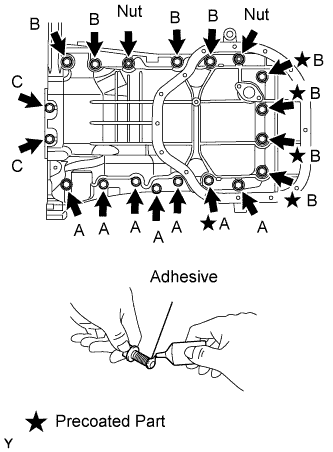 |
Install the oil pan with the 17 bolts and 2nuts. Uniformly tighten the bolts and nuts in several passes.
| 12. INSTALL OIL STRAINER |
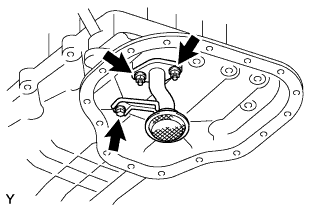 |
Install a new gasket and the oil strainer with bolt and 2 nuts.
| 13. INSTALL NO. 2 OIL PAN |
Remove any old seal packing (FIPG material) and be careful not to drop any oil on the contact surfaces of the oil pan and No. 2 oil pan.
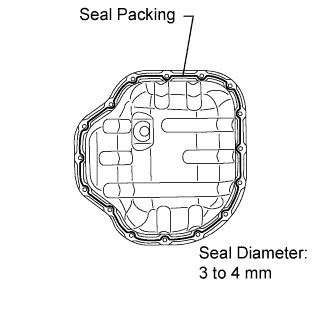 |
Apply seal packing in a continuous line as shown in the illustration.
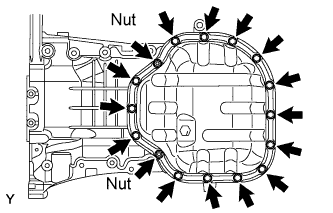 |
Install the No. 2 oil pan with the 14 bolts and 2 nuts. Uniformly tighten the bolts and nuts in several passes.
| 14. INSTALL CRANKSHAFT PULLEY |
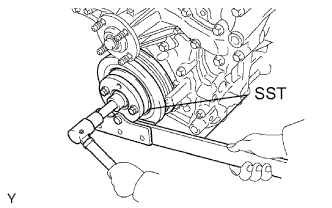 |
Using SST, install the pulley set bolt.
| 15. INSTALL NO. 1 IDLER PULLEY |
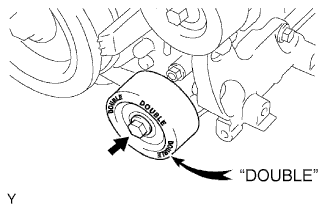 |
Install the idler pulley with the bolt.
| 16. INSTALL NO. 2 IDLER PULLEY |
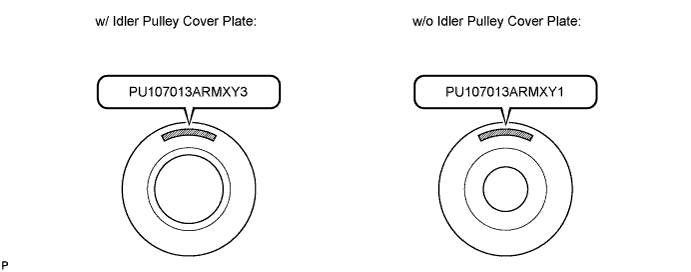
w/ Idler Pulley Cover Plate (PU107013ARMXY3):
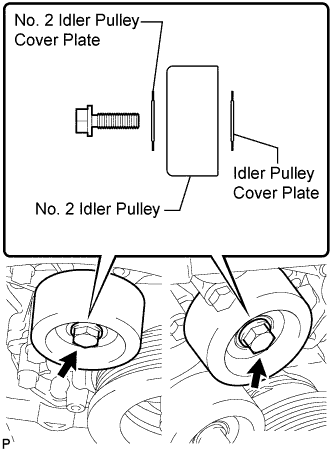 |
Install the idler pulley cover plate, idler pulley and No. 2 idler pulley cover plate with the bolt.
w/o Idler Pulley Cover Plate (PU107013ARMXY1):
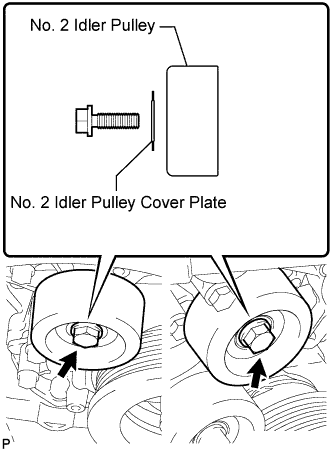 |
Install the idler pulley and No. 2 idler pulley cover plate with the bolt.
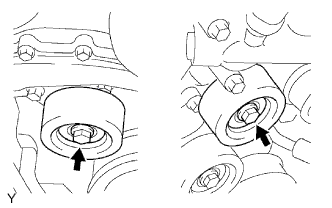 |
for Integrated Type:
Install the 2 No. 2 idler pulleys with the 2 bolts.
| 17. INSTALL V-RIBBED BELT TENSIONER |
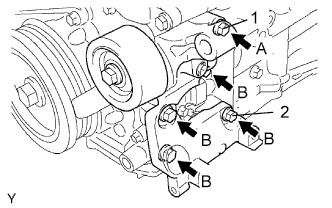 |
Temporarily install the V-ribbed belt tensioner with the 5 bolts.
Install the V-ribbed belt tensioner by tightening bolt 1 and then bolt 2.
Tighten the other bolts.
| 18. INSTALL WATER INLET |
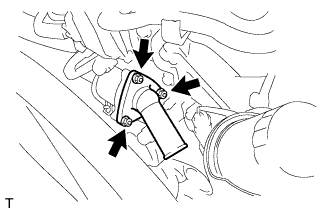 |
Install a new gasket to the water inlet housing with thermostat.
Install the water inlet housing with thermostat with the 3 nuts.
| 19. INSTALL OIL DIPSTICK GUIDE |
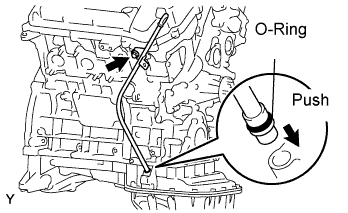 |
Install a new O-ring to the oil dipstick guide.
Apply a light coat of engine oil to the O-ring.
Push in the oil dipstick guide end into the guide hole of the oil pan.
Install the oil dipstick guide with the bolt.
Install the oil dipstick gauge.
| 20. REMOVE ENGINE FROM ENGINE STAND |
| 21. INSTALL ENGINE ASSEMBLY |
Install the engine assembly to the vehicle (Click here).