 |
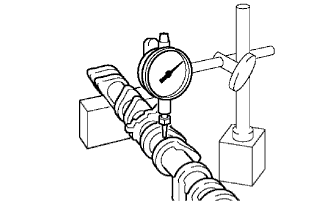
Inspect the camshaft for runout.
Place the camshaft on V-blocks.
Using a dial indicator, measure the circle runout at the center journal.
- Maximum circle runout:
- 0.06 mm (0.0024 in.)
ENGINE UNIT > INSPECTION |
| 1. INSPECT CAMSHAFT (for Bank 1) |
|
Inspect the camshaft for runout.
Place the camshaft on V-blocks.
Using a dial indicator, measure the circle runout at the center journal.
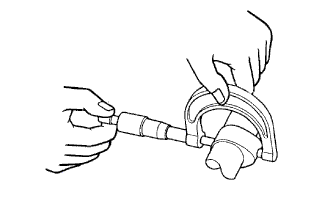 |
Inspect the cam lobes.
Using a micrometer, measure the cam lobe height.
| Camshaft | Specified Condition |
| Intake | 44.168 to 44.268 mm (1.7389 to 1.7428 in.) |
| Exhaust | 44.580 to 44.680 mm (1.7551 to 1.7591 in.) |
| Camshaft | Specified Condition |
| Intake | 44.018 mm (1.7330 in.) |
| Exhaust | 44.430 mm (1.7492 in.) |
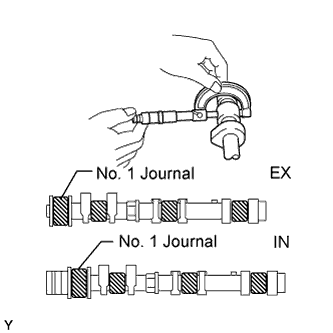 |
Inspect the camshaft journals.
Using a micrometer, measure the journal diameter.
| Journal | Specified Condition |
| No. 1 journal | 35.971 to 35.985 mm (1.4162 to 1.4167 in.) |
| Other journal | 22.959 to 22.975 mm (0.9039 to 0.9045 in.) |
| 2. INSPECT CAMSHAFT TIMING GEAR (for Bank 1) |
Fix the intake camshaft with a vise.
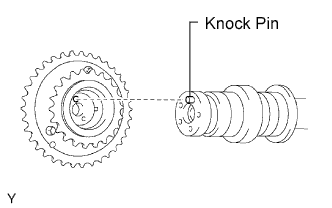 |
Align the knock pin hole in the camshaft timing gear with the knock pin of the camshaft, and install the camshaft timing gear with the bolt.
Confirm that the camshaft timing gear is locked.
 |
Release the lock pin.
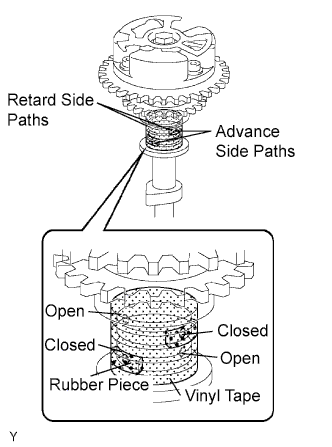
Cover the 4 oil paths of the cam journal with vinyl tape as shown in the illustration.
Break through the tape of the advance side path and the retard side path on the opposite side of the groove.
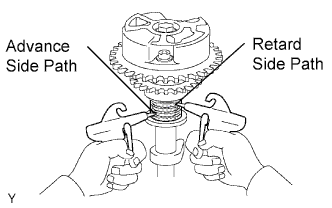 |
Using air guns, apply air pressure of approximately 200 kPa (2.0 kgf/cm2, 28 psi) into the 2 broken paths (advance side path and retard side path).
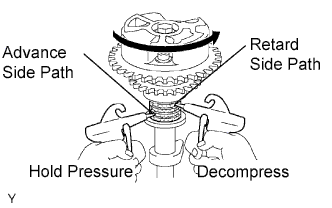 |
Confirm if the camshaft timing gear rotates in the timing advance direction when weakening the air pressure of the timing retard path.
When the camshaft timing gear comes to the most advanced position, remove the air gun from the retard side path, and then remove the air gun from the advance side path.
Check the smooth revolution.
Except the position where the lock pin meets at the most retarded angle, let the camshaft timing gear turn back and forth. Check the movable range and that there is no disturbance.
Check the lock in the most retarded position.
Confirm that the camshaft timing gear is locked at the most retarded position.
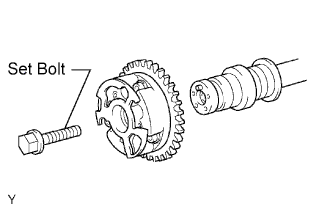 |
Remove the set bolt and camshaft timing gear.
| 3. INSPECT CAMSHAFT (for Bank 2) |
|
Inspect the camshaft for runout.
Place the camshaft on V-blocks.
Using a dial indicator, measure the circle runout at the center journal.
|
Inspect the cam lobes.
Using a micrometer, measure the cam lobe height.
| Camshaft | Specified Condition |
| Intake | 44.168 to 44.268 mm (1.7389 to 1.7428 in.) |
| Exhaust | 44.580 to 44.680 mm (1.7551 to 1.7591 in.) |
| Camshaft | Specified Condition |
| Intake | 44.018 mm (1.7330 in.) |
| Exhaust | 44.430 mm (1.7492 in.) |
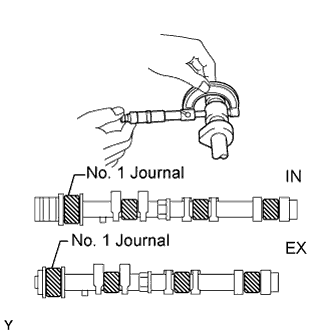 |
Inspect the camshaft journals.
Using a micrometer, measure the journal diameter.
| Journal | Specified Condition |
| No. 1 journal | 35.971 to 35.985 mm (1.4162 to 1.4167 in.) |
| Other journal | 22.959 to 22.975 mm (0.9039 to 0.9045 in.) |
| 4. INSPECT CAMSHAFT TIMING GEAR (for Bank 2) |
Fix the intake camshaft with a vise.
|
Align the knock pin hole in the camshaft timing gear with the knock pin of the camshaft, and install the camshaft timing gear with the bolt.
Confirm that the camshaft timing gear is locked.
|
Release the lock pin.
Cover the 4 oil paths of the cam journal with vinyl tape as shown in the illustration.
Break through the tape of the advance side path and the retard side path on the opposite side of the groove.
|
Using air guns, apply air pressure of approximately 200 kPa (2.0 kgf/cm2, 28 psi) into the 2 broken paths (advance side path and retard side path).
|
Confirm if the camshaft timing gear rotates in the timing advance direction when weakening the air pressure of the timing retard path.
When the camshaft timing gear comes to the most advanced position, remove the air gun from the retard side path, and then remove the air gun from the advance side path.
Check the smooth revolution.
Except the position where the lock pin meets at the most retarded angle, let the camshaft timing gear turn back and forth. Check the movable range and that there is no disturbance.
Check the lock in the most retarded position.
Confirm that the camshaft timing gear is locked at the most retarded position.
|
Remove the set bolt and camshaft timing gear.
| 5. INSPECT CYLINDER HEAD SET BOLT |
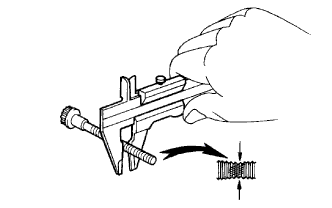 |
Using a vernier caliper, measure the thread outside diameter of the bolt.
| 6. INSPECT CHAIN |
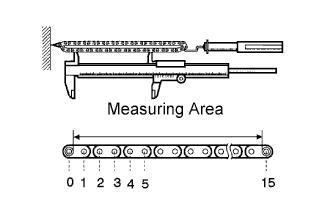 |
Using a spring scale, pull the chain with a force of 147 N (15.0 kgf, 33.1 lbf). Using a vernier caliper, measure the length of 15 links of the chain.
| 7. INSPECT NO. 2 CHAIN |
|
Using a spring scale, pull the chain with a force of 147 N (15.0 kgf, 33.1 lbf). Using a vernier caliper, measure the length of 15 links of the chain.
| 8. INSPECT CAMSHAFT TIMING GEAR ASSEMBLY |
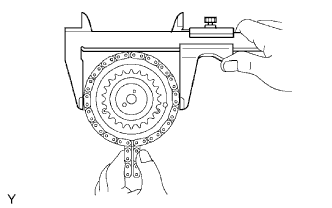 |
Wrap the No. 1 chain around the larger gear of the camshaft timing gear.
Using a vernier caliper, measure the timing gear with the chain.
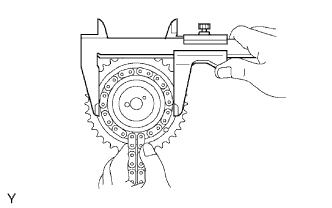 |
Wrap the No. 2 chain around the smaller gear of the camshaft timing gear.
Using a vernier caliper, measure the timing gear with the chain.
| 9. INSPECT CAMSHAFT TIMING SPROCKET |
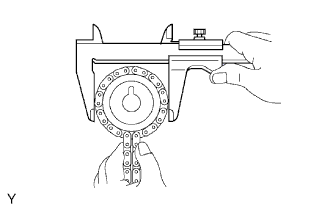 |
Wrap the No. 2 chain around the camshaft timing gear.
Using a vernier caliper, measure the camshaft timing gear diameter with the chain.
| 10. INSPECT CRANKSHAFT TIMING SPROCKET |
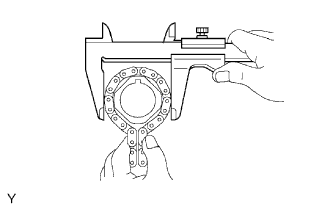 |
Wrap the No. 1 chain around the crankshaft timing gear.
Using a vernier caliper, measure the crankshaft timing gear diameter with the chain.
| 11. INSPECT NO. 1 IDLE GEAR |
|
Wrap the No. 1 chain around the idle gear.
Using a vernier caliper, measure the idle gear with the chain.
| 12. INSPECT IDLE GEAR SHAFT OIL CLEARANCE |
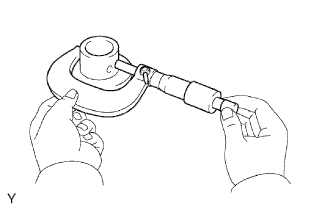 |
Using a micrometer, measure the idle gear shaft diameter.
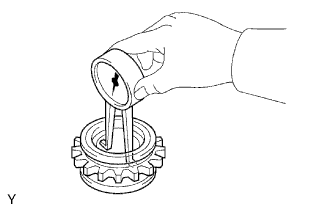 |
Using a caliper gauge, measure the inside diameter of the idle gear.
Subtract the idle gear shaft diameter measurement from the idle gear inside diameter measurement.
| 13. INSPECT NO. 1 CHAIN TENSIONER |
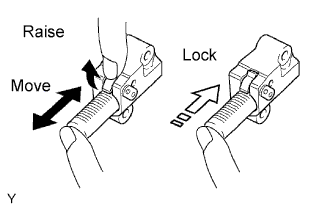 |
Check that the plunger moves smoothly when the ratchet pawl is raised with your finger.
Release the ratchet pawl and check that the plunger is locked in place by the ratchet pawl and does not move when pushed with your finger.
| 14. INSPECT NO. 2 CHAIN TENSIONER |
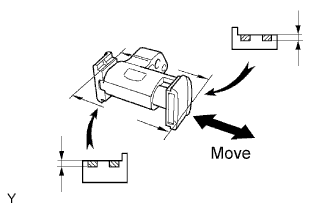 |
Check that the plunger moves smoothly.
Measure the worn depth of the chain tensioner.
| 15. INSPECT NO. 3 CHAIN TENSIONER |
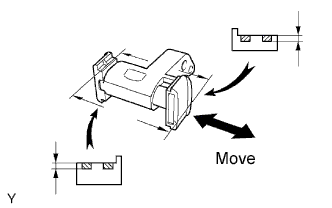 |
Check that the plunger moves smoothly.
Measure the worn depth of the chain tensioner.
| 16. INSPECT CHAIN TENSIONER SLIPPER |
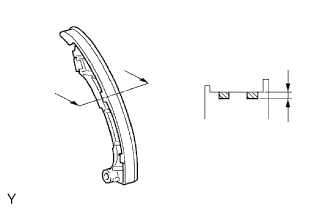 |
Measure the worn depth of the chain tensioner slipper.
| 17. INSPECT NO. 1 CHAIN VIBRATION DAMPER |
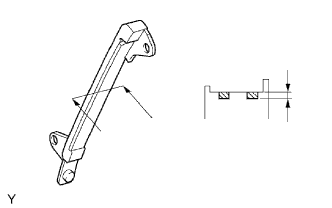 |
Measure the worn depth of the No. 1 chain vibration damper.
| 18. INSPECT NO. 2 CHAIN VIBRATION DAMPER |
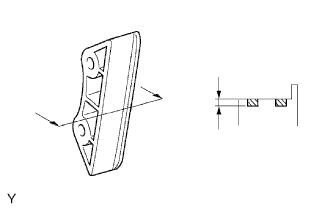 |
Measure the worn depth of the No. 2 chain vibration damper.
| 19. CLEAN CYLINDER HEAD |
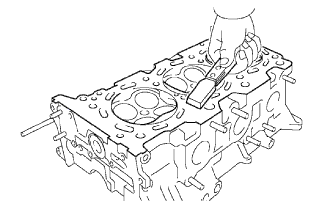 |
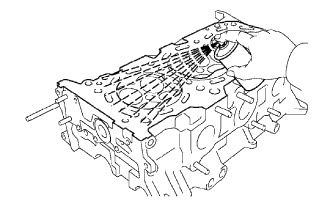
Using a gasket scraper, remove all the gasket material from the cylinder block contact surface.
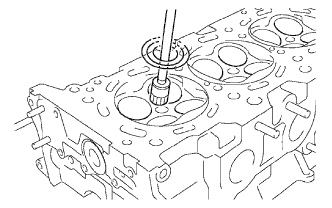 |
Using a wire brush, remove all the carbon from the combustion chambers.
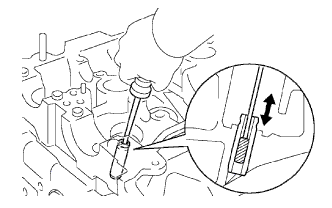 |
Using a valve guide bushing brush and solvent, clean all the valve guide bushes.
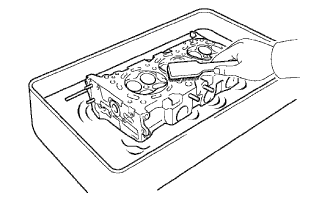 |
Using a soft brush and solvent, thoroughly clean the cylinder head.
| 20. INSPECT CYLINDER HEAD |
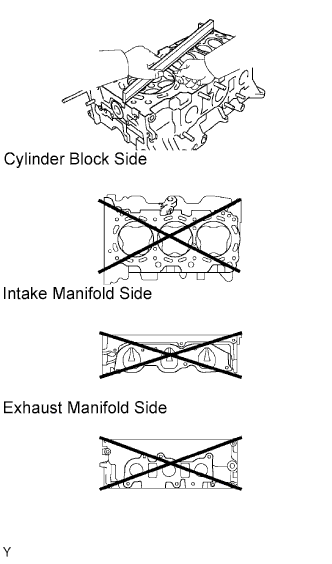 |
Inspect the flatness.
Using a precision straightedge and feeler gauge, measure the warpage of the contact surfaces of the cylinder block and manifolds.
 |
Inspect for cracks.
Using a dye penetrant, check the combustion chamber, intake ports, exhaust ports and cylinder block surface for cracks.
If cracked, replace the cylinder head.
| 21. CLEAN VALVE |
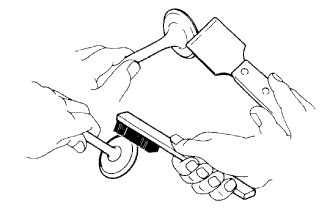 |
Using a gasket scraper, chip off any carbon from the valve head.
Using a wire brush, thoroughly clean the valve.
| 22. INSPECT VALVE |
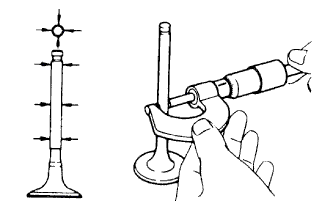 |
Inspect the valve stem diameter.
Using a micrometer, measure the diameter of the valve stem.
| Item | Specified Condition |
| Intake | 5.470 to 5.485 mm (0.2154 to 0.2159 in.) |
| Exhaust | 5.465 to 5.480 mm (0.2152 to 0.2158 in.) |
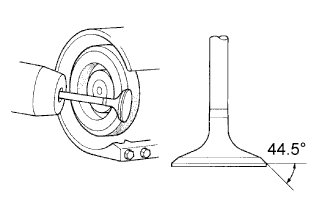 |
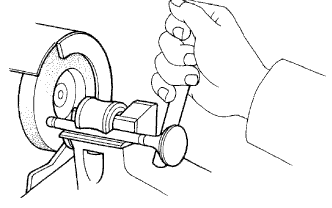
Inspect the valve face angle.
Grind the valve enough to remove pits and carbon.
Check that the valve is ground to the correct valve face angle.
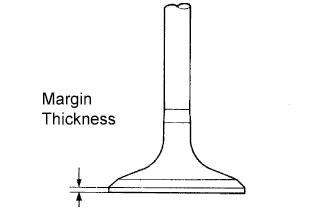 |
Inspect the valve head margin thickness.
Using a vernier caliper, check the valve head margin thickness.
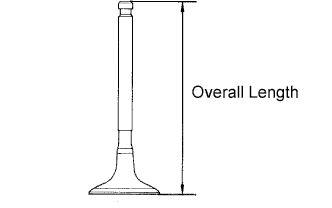 |
Inspect the overall length.
Using a vernier caliper, check the overall length.
| Item | Specified Condition |
| Intake | 106.95 mm (4.2106 in.) |
| Exhaust | 105.80 mm (4.1654 in.) |
| Item | Specified Condition |
| Intake | 106.40 mm (4.1890 in.) |
| Exhaust | 105.30 mm (4.1457 in.) |
 |
Inspect the valve stem tip.
Check the surface of the valve stem tip for wear.
If the valve stem tip is worn, resurface the tip with a grinder or replace the valve.
| 23. CLEAN VALVE SEAT |
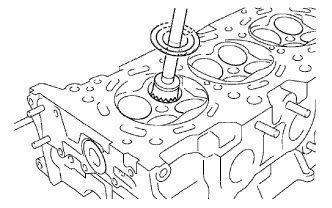 |
Using a 45° carbide cutter, resurface the valve seats.
Remove only enough metal to clean the valve seats.
| 24. INSPECT VALVE SEAT |
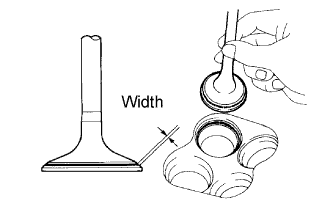 |
Apply a light coat of Prussian blue (or white lead) to the valve face.
Lightly press the valve against the valve seat.
Check the valve face and seat according to the following procedure.
If blue appears 360° around the face, the valve is concentric.
If not, replace the valve.
If blue appears 360° around the valve seat, the guide and face are concentric.
If not, resurface the valve seat.
Check that the seat contact is in the middle of the valve face with the width below.
| 25. INSPECT COMPRESSION SPRING |
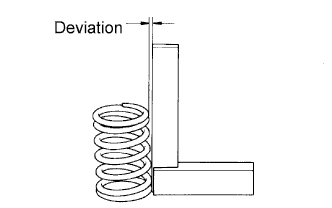 |
Inspect for deviation.
Using a steel square, measure the deviation of the inner compression spring.
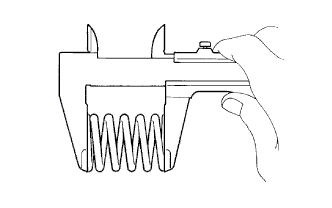 |
Inspect the free length.
Using a vernier caliper, measure the free length of the inner compression spring.
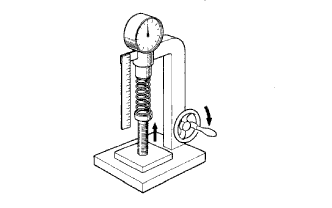 |
Inspect the tension.
Using a spring tester, measure the tension of the inner compression spring at the specified installed length.
| 26. INSPECT VALVE GUIDE BUSH OIL CLEARANCE |
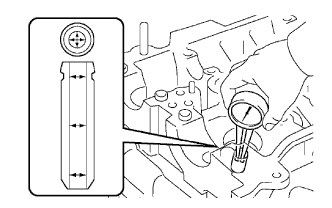 |
Using a caliper gauge, measure the inside diameter of the valve guide bush.
Subtract the valve stem diameter measurement (see "INSPECT VALVE: Inspect valve stem diameter" procedures above) from the valve guide bush inside diameter measurement.
| Item | Specified Condition |
| Intake | 0.025 to 0.060 mm (0.0010 to 0.0024 in.) |
| Exhaust | 0.030 to 0.065 mm (0.0012 to 0.0026 in.) |
| Item | Specified Condition |
| Intake | 0.08 mm (0.0031 in.) |
| Exhaust | 0.10 mm (0.0039 in.) |
| 27. INSPECT VALVE LIFTER |
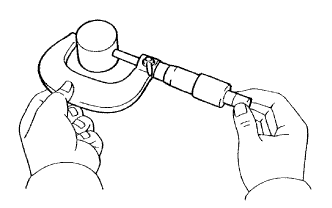 |
Using a micrometer, measure the valve lifter diameter.
| 28. INSPECT VALVE LIFTER OIL CLEARANCE |
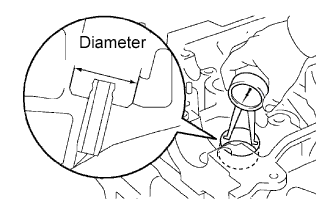 |
Using a caliper gauge, measure the lifter bore diameter of the cylinder head.
Subtract the valve lifter diameter measurement (see "INSPECT VALVE LIFTER" procedures above) from the lifter bore diameter measurement.
| 29. INSPECT CAMSHAFT OIL CLEARANCE |
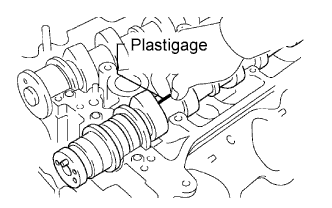 |
Clean the camshaft bearing caps, camshaft bearings and camshaft journals.
Install the camshaft bearing.
Place the camshaft on the cylinder head.
Lay a strip of Plastigage across each of the camshaft journals.
Install the camshaft bearing caps .
Remove the camshaft bearing caps.
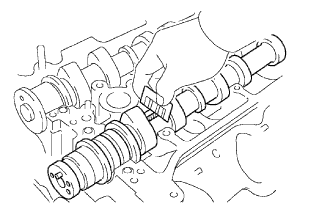 |
Measure the Plastigage at its widest point.
| Item | Specified Condition |
| No. 1 (Intake) | 0.008 to 0.038 mm (0.0003 to 0.0015 in.) |
| No. 1 (Exhaust) | 0.040 to 0.079 mm (0.0016 to 0.0031 in.) |
| Others | 0.025 to 0.062 mm (0.0010 to 0.0024 in.) |
| Item | Specified Condition |
| No. 1 | 0.040 to 0.079 mm (0.0016 to 0.0031 in.) |
| Others | 0.025 to 0.062 mm (0.0010 to 0.0024 in.) |
| Item | Specified Condition |
| No. 1 | 0.07 mm (0.0028 in.) |
| Others | 0.10 mm (0.0039 in.) |
| Item | Specified Condition |
| Cylinder head journal bore diameter | 40.009 to 40.017 mm (1.5752 to 1.5755 in.) |
| Camshaft bearing center wall thickness (Mark "2") | 2.004 to 2.008 mm (0.0789 to 0.0791 in.) |
| Camshaft journal diameter | 35.971 to 35.985 mm (1.4165 to 1.4167 in.) |
Remove the Plastigage completely.
Remove the camshafts.
Remove the camshaft bearing.
| 30. INSPECT CYLINDER BLOCK FOR FLATNESS |
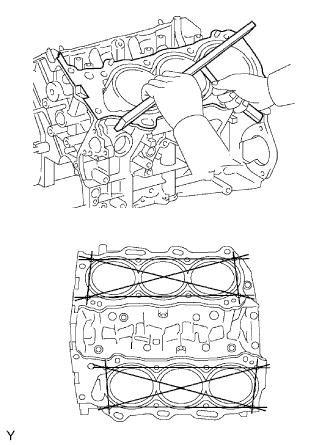 |
Using a precision straightedge and feeler gauge, measure the surface contacting the cylinder head gasket for warpage.
| 31. INSPECT CYLINDER BORE |
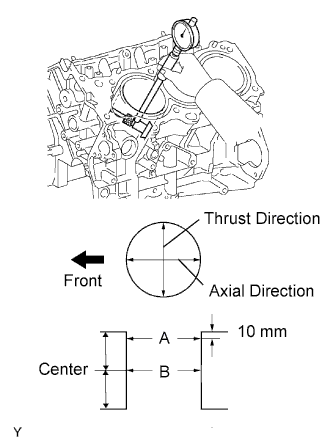 |
Using a cylinder gauge, measure the cylinder bore diameter at positions A and B in the thrust and axial directions.
| 32. INSPECT PISTON |
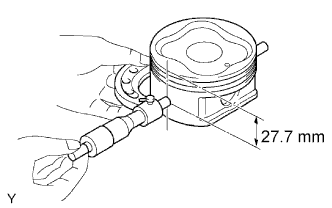 |
Using a micrometer, measure the piston diameter at right angles to the piston pin center line, 27.7 mm (1.091 in.) from the piston head.
| 33. INSPECT PISTON OIL CLEARANCE |
Subtract the piston diameter measurement from the cylinder bore diameter measurement.
| 34. INSPECT CONNECTING ROD |
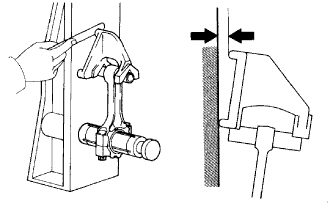 |
Using a rod aligner and feeler gauge, check the connecting rod alignment.
Check for out-of-alignment.
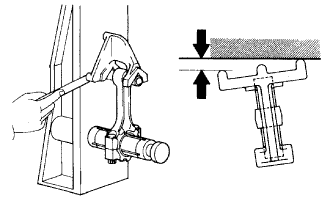 |
Check for twist.
| 35. INSPECT PISTON PIN OIL CLEARANCE |
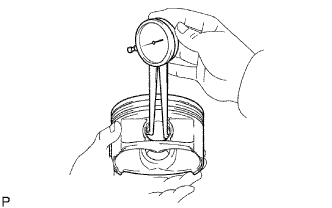 |
Using a caliper gauge, measure the inside diameter of the piston pin hole.
| Mark | Specified Condition |
| A | 22.001 to 22.004 mm (0.8662 to 0.8663 in.) |
| B | 22.005 to 22.007 mm (0.8663 to 0.8664 in.) |
| C | 22.008 to 22.010 mm (0.8665 to 0.8665 in.) |
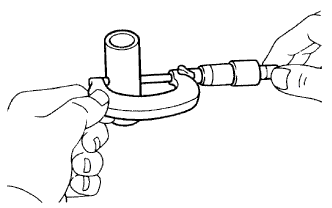 |
Using a micrometer, measure the piston pin diameter.
| Mark | Specified Condition |
| A | 21.997 to 22.000 mm (0.8660 to 0.8661 in.) |
| B | 22.001 to 22.003 mm (0.8661 to 0.8663 in.) |
| C | 22.004 to 22.006 mm (0.8663 to 0.8664 in.) |
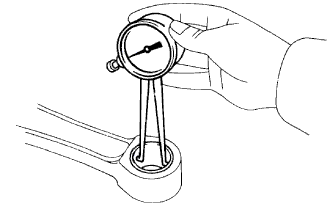 |
Using a caliper gauge, measure the inside diameter of the connecting rod bush.
| Mark | Specified Condition |
| A | 22.005 to 22.008 mm (0.8663 to 0.8665 in.) |
| B | 22.009 to 22.011 mm (0.8665 to 0.8666 in.) |
| C | 22.012 to 22.014 mm (0.8666 to 0.8667 in.) |
Subtract the piston pin diameter measurement from the piston pin hole diameter measurement.
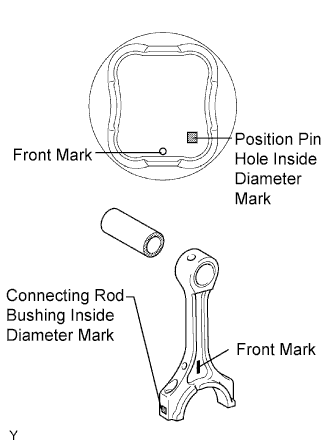 |
Subtract the piston pin diameter measurement from the bush inside diameter measurement.
| 36. INSPECT PISTON RING GROOVE CLEARANCE |
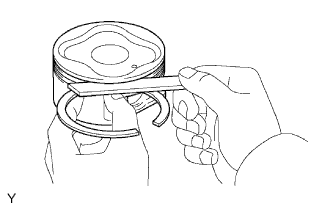 |
Using a feeler gauge, measure the clearance between a new piston ring and the wall of the ring groove.
| Ring | Groove Clearance |
| No. 1 | 0.02 to 0.07 mm (0.0008 to 0.0028 in.) |
| No. 2 | 0.02 to 0.06 mm (0.0008 to 0.0024 in.) |
| Oil | 0.07 to 0.15 mm (0.0028 to 0.0060 in.) |
| 37. INSPECT PISTON RING END GAP |
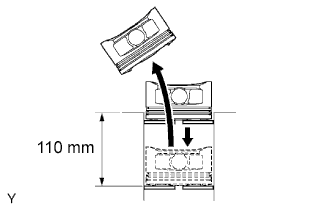 |
Using a piston, push the piston ring a little beyond the bottom of the ring travel, 110 mm (4.33 in.) from the top of the cylinder block.
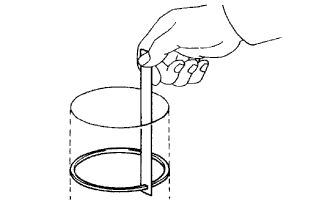 |
Using a feeler gauge, measure the end gap.
| Ring | End Gap |
| No. 1 | 0.22 to 0.32 mm (0.00866 to 0.0126 in.) |
| No. 2 | 0.35 to 0.45 mm (0.0138 to 0.0177 in.) |
| Oil (side rail) | 0.10 to 0.40 mm (0.0039 to 0.0157 in.) |
| Ring | End Gap |
| No. 1 | 1.0 mm (0.039 in.) |
| No. 2 | 1.1 mm (0.043 in.) |
| Oil (side rail) | 1.0 mm (0.039 in.) |
| 38. INSPECT CONNECTING ROD BOLT |
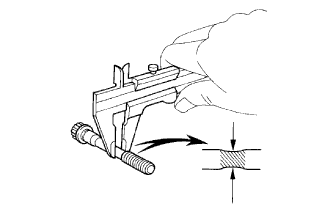 |
Using a vernier caliper, measure the tension portion diameter of the bolt.
| 39. INSPECT CRANKSHAFT BEARING CAP BOLT |
|
Using a vernier caliper, measure the tension portion diameter of the bolt.
| 40. INSPECT CRANKSHAFT |
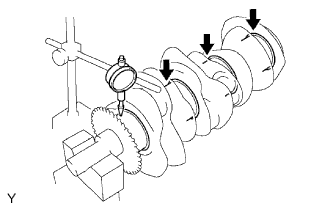 |
Using a dial indicator and V-blocks, measure the circle runout, as shown in the illustration.
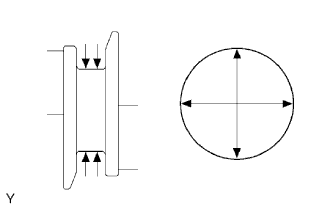 |
Using a micrometer, measure the diameter of each main journal.
Check each main journal for taper and out-of-round as shown.
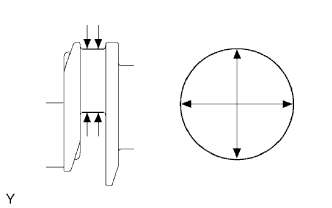 |
Using a micrometer, measure the diameter of each crank pin.
Check each crank pin for taper and out-of-round as shown.
| 41. INSPECT NO. 1 OIL NOZZLE SUB-ASSEMBLY |
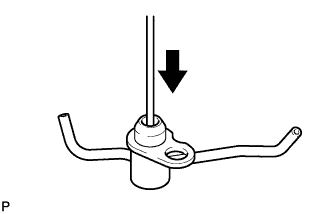 |
Push the check valve with a pin to check if it is stuck. If stuck, replace the oil nozzle.
Push the check valve with a pin to check if it moves smoothly.
If it does not move smoothly, clean or replace the oil nozzle.
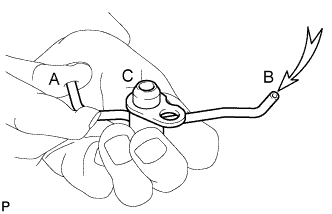 |
While covering A, blow air into B. Check that air does not leak through C. Perform the check again while covering B and blowing air into A.
If air leaks, clean or replace the oil nozzle.
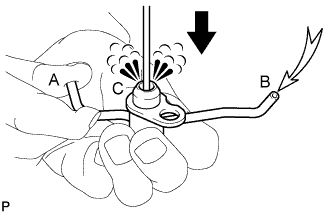 |
Push the check valve while covering A, and blow air into B. Check that air passes through C. Perform the check again while covering B, pushing the check valve and blowing air into A.
If air does not pass through C, clean or replace the oil nozzle.