Home › BODY ELECTRICAL › LIGHTING › SIDE TURN SIGNAL LIGHT ASSEMBLY

SIDE TURN SIGNAL LIGHT ASSEMBLY > REMOVAL

for Preparation Click here


HINT:
  1. Use the same procedure for the RH and LH sides.
  2. The procedure listed below is for the LH side.


1. REMOVE OUTER REAR VIEW MIRROR ASSEMBLY LH
(Click here)


2. REMOVE OUTER MIRROR LH


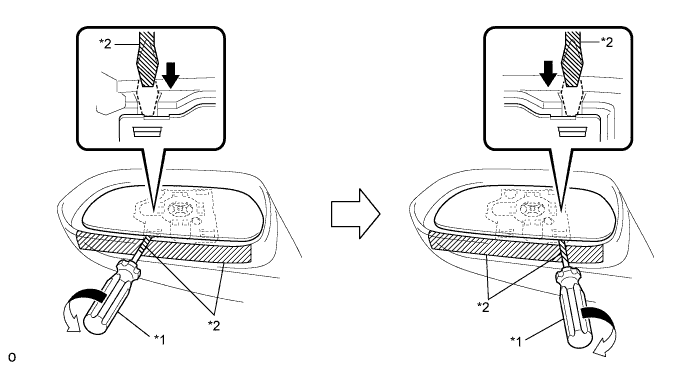
  1. Using a screwdriver, detach the 2 claws as shown in the illustration.

    B278386E01


    Text in Illustration 
    *1
    Screwdriver
    *2
    Protective Tape

    NOTICE:
    Do not pull the outer mirror LH with excessive force. Doing so may cause the actuator to come off or break the mirror surface.

    HINT:
    Apply protective tape to the mirror body and screwdriver tip.


    B278387
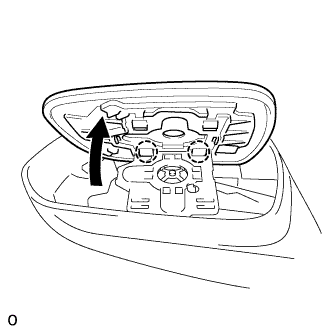
  1. Detach the 2 claws at the upper part of the outer mirror.

  1. Remove the outer mirror LH.


3. REMOVE OUTER MIRROR COVER LH


    B278447E01
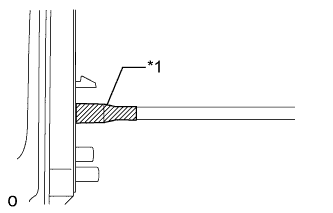
  1. Remove the tape.
    Text in Illustration 
    *1
    Tape


    B278379
  1. Remove the screw, detach the 5 claws and remove the rubber base.

    HINT:
    It is not necessary to completely remove the rubber base. Slightly move the rubber base so that the outer mirror cover LH can be removed in a later step.


    B278380
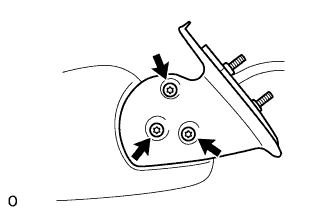
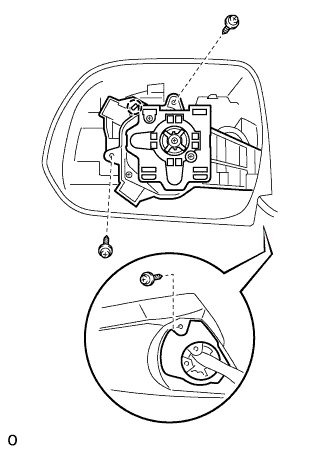
  1. Using a T25 "TORX" socket wrench, remove the 3 screws.


    B278381
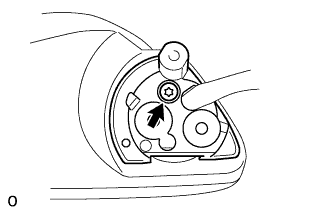
  1. Using a T25 "TORX" socket wrench, remove the screw.


    B278382
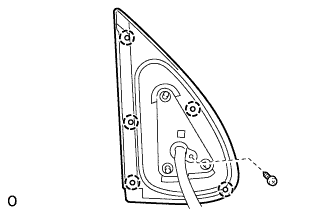
  1. Remove the 3 screws.


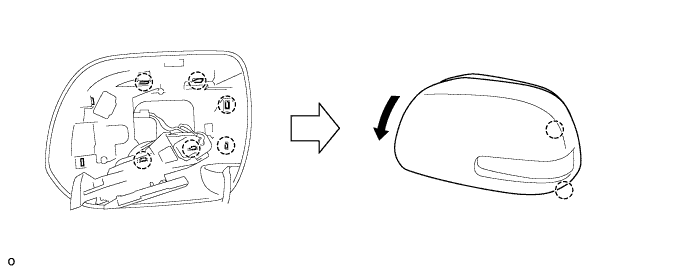
  1. Detach the 6 claws.


    B278383E01

  1. Detach the 2 claws and remove the outer mirror cover LH as shown in the illustration.


4. REMOVE SIDE TURN SIGNAL LIGHT ASSEMBLY LH


    E225351
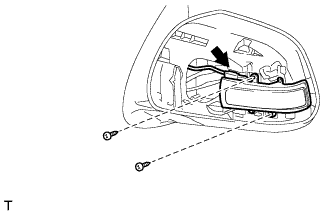
  1. Remove the 2 screws.

  1. Disconnect the connector and side turn signal light assembly LH.