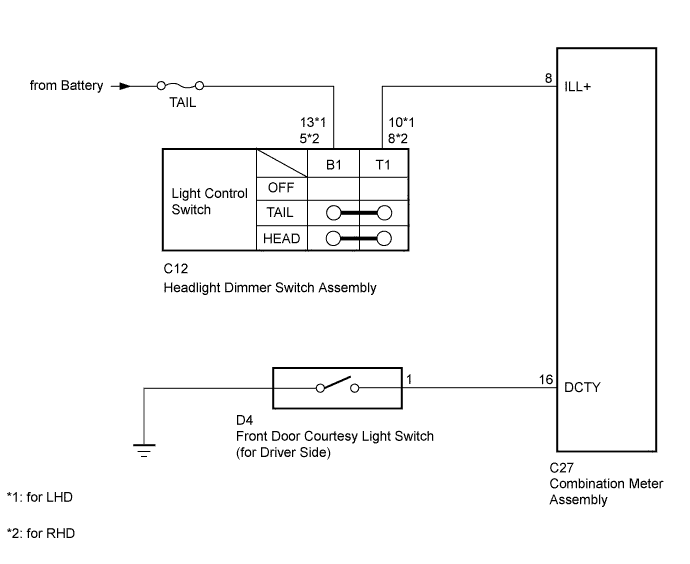
METER / GAUGE SYSTEM > Warning Buzzer does not Sound |
| 1.INSPECT HEADLIGHT DIMMER SWITCH ASSEMBLY (LIGHT CONTROL SWITCH) |
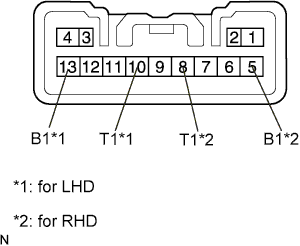 |
Remove the headlight dimmer switch assembly.
Measure the resistance according to the value(s) in the table below.
| Tester Connection | Switch Condition | Specified Condition |
| 13 (B1) - 10 (T1) | HEAD | Below 1 Ω |
| 13 (B1) - 10 (T1) | TAIL | Below 1 Ω |
| 13 (B1) - 10 (T1) | OFF | 10 kΩ or higher |
| Tester Connection | Switch Condition | Specified Condition |
| 5 (B1) - 8 (T1) | HEAD | Below 1 Ω |
| 5 (B1) - 8 (T1) | TAIL | Below 1 Ω |
| 5 (B1) - 8 (T1) | OFF | 10 kΩ or higher |
|
| ||||
| OK | |
 |
| 2.CHECK HARNESS AND CONNECTOR (HEADLIGHT DIMMER SWITCH - COMBINATION METER AND BATTERY) |
Disconnect the C12 headlight dimmer switch connector.
Disconnect the C27 combination meter assembly connector.
Measure the voltage according to the value(s) in the table below.
| Tester Connection | Condition | Specified Condition |
| C12-13 (B1) - Body ground | Always | 11 to 14 V |
| Tester Connection | Condition | Specified Condition |
| C12-5 (B1) - Body ground | Always | 11 to 14 V |
Measure the resistance according to the value(s) in the table below.
| Tester Connection | Condition | Specified Condition |
| C12-10 (T1) - C27-8 (ILL+) | Always | Below 1 Ω |
| C12-10 (T1) - Body ground | Always | 10 kΩ or higher |
| Tester Connection | Condition | Specified Condition |
| C12-8 (T1) - C27-8 (ILL+) | Always | Below 1 Ω |
| C12-8 (T1) - Body ground | Always | 10 kΩ or higher |
|
| ||||
| OK | |
|
| 3.INSPECT FRONT DOOR COURTESY LIGHT SWITCH ASSEMBLY (for Driver Side) |
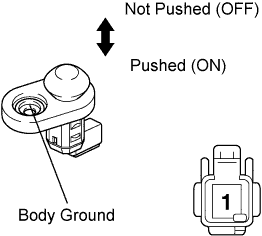 |
Remove the front door courtesy light switch assembly (for Driver Side).
Measure the resistance according to the value(s) in the table below.
| Tester Connection | Switch Condition | Specified Condition |
| 1 - Body ground | Not pushed (OFF) | Below 1 Ω |
| 1 - Body ground | Pushed (ON) | 10 kΩ or higher |
|
| ||||
| OK | |
|
| 4.CHECK HARNESS AND CONNECTOR (FRONT DOOR COURTESY LIGHT SWITCH - COMBINATION METER) |
Disconnect the D4 front door courtesy light switch assembly connector (for Driver Side).
Disconnect the C27 combination meter assembly connector.
Measure the resistance according to the value(s) in the table below.
| Tester Connection | Condition | Specified Condition |
| D4-1 - C27-16 (DCTY) | Always | Below 1 Ω |
| D4-1 - Body ground | Always | 10 kΩ or higher |
|
| ||||
| OK | ||
 | ||
| ||
