FRONT SEAT OUTER BELT ASSEMBLY > REMOVAL |
| 1. DISCONNECT CABLE FROM NEGATIVE BATTERY TERMINAL |
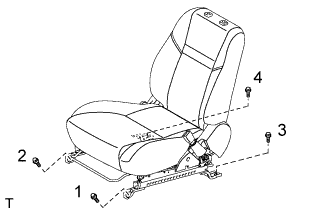
| 2. REMOVE FRONT SEAT ASSEMBLY RH |
|
Lift up the seat track adjusting handle and move the seat to the rearmost position.
Remove the 2 bolts on the front side of the seat.
Lift up the seat track adjusting handle and move the seat to the foremost position.
Remove the 2 bolts on the rear side of the seat.
Lift up the seat track adjusting handle and move the seat to the center position. Also, operate the reclining adjuster release handle and move the seatback to the upright position.
w/ Seat belt warning, w/ occupant detection sensor:
Disconnect the connector under the seat.
Remove the seat.
| 3. REMOVE FRONT DOOR SCUFF PLATE RH |
| 4. REMOVE FRONT DOOR OPENING TRIM WEATHERSTRIP RH |
| 5. REMOVE REAR DOOR SCUFF PLATE RH |
| 6. REMOVE REAR DOOR OPENING TRIM WEATHERSTRIP RH |
| 7. REMOVE CENTER PILLAR GARNISH LOWER RH |
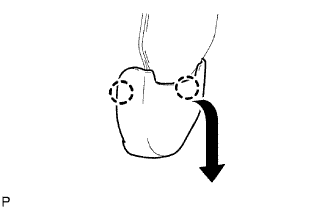 |
Detach the 2 claws and remove the lap belt outer anchor cover.
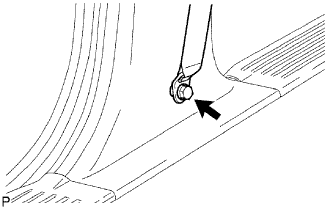 |
Remove the anchor's built-in bolt from the pillar and disconnect the outer belt.
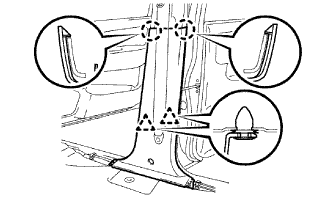 |
Using a screwdriver, detach the 2 claws.
Using a clip remover, detach the 2 clips and remove the garnish.
| 8. REMOVE FRONT SEAT OUTER BELT ASSEMBLY RH |
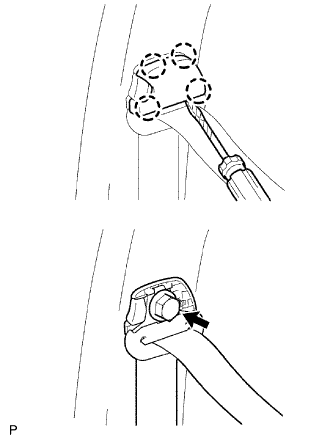 |
Using a screwdriver, detach the 4 claws and remove the seat belt anchor cover cap.
Remove the shoulder anchor's bolt and disconnect the outer belt.
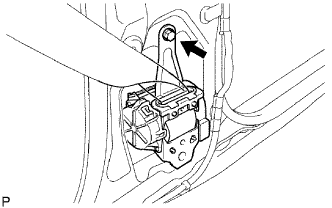 |
w/o Pretensioner:
Remove the bolt and outer belt.
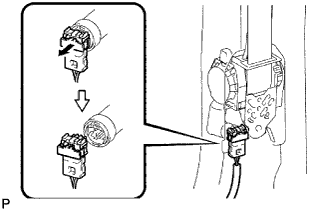 |
w/ Pretensioner:
Disconnect the pretensioner connector as shown in the illustration.
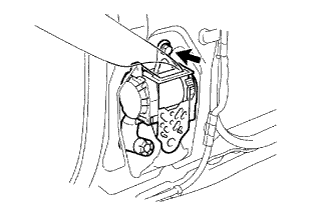 |
Remove the bolt and outer belt.
| 9. REMOVE CENTER PILLAR GARNISH RH |
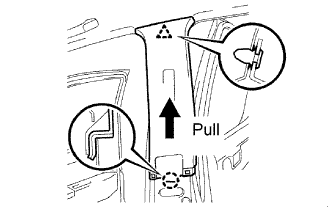 |
Using a clip remover, detach the clip.
Pull the garnish in the direction indicated by the arrow in the illustration to detach the claw. Then remove the garnish.
| 10. REMOVE SHOULDER BELT ANCHORAGE PLATE COVER |
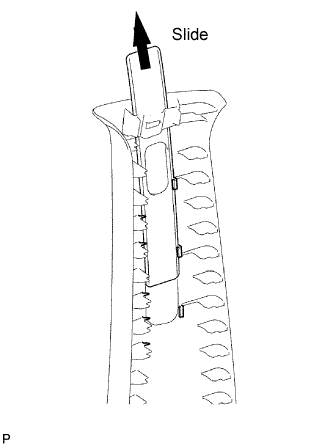 |
Slide the plate cover upward and remove it from the garnish.
| 11. REMOVE FRONT SHOULDER BELT ANCHOR ADJUSTER ASSEMBLY |
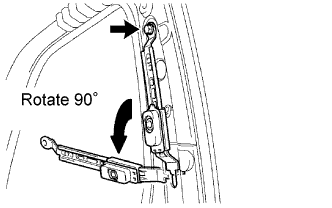 |
Remove the bolt.
Rotate the adjuster approximately 90°, and then pull and remove it.