 |
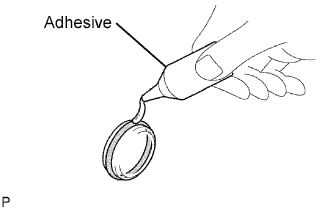
Apply adhesive to a new tight plug.
- Adhesive:
- Toyota Genuine Adhesive 1324, Three Bond 1324 or equivalent
- NOTICE:
- Do not start the engine for 1 hour after the installation.
ENGINE UNIT > REASSEMBLY |
| 1. INSTALL TIGHT PLUG |
|
Apply adhesive to a new tight plug.
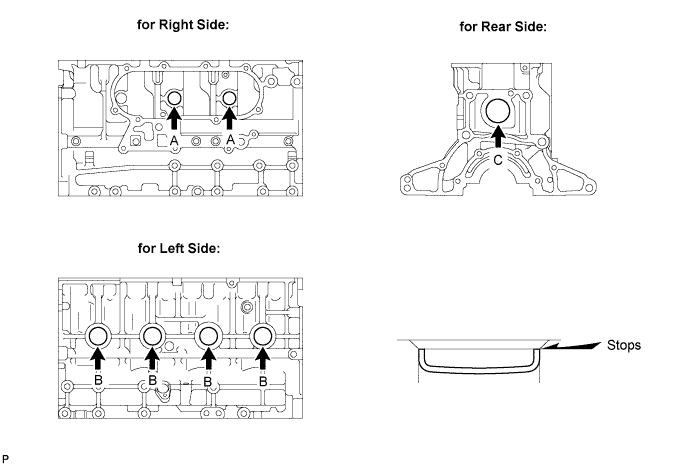
Using SST and a hammer, tap in the 2 tight plugs A.
Using SST and a hammer, tap in the 4 tight plugs B.
Using SST and a hammer, tap in tight plug C.
| 2. INSTALL STUD BOLT |
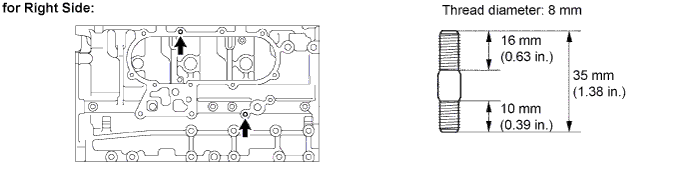
Install the stud bolts as shown in the illustration.
| 3. INSTALL STRAIGHT PIN |
Install the straight pins as shown in the illustration.
| 4. INSTALL RING PIN |
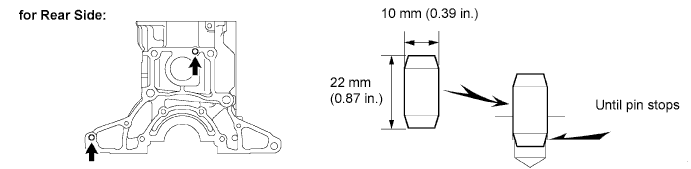
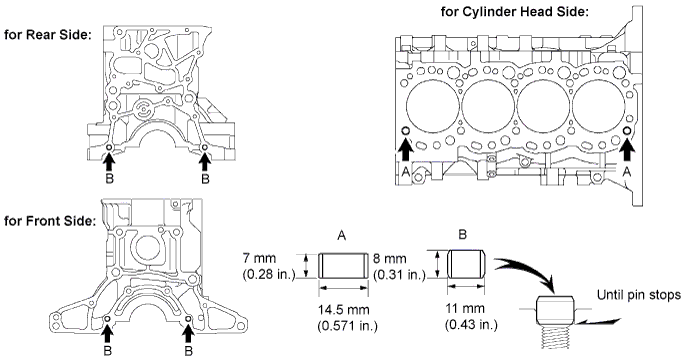
Install the ring pins as shown in the illustration.
| 5. INSTALL NO. 1 TAPER SCREW PLUG |
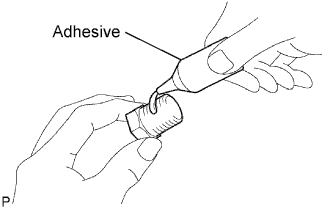 |
Apply adhesive to 2 or 3 threads.
Install the screw plug.
| 6. INSTALL CYLINDER BLOCK WATER DRAIN COCK SUB-ASSEMBLY |
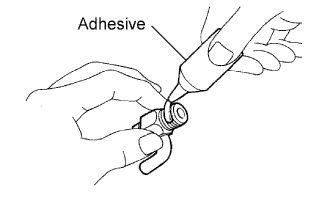 |
Apply adhesive to 2 or 3 threads.
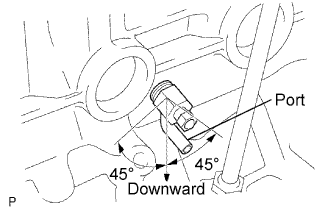 |
Install the water drain cock.
| 7. INSTALL CYLINDER BLOCK OIL ORIFICE |
Using a 6 mm hexagon wrench, install the oil orifice.
| 8. INSTALL NO. 1 OIL NOZZLE SUB-ASSEMBLY |
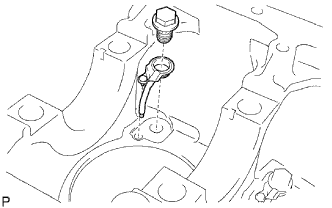 |
Align the pin of the oil nozzle with the pin hole of the cylinder block.
Install the 4 oil nozzles with the 4 check valves.
| 9. INSTALL PISTON SUB-ASSEMBLY |
Assemble the piston and connecting rod.
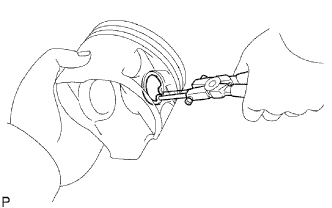 |
Using snap ring pliers, install a new snap ring on one side of the piston pin hole.
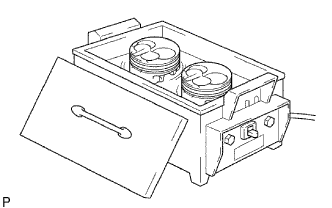 |
Gradually heat the piston to approximately 60°C (140°F).
Coat the piston pin with engine oil.
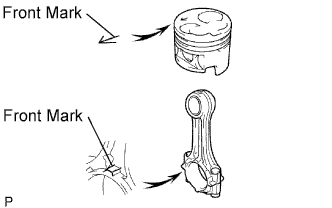 |
Align the front marks of the piston and connecting rod, and push in the piston pin with your thumb.
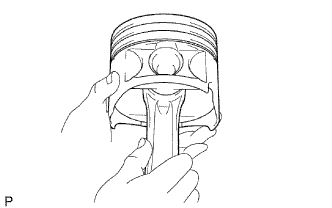 |
Check the fitting condition between the piston and piston pin. Try to move the piston back and forth on the piston pin.
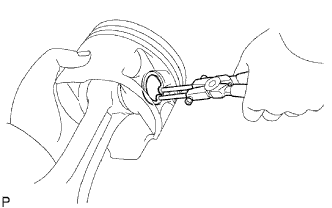 |
Using snap ring pliers, install a new snap ring on the other side of the piston pin hole.
Install the piston rings.
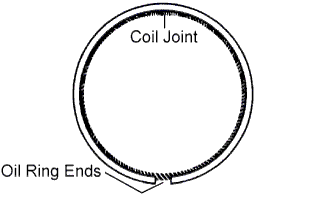 |
Install the coil and oil ring by hand.
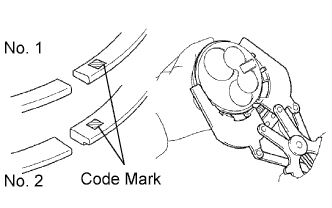 |
Using a piston ring expander, install the No. 1 and No. 2 piston rings with the code mark facing upward.
| Item | Code Mark |
| No. 1 piston ring | 1N |
| No. 2 piston ring | 2N |
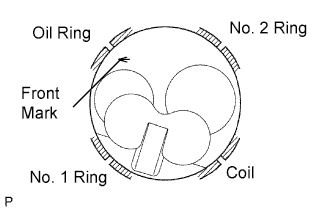 |
Position the piston rings so that the ring ends are as shown in the illustration.
| 10. INSTALL CONNECTING ROD BEARING |
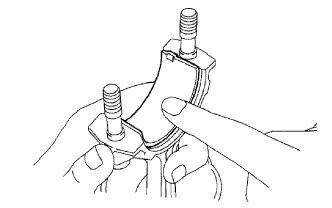 |
Align the bearing claw with the groove of the connecting rod or connecting rod cap.
Install the bearings in the connecting rod and connecting rod cap.
| 11. INSTALL CRANKSHAFT BEARING |
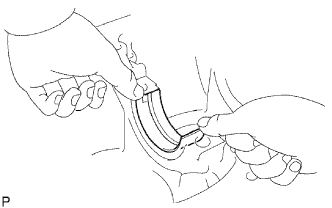 |
Align the bearing claw with the claw groove of the cylinder block, and push in the 5 upper bearings.
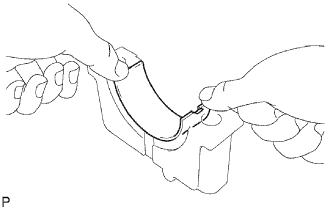 |
Align the bearing claw with the claw groove of the crankshaft bearing cap, and push in the 5 lower bearings.
| 12. INSTALL CRANKSHAFT THRUST WASHER SET |
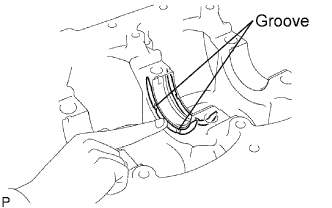 |
Install the 2 thrust washers with the oil grooves facing outward as shown in the illustration.
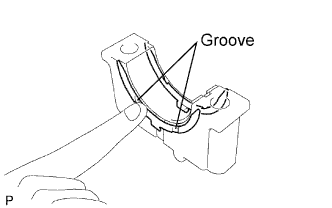 |
Install the 2 thrust washers to the No. 3 crankshaft bearing cap with the grooves facing outward as shown the illustration.
| 13. INSTALL CRANKSHAFT |
Place the crankshaft on the cylinder block.
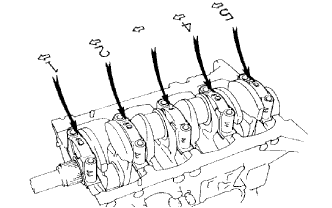 |
Install the 5 crankshaft bearing caps in their proper locations.
Install the crankshaft bearing cap bolts.
Apply a light coat of the engine oil to the threads and under the bolt heads of the crankshaft bearing caps.
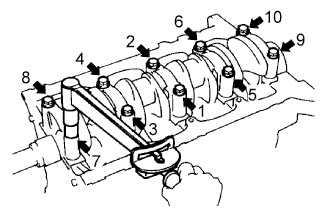 |
Install and uniformly tighten the 10 bolts of the crankshaft bearing caps, in several steps, in the sequence shown in the illustration.
Check that the crankshaft turns smoothly.
Check the crankshaft thrust clearance .
| 14. INSTALL PISTON AND CONNECTING ROD |
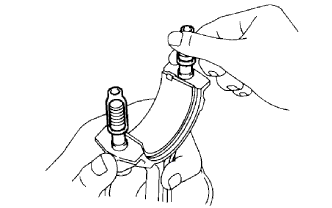 |
Cover the connecting rod bolts with a short piece of hose to protect the crankshaft and cylinder bore from damage.
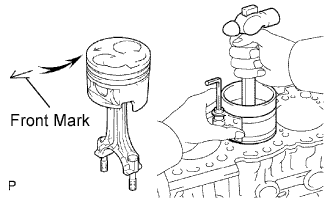 |
Using a piston ring compressor, push the correctly numbered piston and connecting rod into the cylinder with the front mark of the piston facing forward.
Place the connecting rod cap on the connecting rod.
Match the numbered connecting rod cap with the connecting rod.
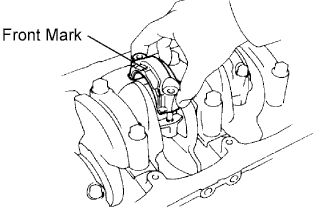 |
Install the connection rod cap with the front mark facing forward.
Install the connecting rod cap nuts.
If any connecting rod bolt is broken or deformed, replace it.
Apply a light of engine oil to the threads and under the heads of the connecting rod cap nuts.
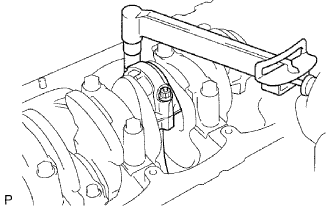 |
Install and alternately tighten the nuts of the connecting rod cap in several passes.
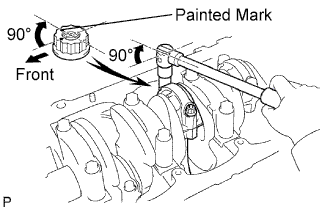 |
Mark the front of the connecting rod cap nuts with paint.
Retighten the connecting rod cap nuts 90° as shown.
Check that the painted marks are now at a 90° angle to the front.
Check that the crankshaft turns smoothly.
Check the connecting rod thrust clearance .
| 15. INSTALL ENGINE REAR OIL SEAL RETAINER |
Install a new gasket and the retainer with the 4 bolts.
| 16. INSTALL TIMING BELT CASE SUB-ASSEMBLY |
Place a new gasket on the cylinder block.
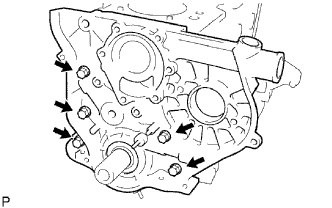 |
Install the timing belt case with the 5 bolts.
| 17. INSTALL OIL STRAINER SUB-ASSEMBLY |
Install a new gasket and oil strainer with the 2 bolts and 2 nuts.
| 18. INSTALL OIL PAN SUB-ASSEMBLY |
Using a gasket scraper, remove all the old seal packing material from the installation surface of the oil pan and cylinder block.
Remove any old seal packing material and do not drop any oil on the contact surfaces of the oil pan and cylinder block.
Apply seal packing to the oil pan as shown in the illustration.
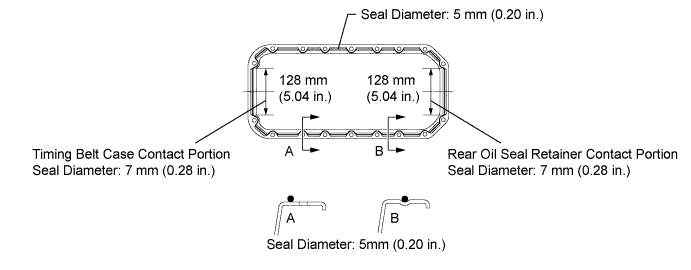
Install the oil pan with the 16 bolts and 2 nuts. Uniformly tighten the bolts and nuts in several steps.
| 19. INSTALL CRANKSHAFT TIMING PULLEY |
Align the pulley set key with the key groove of the timing pulley.
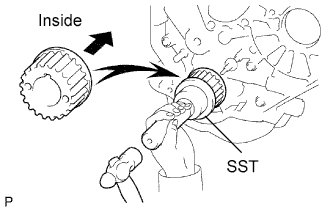 |
Using SST and a hammer, tap in the timing pulley, facing the flange side inward.
| 20. INSTALL WATER PUMP ASSEMBLY |
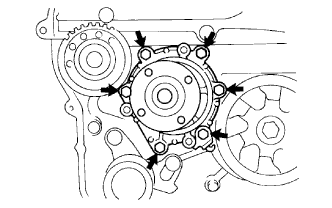 |
Install a new gasket, the water pump and tension spring bracket with the 6 bolts.
| 21. INSTALL NO. 2 TIMING BELT IDLER SUB-ASSEMBLY |
Install the spacer and No. 2 timing belt idler with the bolt.
Check that the No. 2 timing belt idler moves smoothly.
| 22. INSTALL NO. 1 TIMING BELT IDLER SUB-ASSEMBLY |
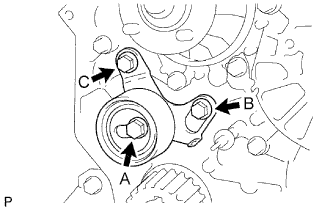 |
Temporarily install the No. 1 timing belt idler with the 3 bolts labeled A, B and C.
Tighten the bolt C.
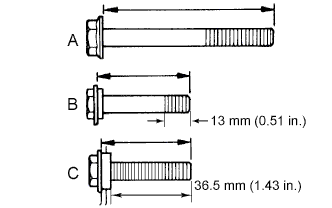 |
| 23. INSTALL CYLINDER HEAD |
Install the cylinder head (Click here).