TRANSMISSION CONTROL CABLE > REPLACEMENT |
| 1. REMOVE TRANSFER SHIFT LEVER KNOB SUB-ASSEMBLY |
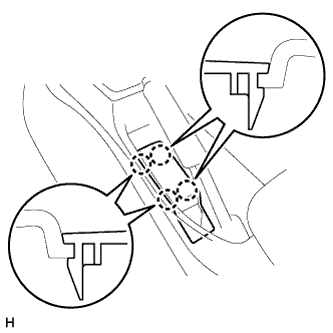
| 2. REMOVE PARKING BRAKE HOLE COVER SUB-ASSEMBLY |
|
Detach the 4 claws and remove the parking brake hole cover.
| 3. REMOVE UPPER CONSOLE PANEL SUB-ASSEMBLY |
for Manual Transmission:
Detach the 12 claws and remove the upper console panel.
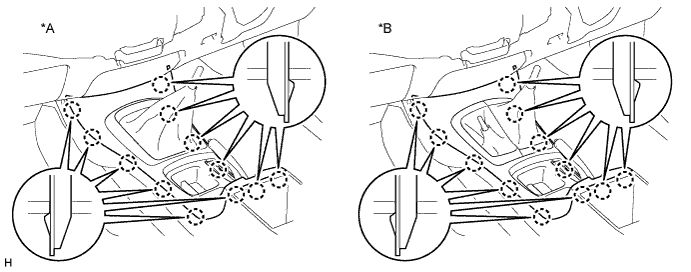
| *A | for 2WD | *B | for 4WD |
for Automatic Transmission:
Detach the 12 claws and remove the upper console panel.
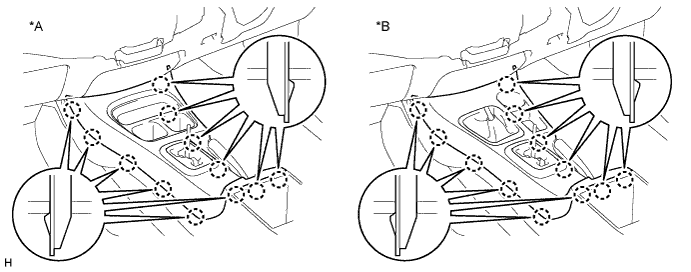
| *A | for 2WD | *B | for 4WD |
| 4. REMOVE CONSOLE BOX ASSEMBLY |
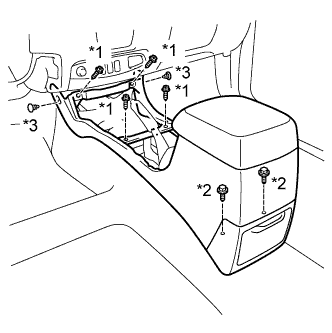 |
Remove the 4 screws and 2 bolts.
Using a clip remover, remove the 2 clips and console box.
| *1 | Screw |
| *2 | Bolt |
| *3 | Clip |
| 5. REMOVE TRANSMISSION CONTROL CABLE ASSEMBLY |
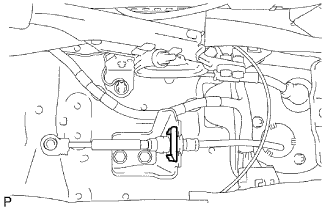 |
Move the shift lever to L.
Disconnect the control cable from the shift lever.
Remove the lock clip and disconnect the control cable from the bracket.
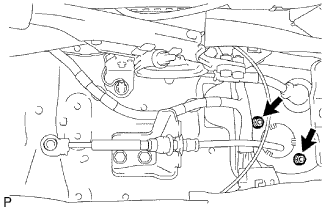 |
Remove the 2 nuts and disconnect the control cable from the vehicle body.
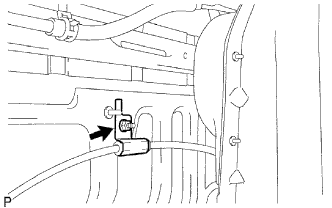 |
Remove the nut and disconnect the control cable from the vehicle body.
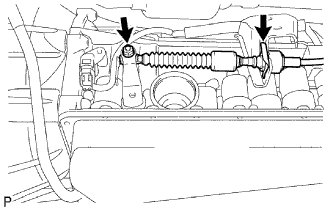 |
Remove the lock clip and control cable bracket.
Remove the nut and control cable.
| 6. INSTALL TRANSMISSION CONTROL CABLE ASSEMBLY |
Install the control cable with the nut.
Install the control cable bracket and lock clip.
|
Connect the control cable to the body with the nut.
|
Connect the control cable to the body with the 2 nuts.
|
Connect the control cable to the bracket with the lock clip.
Move the shift lever to L.
Install the control cable to the shift lever.
| 7. ADJUST SHIFT LEVER POSITION |
| 8. INSPECT SHIFT LEVER POSITION |
| 9. INSTALL CONSOLE BOX ASSEMBLY |
|
Install the console box with the 4 screws and 2 bolts.
Install the 2 clips.
| *1 | Screw |
| *2 | Bolt |
| *3 | Clip |
| 10. INSTALL UPPER CONSOLE PANEL SUB-ASSEMBLY |
for Manual Transmission:
Attach the 12 claws to install the upper console panel.
| *A | for 2WD | *B | for 4WD |
for Automatic Transmission:
Attach the 12 claws to install the upper console panel.
| *A | for 2WD | *B | for 4WD |
| 11. INSTALL PARKING BRAKE HOLE COVER SUB-ASSEMBLY |
Attach the 4 claws to install the parking brake hole cover.
| 12. INSTALL TRANSFER SHIFT LEVER KNOB SUB-ASSEMBLY |