 |
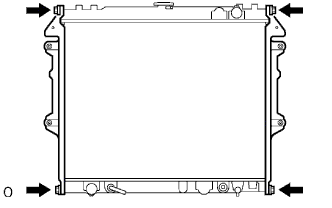
Remove the 4 bolts and 2 brackets.
RADIATOR > DISASSEMBLY |
| 1. REMOVE RADIATOR BRACKET SUB-ASSEMBLY |
|
Remove the 4 bolts and 2 brackets.
| 2. REMOVE RADIATOR DRAIN COCK PLUG |
Remove the drain cock plug.
Remove the O-ring.
| 3. ASSEMBLE SST |
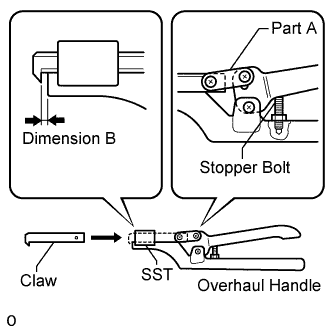 |
Install the claw to part A of the overhaul handle as shown in the illustration.
While squeezing the handle, adjust the stopper bolt so that dimension B is as specified below.
| 4. UNCAULK LOCK PLATE |
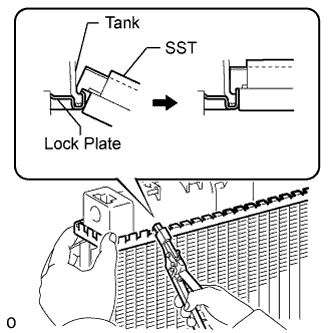 |
Using SST to release the caulking, squeeze the handle until stopped by the stopper bolt.
| 5. REMOVE RADIATOR TANK UPPER AND TANK LOWER |
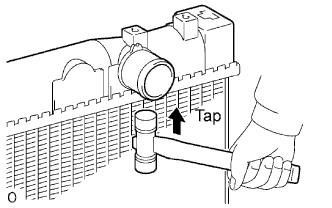 |
Lightly tap the bracket of the radiator (or radiator hose inlet or outlet) with a plastic-faced hammer and remove the tank.
Remove the O-ring.
| 6. REMOVE OIL COOLER ASSEMBLY |
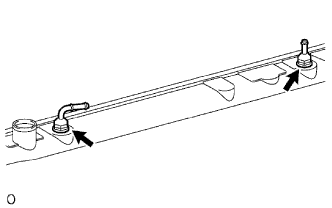 |
Remove the 2 cooler pipes.
Remove the 2 nuts, 2 lock plates and oil cooler.
Remove the 2 O-rings from the oil cooler.