 |
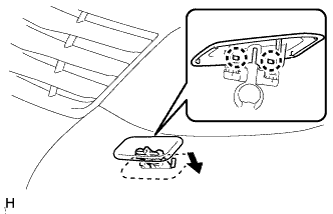
Attach the 2 claws to install the headlight washer nozzle.
HEADLIGHT CLEANER ACTUATOR > INSTALLATION |
| 1. INSTALL NO. 1 HEADLIGHT CLEANER HOSE |
Attach the 3 clamps to install the No. 1 headlight cleaner hose to the front bumper cover.
| 2. INSTALL HEADLIGHT WASHER ACTUATOR SUB-ASSEMBLY LH |
Attach the 2 claws to install the headlight washer actuator sub-assembly with the bolt.
| 3. INSTALL HEADLIGHT WASHER ACTUATOR SUB-ASSEMBLY RH |
| 4. INSTALL TYPE 1 HEADLIGHT WASHER NOZZLE SUB-ASSEMBLY LH |
|
Attach the 2 claws to install the headlight washer nozzle.
| 5. INSTALL FRONT BUMPER COVER |
w/ Headlight Cleaner System:
Connect the headlight cleaner hose.
w/ Fog Light:
Connect the 2 fog light connectors.
Attach the 8 claws to install the front bumper cover.
Install the 5 clips, 2 bolts and 2 screws.
Install the 3 clips and 6 screws.
| 6. INSTALL FRONT BUMPER HOLE COVER LH (w/o Fog Light) |
Attach the 8 claws to install the front bumper hole cover.
| 7. INSTALL FRONT BUMPER HOLE COVER RH (w/o Fog Light) |
| 8. INSTALL FOG LIGHT COVER LH (w/ Fog Light) |
Attach the 8 claws to install the fog light cover.
| 9. INSTALL FOG LIGHT COVER RH (w/ Fog Light) |
| 10. INSTALL RADIATOR GRILLE |
Attach the 6 claws to install the radiator grille.
Install the 2 screws and 2 clips.
| 11. VEHICLE PREPARE FOR FOG LIGHT AIM ADJUSTMENT (w/ Fog Light) |
Prepare the vehicle:
| 12. PREPARE FOR FOG LIGHT AIMING (w/ Fog Light) |
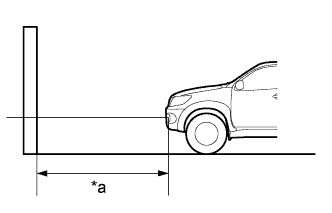 |
Prepare the vehicle:
| *a | 25 m or 3 m |
Prepare a piece of thick white paper that is approximately 2 m (6.56 ft.) (height) x 4 m (13.1 ft.) (width) to use as a screen.
Draw a vertical line down the center of the screen (V line).
Set the screen as shown in the illustration.
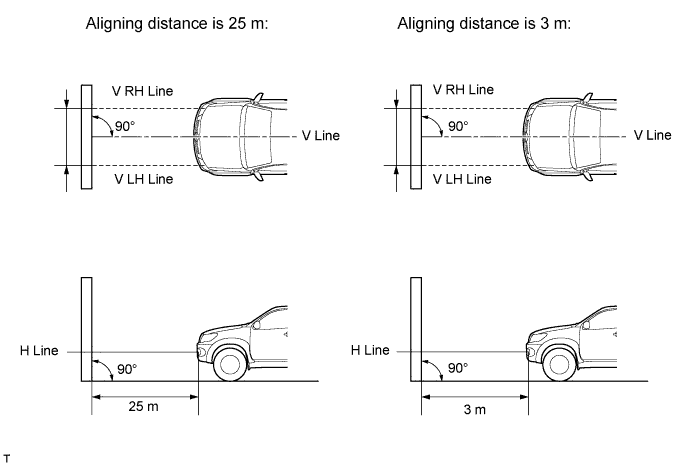
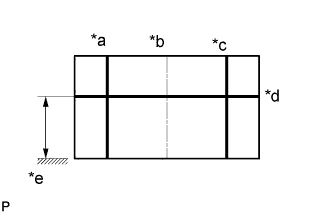 |
Draw base lines (H line, V LH and V RH lines) on the screen as shown in the illustration.
| *a | V LH Line |
| *b | V Line |
| *c | V RH Line |
| *d | H Line |
| *e | Ground |
H Line (fog light height):
Draw a horizontal line across the screen so that it passes through the center marks. The H line should be at the same height as the fog light bulb center marks of the fog lights.
V LH Line, V RH Line (center mark position of LH and RH fog lights): Draw two vertical lines so that they intersect the H line at each center mark.
| 13. INSPECT FOG LIGHT AIMING (w/ Fog Light) |
Choose a headlight to inspect first. Cover or disconnect the connector of the other fog light to prevent light from that fog light from affecting the fog light aiming inspection.
Start the engine.
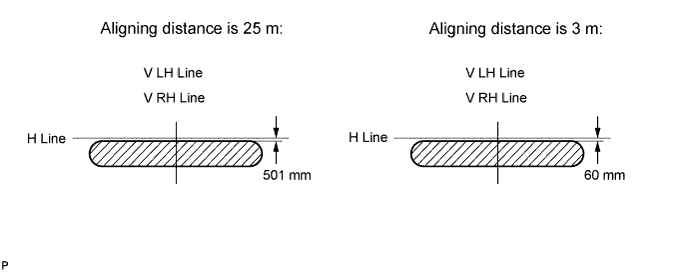
Turn on the fog lights and make sure that the cutoff line is within the specified area shown in the illustration.
| 14. ADJUST FOG LIGHT AIMING (w/ Fog Light) |
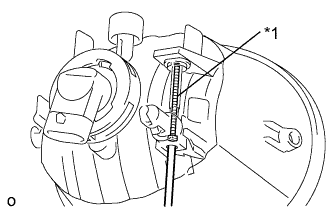 |
Adjust the fog light aim so that it is within the specified range by turning the aiming screw with a screwdriver.
| *1 | Aiming Screw |