REMOVAL
Removal / installation · Vehicles built from Jun 2011
- CAUTION:
- Wear protective gloves. Sharp areas on the parts may injure your hands.
- HINT:
- Use the same procedure for RHD and LHD vehicles.
- The procedure listed below is for LHD vehicles.
- Use the same procedure for the RH and LH sides.
- The procedure listed below is for the LH side.
- Use the same procedure for RHD and LHD vehicles.
| 1. REMOVE INNER SEAT TRACK BRACKET COVER (Except Single Cab) |

Lift up the seat track handle sub-assembly LH and move the seat to the foremost position.
Using a moulding remover, detach the 2 claws and remove the inner seat track bracket cover LH.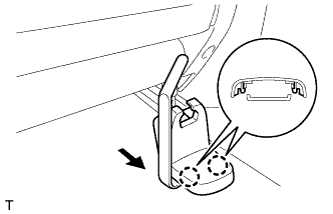

| 2. REMOVE OUTER SEAT TRACK BRACKET COVER (Except Single Cab) |
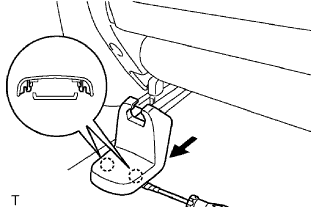 |
Using a moulding remover, detach the 2 claws and remove the outer seat track bracket cover.
| 3. REMOVE FRONT SEAT HEADREST ASSEMBLY |
Remove the front seat headrest assembly.
| 4. REMOVE FRONT SEAT ASSEMBLY |
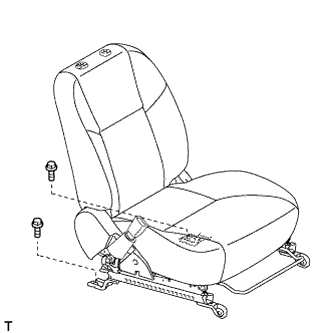 |
Remove the 2 bolts.
Lift up the seat track handle sub-assembly LH and move the seat to the rearmost position.
Remove the 2 bolts.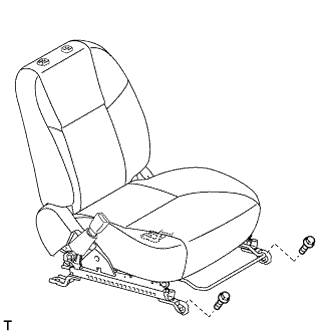
Lift up the seat track handle sub-assembly LH and move the seat to the center position. Also, operate the reclining adjuster release handle LH and move the seatback to the upright position.
Disconnect the connector and detach the wire harness clamp from under the seat.
Remove the front seat assembly from the vehicle.
- NOTICE:
- Be careful not to damage the vehicle body.