DISASSEMBLY
Removal / installation · Vehicles built from Jun 2011
| 1. REMOVE UNIVERSAL JOINT SPIDER ASSEMBLY |

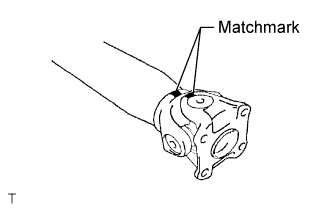  |
Place matchmarks on the flange yoke and propeller shaft.
Using a brass bar and hammer, slightly tap in the spider bearing outer races.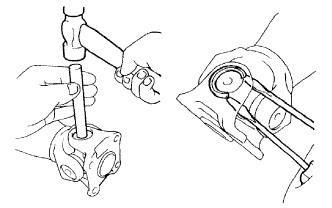
Using 2 screwdrivers, remove the 4 snap rings from the grooves.
Clamp the propeller shaft in a vise between aluminum plates.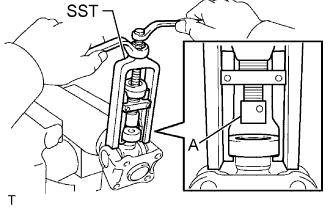
Using SST, push the sleeve yoke side spider bearing until: 1) the spider almost touches the sleeve yoke or propeller shaft, and 2) the spider bearing on the opposite side is partially pushed out.
- SST
- 09332-25010
- HINT:
- Before installing SST, sufficiently raise the part labeled A. If part A is too low, SST may be difficult to install.
Clamp the pushed out spider bearing outer race in a vise and tap the propeller shaft to remove the spider bearing.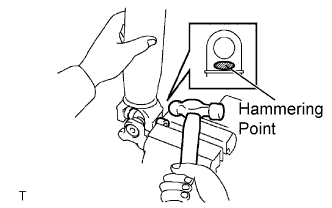
- NOTICE:
- Do not tap the shaft tube.
- HINT:
- Remove the spider bearing from the opposite side of the spider using the same procedure.
Separate the flange yoke and spider from the propeller shaft.
Reinstall the 2 removed spider bearings to the spider and clamp the spider bearings in a vise.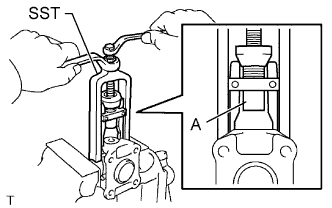
Using SST, push the flange yoke side spider bearing until: 1) the spider almost touches the flange yoke, and 2) the spider bearing on the opposite side is partially pushed out.
- SST
- 09332-25010
- HINT:
- Before installing SST, sufficiently raise the part labeled A. If part A is too low, SST may be difficult to install.
Clamp the pushed out spider bearing outer race in a vise and tap the flange yoke to remove the spider bearing.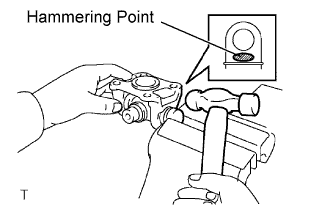
- HINT:
- Remove the spider bearing from the opposite side of the spider using the same procedure.
Separate the spider from the flange yoke.
- HINT:
- Perform the removal of the other universal joint spider using the same procedures.