REMOVAL
Removal / installation · Vehicles built Jun 2011 – Jul 2013
Versions by build date: Jun 2011 – Jul 2013 from Aug 2013
| 1. DRAIN BRAKE FLUID |

- NOTICE:
- Wash off brake fluid immediately if it comes in contact with any painted surface.
| 2. REMOVE BRAKE MASTER CYLINDER SUB-ASSEMBLY (w/ ABS) |
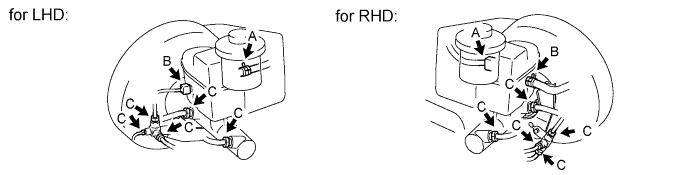

for Manual Transmission:
Disconnect the clutch reservoir tube labeled A from the master cylinder.
Disconnect the brake fluid level warning switch connector labeled B.
Using a union nut wrench, disconnect the 5 brake lines labeled C from the master cylinder and 3-way.
Remove the 2 nuts and bracket (with 3-way).
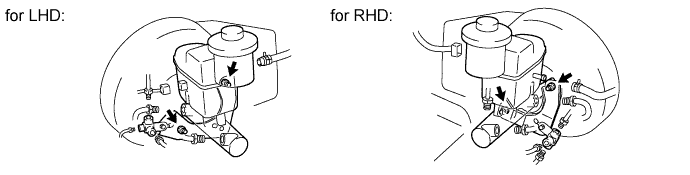
Pull out the master cylinder from the brake booster.
Remove the O-ring from the master cylinder.
| 3. REMOVE BRAKE MASTER CYLINDER SUB-ASSEMBLY (w/o ABS) |
for Manual Transmission:
Disconnect the clutch reservoir tube labeled A from the master cylinder.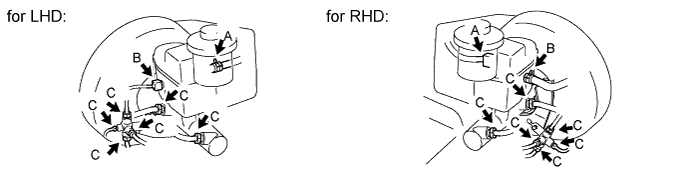
Disconnect the brake fluid warning switch connector labeled B.
Using a union nut wrench, disconnect the 6 brake lines labeled C from the master cylinder and 4-way.
Remove the 2 nuts and bracket (with 4-way).
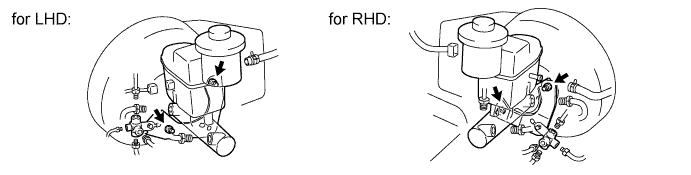
Pull out the master cylinder from the brake booster.
Remove the O-ring from the master cylinder.
| 4. REMOVE BRAKE BOOSTER ASSEMBLY |
Disconnect the vacuum warning switch connector and remove the vacuum warning switch from the booster.
Disconnect the vacuum hose.
Remove the check valve and grommet from the booster.
Remove the return spring, clip and clevis pin.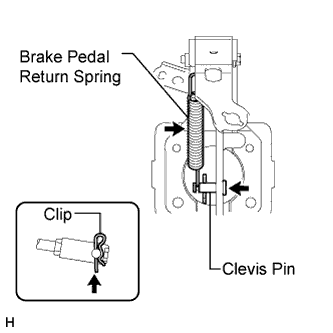
Loosen the push rod clevis lock nut.
Remove the 4 nuts and push rod clevis.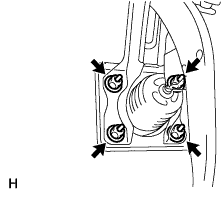
Pull out the booster and gasket.