DISASSEMBLY
Removal / installation · Vehicles built from Jun 2011
- HINT:
- Use the same procedures for the LH side and RH side.
- The procedures listed below are for the LH side.
- Use the same procedures for the LH side and RH side.
| 1. DISCONNECT REAR BRAKE SHOE RETURN SPRING |

Using SST, disconnect the spring from the front brake shoe and rear brake shoe.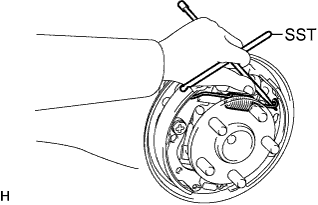

- SST
- 09703-30011
- NOTICE:
- Be careful not to damage the wheel cylinder boot.
| 2. REMOVE FRONT BRAKE SHOE |
Using SST, remove the shoe hold down spring cup, shoe hold down spring and pin.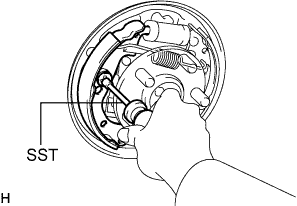
- SST
- 09718-00010
Remove the shoe and tension spring.
| 3. REMOVE PARKING BRAKE SHOE STRUT SET LH |
Remove the strut set from the rear brake shoe.
| 4. REMOVE REAR BRAKE SHOE |
Using SST, remove the shoe hold down spring cup, shoe hold down spring and pin.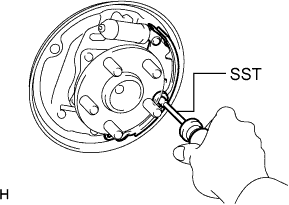
- SST
- 09718-00010
Using needle-nose pliers, remove the adjust lever tension spring from the automatic adjust lever. Then remove the shoe.
Using needle-nose pliers, disconnect the No. 3 parking brake cable from the parking brake shoe lever.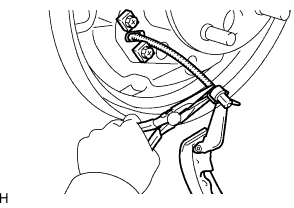
| 5. REMOVE REAR BRAKE AUTOMATIC ADJUST LEVER LH |
Using a screwdriver, remove the E-ring and lever.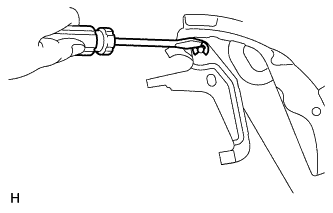
| 6. REMOVE REAR BRAKE PARKING BRAKE SHOE LEVER SUB-ASSEMBLY |
Using a screwdriver, remove the C-washer and lever.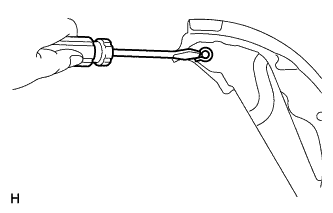
| 7. REMOVE REAR WHEEL BRAKE CYLINDER ASSEMBLY LH |
Using a union nut wrench, disconnect the brake line.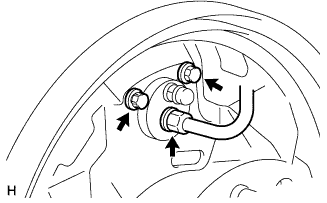
Remove the 2 bolts and cylinder.
| 8. REMOVE REAR WHEEL BRAKE CYLINDER CUP |
Remove the 2 cylinder dust boots from the cylinder.
Remove the 2 pistons and compression spring.
Remove the 2 cups from each piston.
| 9. REMOVE REAR BRAKE DRUM BLEEDER PLUG |
Remove the bleeder plug cap and bleeder plug from the cylinder.