Removal / installation · Vehicles built from Jun 2011
1.
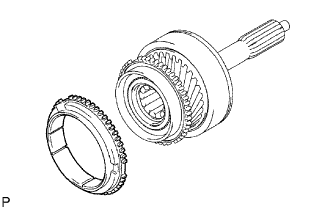
REMOVE NO. 2 SYNCHRONIZER RING
Remove the synchronizer ring.
2.
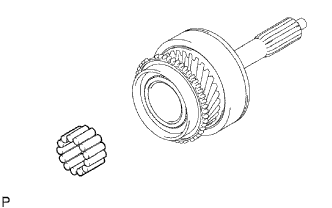
REMOVE INPUT SHAFT BEARING
Remove the 13 input shaft bearings.
3.
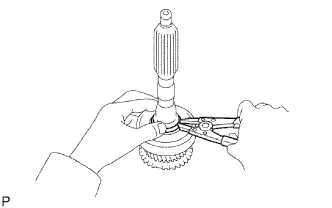
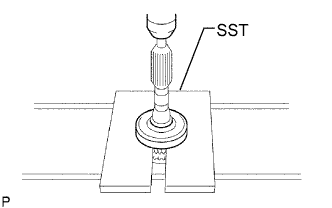
REMOVE INPUT SHAFT FRONT BEARING
Using a snap ring expander, remove the snap ring.
Using SST and a press, press out the front bearing.
SST
09527-10011
4.
INSPECT NO. 2 SYNCHRONIZER RING
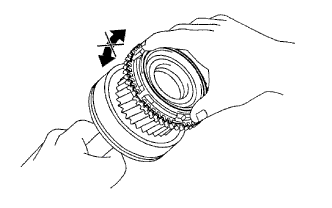
Coat the input shaft cone with gear oil. Check the braking effect of the No. 2 synchronizer ring. Fit the ring to the shaft cone. Apply pressure to the ring and attempt to turn it in both directions. Check that the ring locks.
If the braking effect is insufficient, apply a small amount of fine lapping compound between the No. 2 synchronizer ring and the input shaft cone. Lightly rub the No. 2 synchronizer ring and the input shaft cone together.
NOTICE:
Ensure the fine lapping compound is completely washed off after rubbing.
Check the braking effect of the No. 2 synchronizer ring again.
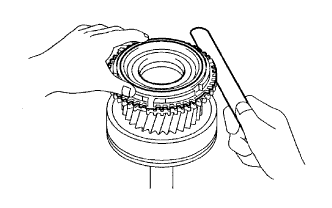
Using a feeler gauge, measure the clearance between the No. 2 synchronizer ring back and the input shaft spline end.
Standard clearance:
1.00 to 2.00 mm (0.0394 to 0.0787 in.)
If the clearance is not as specified, replace the No. 2 synchronizer ring and apply a small amount of fine lapping compound on the input shaft cone.
NOTICE:
Ensure the fine lapping compound is completely washed off after rubbing.