REMOVAL
Removal / installation · Vehicles built from Jun 2011
| 1. INSPECT 1ST GEAR THRUST CLEARANCE |

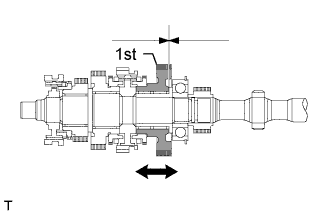  |
Using a dial indicator, measure the thrust clearance.
- Standard clearance:
- 0.10 to 0.25 mm (0.0039 to 0.0098 in.)
| 2. INSPECT 2ND GEAR THRUST CLEARANCE |
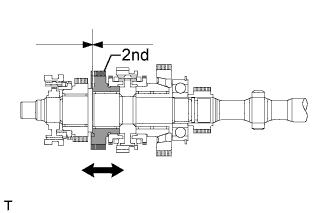 |
Using a dial indicator, measure the thrust clearance.
- Standard clearance:
- 0.10 to 0.25 mm (0.0039 to 0.0098 in.)
| 3. INSPECT 3RD GEAR THRUST CLEARANCE |
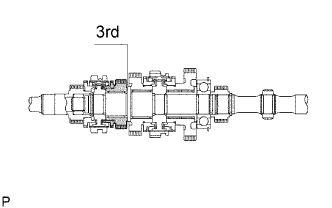 |
Using a feeler gauge, measure the thrust clearance.
- Standard clearance:
- 0.10 to 0.25 mm (0.0039 to 0.0098 in.)
| 4. INSPECT 1ST GEAR RADIAL CLEARANCE |
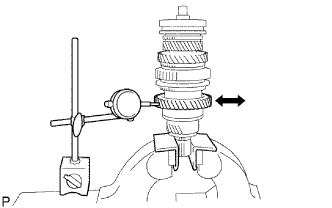 |
Using a dial indicator, measure the radial clearance.
- Standard clearance:
- 0.009 to 0.056 mm (0.0004 to 0.0022 in.)
| 5. INSPECT 2ND GEAR RADIAL CLEARANCE |
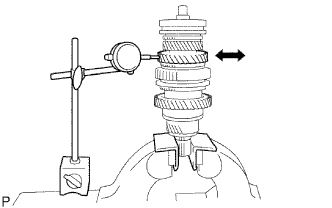 |
Using a dial indicator, measure the radial clearance.
- Standard clearance:
- 0.008 to 0.034 mm (0.0003 to 0.0013 in.)
- If the clearance is not as specified, replace the 2nd gear needle roller bearing.
| 6. INSPECT 3RD GEAR RADIAL CLEARANCE |
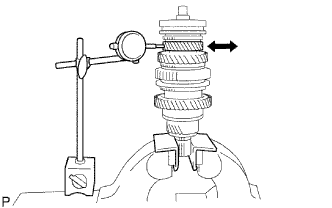 |
Using a dial indicator, measure the radial clearance.
- Standard clearance:
- 0.008 to 0.034 mm (0.0003 to 0.0013 in.)
- If the clearance is not as specified, replace the 3rd gear needle roller bearing.
| 7. REMOVE 1ST GEAR |
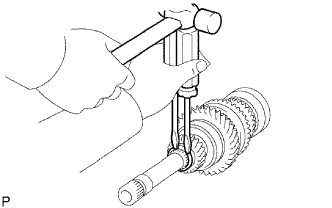 |
Using 2 screwdrivers and a hammer, tap out the snap ring from the output shaft.
Using SST and a press, press out the 5th gear, center bearing, 1st gear, 1st gear needle roller bearing and 1st gear bearing inner race from the output shaft.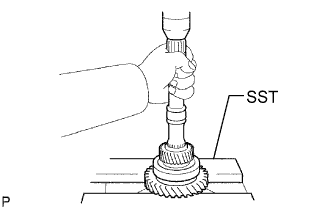
- SST
- 09527-10011
| 8. REMOVE NO. 1 SYNCHRONIZER RING (for 1st Gear) |
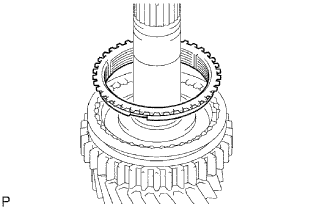 |
Remove the No. 1 synchronizer ring (for the 1st gear) from the No. 1 clutch hub.
| 9. REMOVE 1ST GEAR BEARING INNER RACE LOCK BALL |
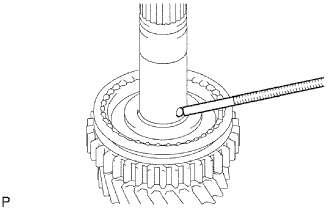 |
Using a magnetic finger, remove the lock ball.
| 10. REMOVE 2ND GEAR |
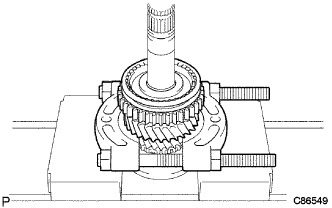 |
Using SST and a press, press out the No. 1 clutch hub reverse gear, No. 1 synchronizer ring and 2nd gear.
- SST
- 09950-00020
| 11. REMOVE NO. 1 SYNCHRONIZER RING (for 2nd Gear) |
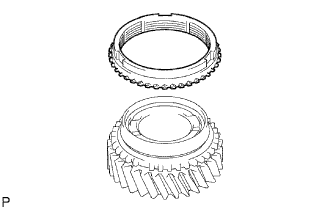 |
Remove the No. 1 synchronizer ring from the 2nd gear.
| 12. REMOVE 2ND GEAR NEEDLE ROLLER BEARING |
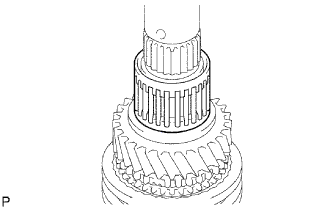 |
Remove the needle roller bearing from the output shaft.
| 13. REMOVE NO. 1 TRANSMISSION CLUTCH HUB |
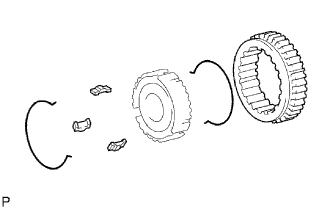 |
Remove the 2 synchromesh shifting key springs.
Remove the reverse gear and 3 synchromesh shifting keys from the transmission clutch hub.
| 14. REMOVE 3RD GEAR |
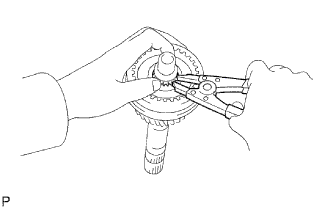 |
Using a snap ring expander, remove the snap ring from the output shaft.
Using a press, press out the No. 2 clutch hub and 3rd gear.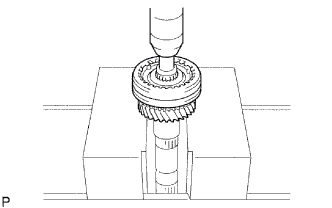
| 15. REMOVE NO. 2 SYNCHRONIZER RING |
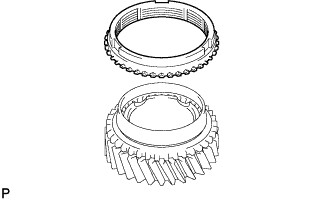 |
Remove the synchronizer ring from the 3rd gear.
| 16. REMOVE 3RD GEAR NEEDLE ROLLER BEARING |
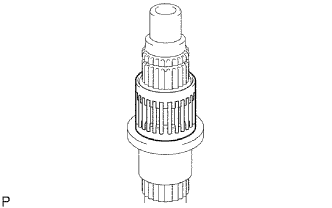 |
Remove the needle roller bearing from the output shaft.
| 17. REMOVE NO. 2 TRANSMISSION CLUTCH HUB |
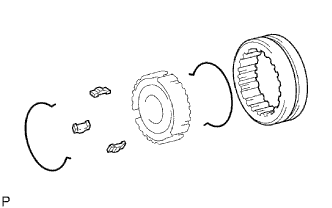 |
Remove the 2 synchromesh shifting key springs.
Remove the transmission hub sleeve and 3 synchromesh shifting keys from the transmission clutch hub.
| 18. INSPECT OUTPUT SHAFT |
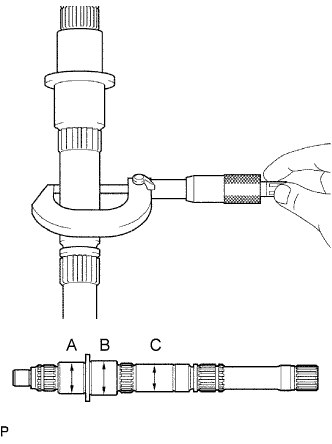 |
Using a micrometer, measure the outside diameter of the output shaft journal surface.
- Standard outside diameter:
Position
Specified Condition
Part A
34.984 to 35.000 mm (1.3773 to 1.3780 in.)
Part B
37.984 to 38.000 mm (1.4945 to 1.4960 in.)
Part C
30.384 to 30.400 mm (1.1962 to 1.1968 in.)
- If the outside diameter is not as specified, replace the output shaft.
Using a micrometer, measure the flange thickness.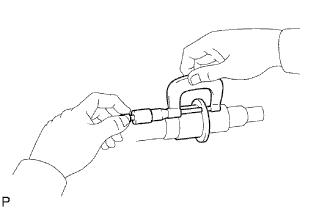
- Standard thickness:
- 4.80 to 5.20 mm (0.1890 to 0.2047 in.)
- Minimum thickness:
- 4.80 mm (0.1890 in.)
- If the thickness is less than the minimum, replace the output shaft.
| 19. INSPECT 1ST GEAR BEARING INNER RACE |
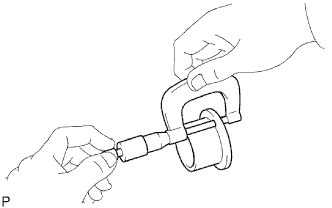 |
Using a micrometer, measure the inner race thickness.
- Standard thickness:
- 4.00 to 4.20 mm (0.1575 to 0.1654 in.)
- Minimum thickness:
- 4.00 mm (0.1575 in.)
- If the thickness is less than the minimum, replace the 1st gear bearing inner race.
Using a micrometer, measure the outside diameter of the inner race.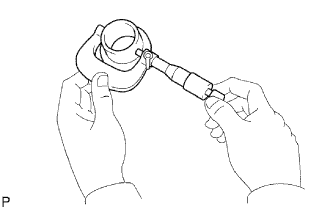
- Standard outside diameter:
- 38.985 to 39.000 mm (1.5348 to 1.5354 in.)
- Minimum outside diameter:
- 38.985 (1.5348 in.)
- If the outside diameter is less than the minimum, replace the 1st gear bearing inner race.
| 20. INSPECT NO. 1 SYNCHRONIZER RING (for 1st Gear) |
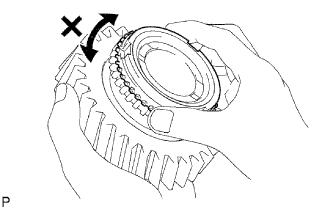 |
Coat the 1st gear cone with gear oil. Check the braking effect of the No. 1 synchronizer ring. Fit the ring to the shaft cone. Apply pressure to the ring and attempt to turn it in both directions. Check that the ring locks.
- If the braking effect is insufficient, apply a small amount of fine lapping compound between the No. 1 synchronizer ring and the 1st gear cone. Lightly rub the No. 1 synchronizer ring and the 1st gear cone together.
- NOTICE:
- Ensure the fine lapping compound is completely washed off after rubbing.
- If the braking effect is insufficient, apply a small amount of fine lapping compound between the No. 1 synchronizer ring and the 1st gear cone. Lightly rub the No. 1 synchronizer ring and the 1st gear cone together.
Check the braking effect of the No. 1 synchronizer ring again.
Using a feeler gauge, measure the clearance between the No. 1 synchronizer ring back and 1st gear spline end.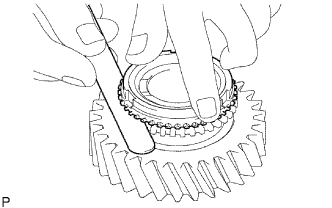
- Standard clearance:
- 1.00 to 2.00 mm (0.0394 to 0.0787 in.)
- If the clearance is not as specified, replace the No. 1 synchronizer ring and apply a small amount of fine lapping compound on the 1st gear cone.
- NOTICE:
- Ensure the fine lapping compound is completely washed off after rubbing.
| 21. INSPECT NO. 1 SYNCHRONIZER RING (for 2nd Gear) |
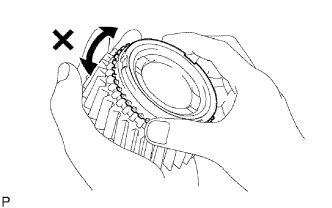 |
Coat the 2nd gear cone with gear oil. Check the braking effect of the No. 1 synchronizer ring. Fit the ring to the shaft cone. Apply pressure to the ring and attempt to turn it in both directions. Check that the ring locks.
- If the braking effect is insufficient, apply a small amount of fine lapping compound between the No. 1 synchronizer ring and the 2nd gear cone. Lightly rub the No. 1 synchronizer ring and the 2nd gear cone together.
- NOTICE:
- Ensure the fine lapping compound is completely washed off after rubbing.
- If the braking effect is insufficient, apply a small amount of fine lapping compound between the No. 1 synchronizer ring and the 2nd gear cone. Lightly rub the No. 1 synchronizer ring and the 2nd gear cone together.
Check the braking effect of the No. 1 synchronizer ring again.
Using a feeler gauge, measure the clearance between the No. 1 synchronizer ring back and 2nd gear spline end.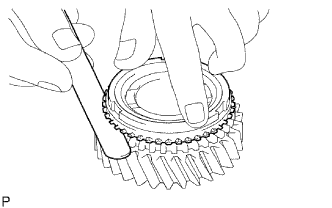
- Standard clearance:
- 1.00 to 2.00 mm (0.0394 to 0.0787 in.)
- If the clearance is not as specified, replace the No. 1 synchronizer ring, and apply a small amount of fine lapping compound on the 2nd gear cone.
- NOTICE:
- Ensure the fine lapping compound is completely washed off after rubbing.
| 22. INSPECT NO. 2 SYNCHRONIZER RING |
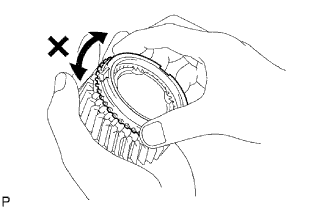 |
Coat the 3rd gear cone with gear oil. Check the braking effect of the No. 2 synchronizer ring. Fit the ring to the shaft cone. Apply pressure to the ring and attempt to turn it in both directions. Check that the ring locks.
- If the braking effect is insufficient, apply a small amount of fine lapping compound between the No. 2 synchronizer ring and the 3rd gear cone. Lightly rub the No. 2 synchronizer ring and the 3rd gear cone together.
- NOTICE:
- Ensure the fine lapping compound is completely washed off after rubbing.
- If the braking effect is insufficient, apply a small amount of fine lapping compound between the No. 2 synchronizer ring and the 3rd gear cone. Lightly rub the No. 2 synchronizer ring and the 3rd gear cone together.
Check the braking effect of the No. 2 synchronizer ring again.
Using a feeler gauge, measure the clearance between the No. 2 synchronizer ring back and 3rd gear spline end.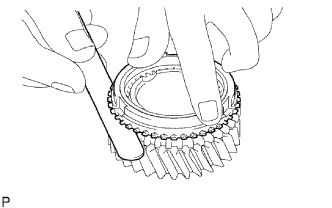
- Standard clearance:
- 1.0 to 2.0 mm (0.0394 to 0.0787 in.)
- If the clearance is not as specified, replace the No. 2 synchronizer ring and apply a small amount of fine lapping compound on the 3rd gear cone.
- NOTICE:
- Ensure the fine lapping compound is completely washed off after rubbing.
| 23. INSPECT REVERSE GEAR |
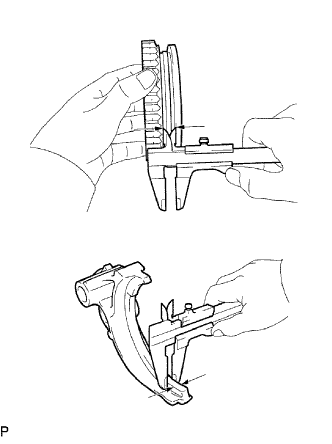 |
Using a vernier caliper, measure the clearance between the reverse gear and No. 1 gear shift fork.
- Standard clearance:
- 0.15 to 0.35 mm (0.0059 to 0.0138 in.)
- Minimum clearance:
- 0.35 mm (0.0138 in.)
- If the clearance is less than the minimum, replace the No. 1 gear shift fork and reverse gear.
Check that the No. 1 transmission clutch hub and reverse gear slide smoothly.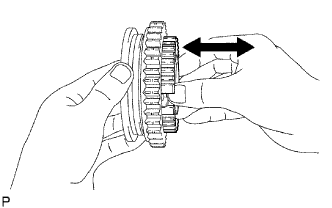
Check that the spline gear's edges of the reverse gear are not worn down.
| 24. INSPECT NO. 2 TRANSMISSION HUB SLEEVE |
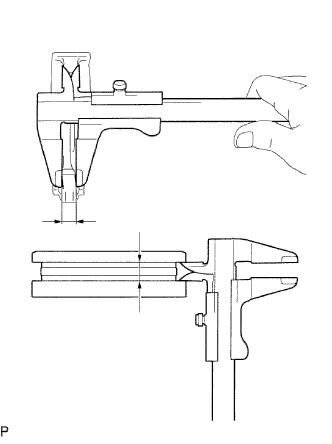 |
Using a vernier caliper, measure the No. 2 hub sleeve and No. 2 gear shift fork as shown in the illustration.
- Standard clearance:
- 0.15 to 0.35 mm (0.0059 to 0.0138 in.)
- If the clearance is not as specified, replace the transmission hub sleeve and the No. 2 gear shift fork.
Check the sliding condition between the No. 2 hub sleeve and No. 2 clutch hub.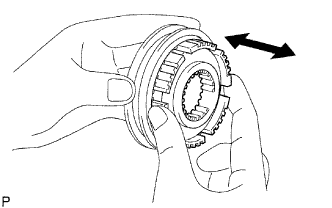
Check that the spline gear's edges of the No. 2 transmission hub sleeve are not worn down.
| 25. INSPECT 1ST GEAR |
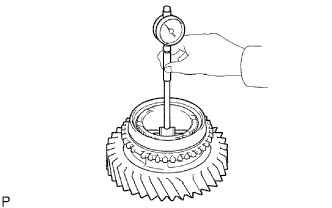 |
Using a cylinder gauge, measure the inside diameter of the 1st gear.
- Standard inside diameter:
- 44.015 to 44.040 mm (1.7329 to 1.7339 in.)
- Maximum inside diameter:
- 44.040 mm (1.7339 in.)
- If the inside diameter is greater than the maximum, replace the 1st gear.
| 26. INSPECT 2ND GEAR |
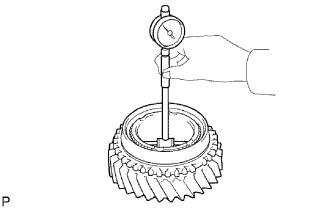 |
Using a cylinder gauge, measure the inside diameter of the 2nd gear.
- Standard inside diameter:
- 44.015 to 44.040 mm (1.7329 to 1.7339 in.)
- Maximum inside diameter:
- 44.040 mm (1.7339 in.)
- If the inside diameter is greater than the maximum, replace the 2nd gear.
| 27. INSPECT 3RD GEAR |
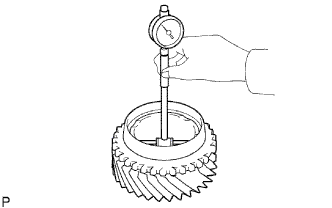 |
Using a cylinder gauge, measure the inside diameter of the 3rd gear.
- Standard inside diameter:
- 44.015 to 44.040 mm (1.7329 to 1.7339 in.)
- Maximum inside diameter:
- 44.040 mm (1.7339 in.)
- If the inside diameter is greater than the maximum, replace the 3rd gear.